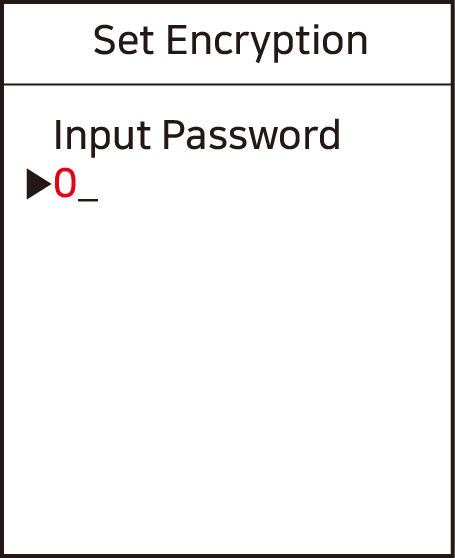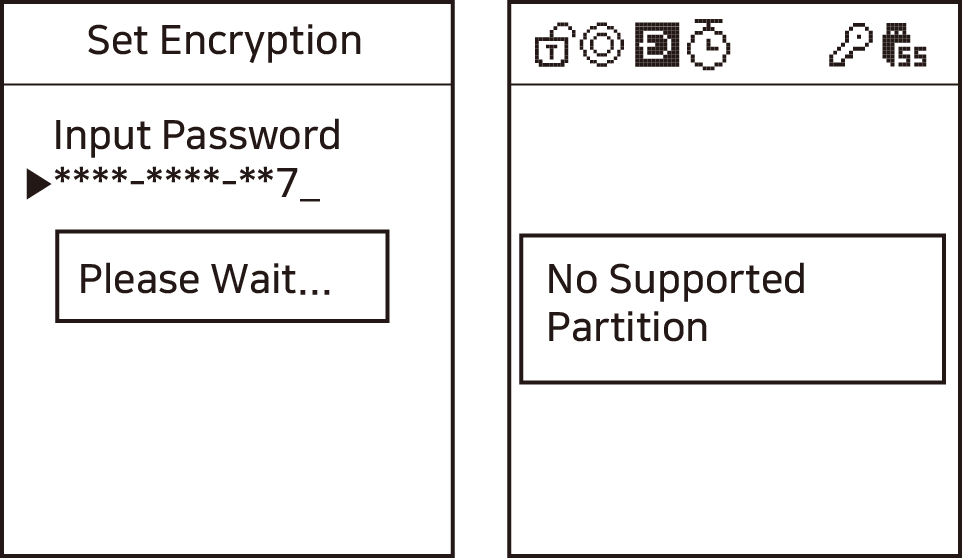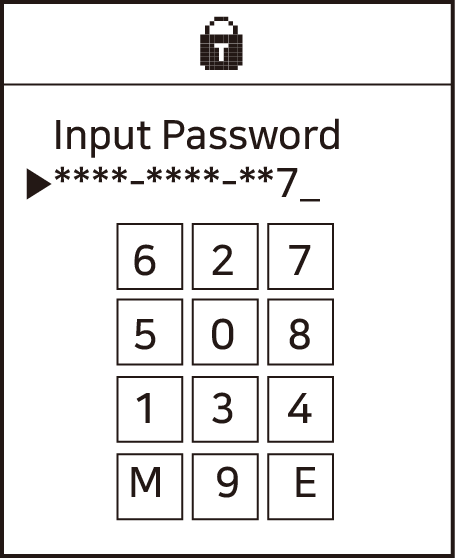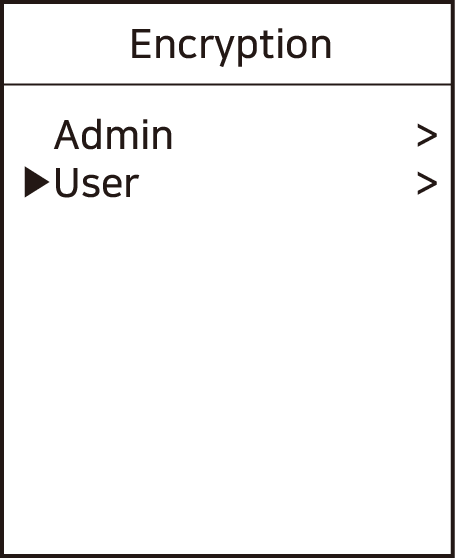
# Welcome to IODD Guide

Official IODD guide for virtual drive setup, AES256 encryption, disk initialization, troubleshooting, firmware updates, and model reference.

<figure><img src="/files/JdIqzsA5DSUD547Hs4cn" alt="IODD Brand Main 2025"><figcaption><p>Experience the ultimate virtual drive and encryption solution.</p></figcaption></figure>

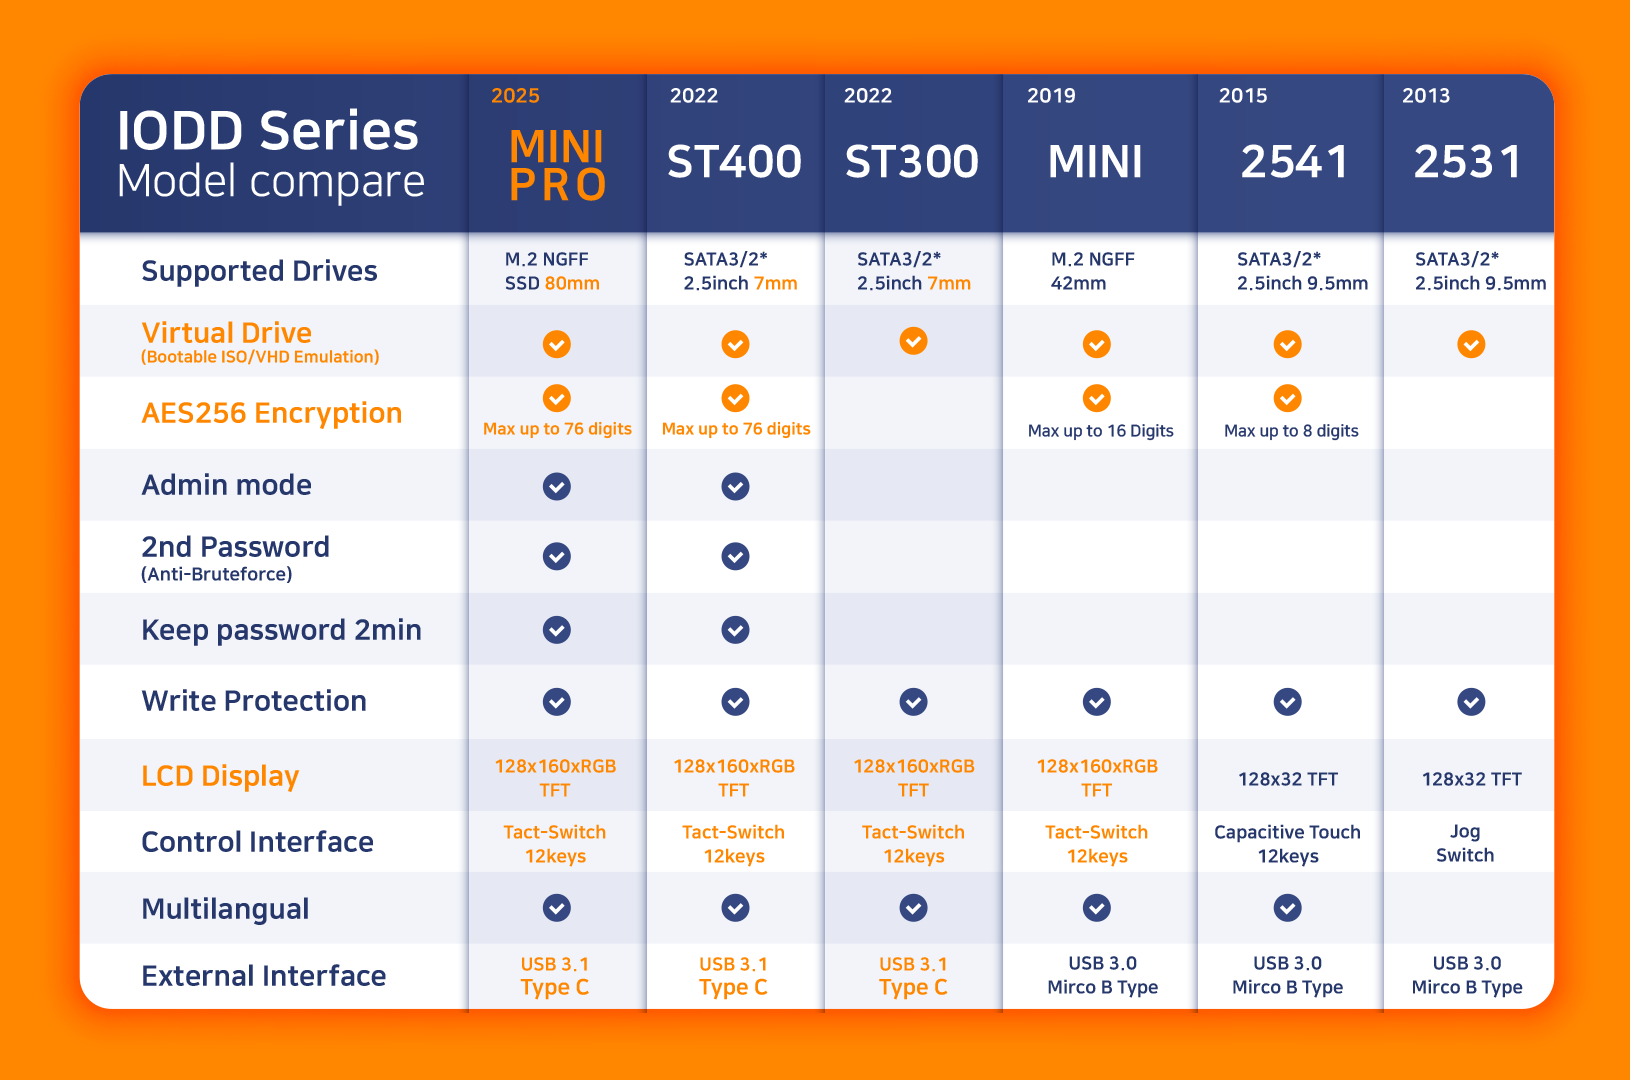
<figure><img src="/files/soJKKef0zThSV35PHG0v" alt="MINI PRO Comparison"><figcaption><p>IODD Series Comparison: Find the right model for your needs.</p></figcaption></figure>

### 🔔 Latest News

Currently sold products use the latest firmware, so no additional update is required. If there is a new update after **May 29, 2024**, we will announce it here.

### ✨ What's New

**Duress PIN / Decoy PIN Guide Added** Learn how ST400 and MINI PRO can show only a prepared `vhd4.vhd` volume for a plausibly deniable access workflow when unlocked with the User 4 PIN.

* [**Duress PIN Manual**](/aes256-encryption-mini-pro-st-lk/admin/duress-pin)

**IODD TRIM Tool Released** A new Windows utility designed to send TRIM commands to external USB SSDs, maintaining performance and extending lifespan.

* [**IODD TRIM Tool Manual**](/various-functions/iodd-trim-tool)

***

### 📘 Introduction

This documentation provides a comprehensive, step-by-step guide to effectively using your IODD device. While the instructions are primarily tailored for the **ST/LK series**, most information is applicable to the **MINI series** as well.

#### ⚠️ Pre-use Checklist

To ensure stable performance and data integrity, please review these requirements:

* **Power Supply**: Connect the IODD to a **rear USB port** on your PC. Laptop users should use a **powered USB hub** for consistent voltage.
* **Encryption Conflict**: Hardware encryption **cannot** be used simultaneously with OS-level encryption (e.g., **BitLocker**).
* **Cable Length**: Use a USB cable **shorter than 50cm** to prevent signal degradation.
* **Disk Compatibility**:
  * **ST300 / ST400 / LK100**: **2.5-inch** **7mm** HDD/SSD.
  * **2531 / 2541 (Legacy)**: **2.5-inch** HDD/SSD up to **9.5mm**.
  * **MINI (Legacy)**: M.2 SATA **2242** SSD.
  * **MINI PRO**: M.2 SATA **2280** SSD.

### 📊 Hardware Model Comparison

| Feature           | ST400 / MINI PRO |       LK100      |       ST300      |   2541 (Legacy)   |   2531 (Legacy)   |   MINI (Legacy)   |
| ----------------- | :--------------: | :--------------: | :--------------: | :---------------: | :---------------: | :---------------: |
| **Encryption**    |    AES256 XTS    |    AES256 XTS    |         ❌        |     AES256 XTS    |         ❌         |     AES256 XTS    |
| **Virtual ODD**   |         ✅        |         ❌        |         ✅        |         ✅         |         ✅         |         ✅         |
| **Virtual HDD**   |     ✅ (3 LUN)    |         ❌        |     ✅ (3 LUN)    |     ✅ (4 LUN)     |     ✅ (4 LUN)     |     ✅ (3 LUN)     |
| **Interface**     | Type-C (USB 3.1) | Type-C (USB 3.1) | Type-C (USB 3.1) | Micro-B (USB 3.0) | Micro-B (USB 3.0) | Micro-B (USB 3.0) |
| **Controls**      |   Tactile Keys   |   Tactile Keys   |   Tactile Keys   |     Touch Keys    |      Jog Dial     |    Tactile Keys   |
| **Max PIN**       |     38 Digits    |     38 Digits    |        N/A       |     15 Digits     |        N/A        |     15 Digits     |
| **2nd P.W.**      |         ✅        |         ✅        |         ❌        |         ❌         |         ❌         |         ❌         |
| **Admin App**     |         ✅        |         ✅        |         ❌        |         ❌         |         ❌         |         ❌         |
| **Internal Disk** |  2.5" 7mm / 2280 |     2.5" 7mm     |     2.5" 7mm     |     2.5" 9.5mm    |     2.5" 9.5mm    |      M.2 2242     |

{% hint style="warning" %}
**Safe Removal (Mandatory)** To prevent data corruption, **always use the "Safely Remove Hardware" option in your PC's operating system.** The hardware button ejection on the IODD may not be sufficient depending on your OS configuration.
{% endhint %}

***

### 🚀 Getting Started

#### First Time Using IODD?

If you haven't assembled your device yet, start here:

* [**Disk Assembly Guide (ST/LK)**](/disk-assembly-st-lk)

If your hardware is ready, follow these core functions:

#### 1. Virtual Drive Feature

Learn how to mount ISO, VHD, and RMD files.

* [**Drive Setup Guide**](/bootable-virtual-drive/drive-setup)

#### 2. Encryption Function

Secure your data with AES-256 hardware encryption.

* [**Encryption Guide (ST/LK/MINI PRO)**](/aes256-encryption-mini-pro-st-lk/encryption-guide)
* [**Encryption Guide (MINI Legacy)**](/aes256-encryption-mini/iodd-mini-encryption)

#### 3. Simultaneous Use (Encryption + Virtual Drive)

For maximum security and utility, follow this specific order:

1. **Configure Encryption**: Set up your password first.
2. **Setup Virtual Drive**: Once encrypted, partition and copy your files.

***

{% hint style="danger" %}
**Encryption Compatibility Notice**

Due to an upgrade in the encryption algorithm, disks encrypted with **2541 / SecureDock** are **NOT compatible** with the **ST400 / LK100 / MINI PRO**.

**To migrate your disk to a newer model:**

1. **Back up** all data to a safe location.
2. **Initialize** the disk on the new IODD device.
3. Set a new password and restore your data.

**Compatibility Map:**

* <mark style="color:blue;">ST400 ↔ LK100 ↔ MINI PRO</mark> (Fully Compatible)
* **\[NOT COMPATIBLE]**
* <mark style="color:red;">2541 ↔ Securedock</mark> (Legacy Compatibility Only)
  {% endhint %}

***

### 🛠️ Need Help?

If you encounter issues, please refer to these troubleshooting resources:

* [**Ask AI About the IODD Documentation**](/ask-ai)
* [**Firmware Update Guide**](/troubleshooting/firmware-update)
* [**Disk Initialization Guide**](/disk-initialization)
* [**Error Messages Guide**](/troubleshooting/error-messages)
* [**FAQ**](/troubleshooting/faq)

#### Terminal Verification

You can check if your IODD is correctly recognized by the OS:

```bash
# On Linux, verify the connected USB mass storage device
$ lsblk -o NAME,MODEL,SIZE,FSTYPE
```

***

### 📞 Corporate Contact

* **Email**: **<webmaster@iodd.kr>** (Technical Support & Business Inquiries).

### 🛒 Official Stores

* [**USA Amazon**](https://www.amazon.com/stores/page/924E4905-B6C0-4750-8728-6C5F95ACAEEA?channel=web_help)
* [**DE or EU Amazon**](https://www.amazon.de/stores/page/97735567-5F5C-428C-BF9E-B4DD4F040979?channel=web_help)
* [**AliExpress (IODD Ewoda Store)**](https://www.aliexpress.com/store/1101231114)
  * Products(limited), Accessories, and Components.
  * **IODD Ewoda Store** is our official worldwide distributor.


# Ask AI

Download the complete IODD documentation MarkDown file and use it with an AI chat service for product setup and troubleshooting questions.

You can use your own AI chat service to search and summarize the complete IODD documentation for ST400, MINI PRO, LK100, MINI, 2531, and 2541. This is useful when you want a quick answer about disk initialization, AES256 encryption, ISO mounting, VHD booting, firmware updates, or troubleshooting.

## 1. Download the MarkDown File

Download this file first:

* **all\_chatbot\_training.md**

{% file src="/files/zMdNcp1otxzOcemujAwO" %}

## 2. Upload It to Your AI Chat

Open your preferred AI chat service, such as ChatGPT, Claude, Gemini, Copilot, or another tool that supports file uploads. Upload the MarkDown file, then ask your question.

Example questions:

* "How do I set up an ISO file on my IODD?"
* "What should I check before initializing the disk?"
* "Summarize the encryption setup steps for ST400."
* "Find the troubleshooting steps for a device recognition problem."

## 3. Check Important Details

AI answers can make mistakes. For important operations such as disk initialization, encryption setup, firmware updates, or formatting, always confirm the answer with the original MarkDown file section before proceeding.


# Disk Assembly \[ST/LK]

\*\*Note:\*\* The joint may feel tight at first, but it will become smoother with repeated use.

### Disk Assembly Guide

Please refer to the images below and follow these steps carefully. This guide applies to **ST300, ST400, and LK100** models, which share the same exterior design and use **2.5-inch 7mm** HDD or SSDs.

***

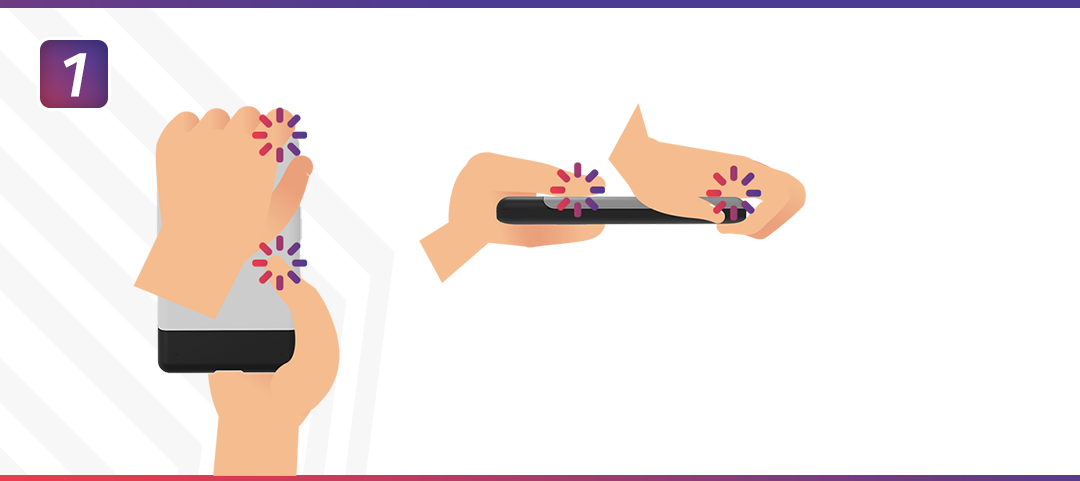
#### 1. Position the Device

Hold the **IODD main body** and the **back cover** as shown in the picture.

* **White:** Back cover
* **Black:** Main body

<figure><img src="/files/rOedDFL4kW3EFAyBiEvR" alt="Positioning the IODD body and cover"><figcaption></figcaption></figure>

***

#### 2. Remove the Rear Cover

While holding the main body firmly in place, **slide the rear cover** in the direction of the arrow.

* Push it all the way to remove it completely.
* **⚠️ Warning:** Do not apply excessive inward pressure, as this may cause damage. **Be sure to push strictly in the direction of the guide.**

<figure><img src="/files/VkFYEB6MbndErmryc3uF" alt="Sliding the rear cover"><figcaption></figcaption></figure>

***

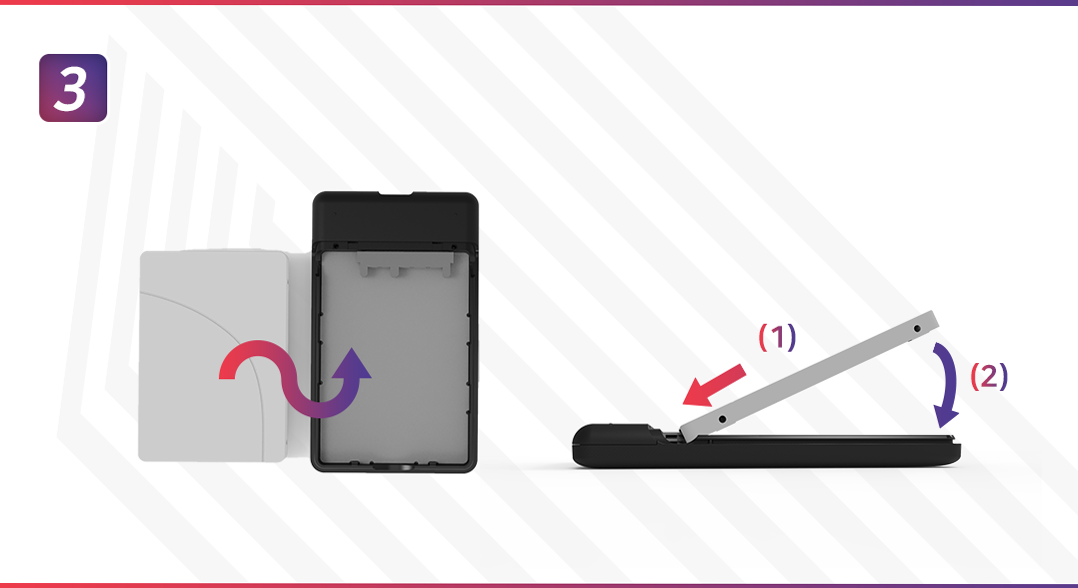
#### 3. Install the Disk Drive

Install the disk in the following order:

1. **Connect the SATA port side first.** Ensure it is aligned correctly.
2. **Seat the disk** into the IODD main body securely.

<figure><img src="/files/fxcQLlsygskx7kaTxBaP" alt="Inserting the SSD/HDD into SATA port"><figcaption></figcaption></figure>

***

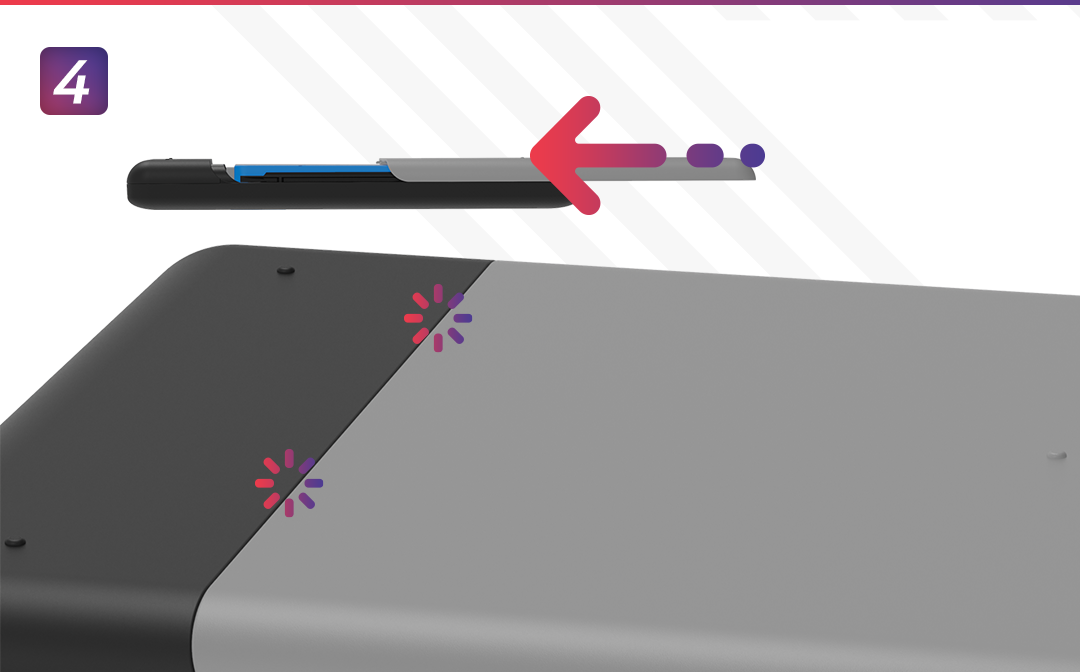
#### 4. Reattach the Cover

Slide the cover back on until you hear a **"click"** sound.

<figure><img src="/files/08GfQHrQiJjHoiBfi8Dp" alt="Closing the rear cover"><figcaption></figcaption></figure>

{% hint style="warning" %}
**Check the Latch** Verify that the rear latch is properly engaged and the cover is flush with the body.
{% endhint %}

***

### What do you want to do now?

If your hardware is ready, you must initialize the disk first: [**Disk Initialization Guide**](/disk-initialization)

* **Use Encryption:** Learn how to secure your data with the [Encryption Guide](/aes256-encryption-mini-pro-st-lk/encryption-guide). (Note: **ST300** does not support encryption).
* **Use Virtual Drive:** Learn how to use the **Bootable Virtual Drive** feature. [Drive Setup](/bootable-virtual-drive/drive-setup)
* **Use Both Simultaneously:** To use encryption and virtual drives together, follow this order:
  1. Complete the **Encryption settings** first.
  2. Then, set up your **Bootable Virtual Drive**.

#### Verification Tool

After assembly, you can check if the drive is physically detected:

```bash
# Verify the physical disk connection
$ lsblk -d | grep -i "iodd"
```

***


# Disk Initialization

First-time disk initialization order for IODD ST400, MINI PRO, LK100, ST300, MINI, 2531, and 2541.

This guide explains the recommended first-time disk initialization sequence for IODD devices. Use it when installing a new HDD or SSD, preparing AES256 encryption before formatting, selecting MBR or GPT, or checking voltage before normal use.

For OS-level partitioning and file system formatting details, also see [IODD Drive Initialization](/troubleshooting/iodd-drive-initialization).

## 1. First-Time Setup Sequence

If you are installing a new disk for the first time, follow this specific order:

1. **Detection:** Once the IODD is recognized, an initialization message will appear in your OS disk management tool.
2. **Encryption First (Optional):** \* If you intend to use hardware encryption, you **must set the password on the IODD hardware first** before initializing the drive in Windows/Mac.
   * **ST400, LK100 & MINI PRO:** Set the **2nd Password first**, followed by the **1st Password**.
3. **Perform Full TRIM (Highly Recommended):** Before creating partitions, we strongly recommend running the [**IODD TRIM Tool**](/various-functions/iodd-trim-tool) to perform a **Full Device TRIM**. This ensures all flash memory blocks are properly initialized to a clean state, providing optimal write speeds and extending the SSD's lifespan. *(If you have already created partitions or are currently using the drive, you can use the **Free Space Only TRIM** feature to safely optimize it without losing data.)*
4. **Disk Initialization:**
   * **Modern Models (ST, MINI PRO, LK100):** Supports both **MBR** and **GPT**. GPT is recommended for drives over 2TB.
   * **Legacy Models (2531, 2541, MINI Legacy):** Supports **MBR only**. GPT is **not supported**.
   * **Note:** Legacy models have a hardware limit that only recognizes the first **2TB** of a drive.
5. **Partitioning & Formatting:**
   * Format using **NTFS, exFAT, or FAT32**.
   * **Note:** FAT32 has a 4GB file size limit. NTFS/exFAT is recommended for ISO/VHD files.
   * **VHD Tool++ note:** If you use VHD Tool++, **exFAT** is recommended. On some Windows versions/locale settings, NTFS may cause occasional time/timestamp format errors in the tool.
   * **ST/MINI PRO:** The IODD data partition does not have to be the first partition on the disk.
6. **Safe Removal (Crucial):** Always use **Safely Remove Hardware** before disconnecting. Failure to do so with NTFS can lead to the "ASSERT" error.
7. **Reconnect & Verify:** Reconnect the IODD.
   * **Modern Models (ST, MINI PRO, LK100):** If files are not visible, **hold the \[4] key for 3 seconds** to manually select the correct partition.
   * **Legacy Models (2531, 2541, MINI Legacy):** This partition selection hotkey is **not supported**. Ensure your data is on the first primary partition. (For 2541, long-pressing \[4] only rescans the current partition).

***

## 2. Fixing Initialization Failures (MBR to GPT to MBR Trick)

If the drive fails to initialize or displays errors, try this cycle:

1. Connect the HDD/SSD directly to a PC (if possible) or via IODD.
2. Initialize it as **GPT**.
3. Then, immediately re-initialize it back to **MBR**. This process can often clear corrupted partition table metadata that simple formatting cannot fix.

***

## OS Specific Guides

* **Windows:** [Microsoft Disk Management Guide](https://learn.microsoft.com/en-us/windows-server/storage/disk-management/initialize-new-disks).
* **macOS:** [Disk Utility User Guide](https://support.apple.com/en-au/guide/disk-utility/dskutl1010/mac).

***

## 3. Voltage Check

Monitoring voltage is crucial for data integrity. Press **\[3]** on the keypad to view the current **V-voltage**.

* **Lowest/Minimum Voltage**: Some models (ST/2541) track the lowest voltage detected since connection. This is the most critical value for stability.
* **Current Voltage**: Displays the real-time BUS voltage.

{% hint style="danger" %}
**Low Voltage Warning (< 4.65V)** This is critical. Large file transfers may fail, or the disk may disconnect randomly. You **must** move to a rear PC port or use a **powered USB hub** immediately to prevent data loss.
{% endhint %}


# Basic Control / Function Keys

IODD keypad controls, shortcut keys, hotkeys, and startup key functions for ST400, ST300, MINI PRO, MINI, LK100, 2531, and 2541.

The physical keys on IODD devices control file navigation, ISO/VHD mounting, write protection, safe removal, voltage checks, and firmware recovery. This guide covers keypad models such as ST400, ST300, MINI PRO, MINI, LK100, plus legacy 2531 jog dial and 2541 touch key operation.

## IODD ST300/400, MINI PRO, MINI (Legacy)

The physical keypad on your IODD allows for quick navigation and advanced power-user shortcuts. Understanding these keys will significantly improve your workflow.

### 1. Basic Control (Press Key Once)

#### ⌨️ For Models with Keypad (ST300/400, MINI PRO, MINI, LK100)

| Key                                                                                                                      | Function    | Description                                                    |
| ------------------------------------------------------------------------------------------------------------------------ | ----------- | -------------------------------------------------------------- |
| <p><img src="/files/MR6TpsEdEpCHdwqDG47Y" alt="IODD key 1" data-size="original"></p><p><strong>\[1]</strong></p>         | **Rescan**  | Rescans the root folder for new files.                         |
| <p><img src="/files/cB683jSVBXhak23059V5" alt="IODD key 2" data-size="original"></p><p><strong>\[2]</strong></p>         | **Up**      | Moves up in the file or item list.                             |
| <p><img src="/files/ejknFAVleTS00OmGmJTP" alt="IODD key 3" data-size="original"></p><p><strong>\[3]</strong></p>         | **Voltage** | Displays the **VBUS minimum voltage** (Crucial for stability). |
| <p><img src="/files/MUnE4f22Td5N2t6GifmB" alt="IODD key 4" data-size="original"></p><p><strong>\[4]</strong></p>         | **Back**    | Goes to the parent folder.                                     |
| <p><img src="/files/uNTxDxwvqJOZQIWmFQmH" alt="IODD key 5" data-size="original"></p><p><strong>\[5]</strong></p>         | **Info**    | View detailed file information (size, fragmentation, etc.).    |
| <p><img src="/files/qoECH5fRwdzrMrtobrrg" alt="IODD key 6" data-size="original"></p><p><strong>\[6]</strong></p>         | **Select**  | Selects a file to mount or enters a folder.                    |
| <p><img src="/files/J8W3B6lF7p0bDH3AwnUh" alt="IODD key 7" data-size="original"></p><p><strong>\[7]</strong></p>         | **Eject**   | Ejects the most recently mounted virtual drive.                |
| <p><img src="/files/YyA7oAH99iBV4QLj4CDG" alt="IODD key 8" data-size="original"></p><p><strong>\[8]</strong></p>         | **Down**    | Moves down in the file or item list.                           |
| <p><img src="/files/buAgU1CaJyHuMYigI5Fq" alt="IODD key 9" data-size="original"></p><p><strong>\[9]</strong></p>         | **Save**    | Saves the current mount state (Auto-mounts on next boot).      |
| <p><img src="/files/0oGOlwTGucTb0Emg6DCf" alt="IODD menu key" data-size="original"></p><p><strong>\[M]</strong></p>      | **Menu**    | Enters or exits the system settings menu.                      |
| <p><img src="/files/ZIhyUoLkA6faAaQq6gku" alt="IODD key 0" data-size="original"></p><p><strong>\[0]</strong></p>         | **Help**    | Accesses the built-in Help menu or active error details.       |
| <p><img src="/files/72xk15vH1VIDBp3y2Gi0" alt="IODD Enter key" data-size="original"></p><p><strong>\[Enter]</strong></p> | **Select**  | Same function as Key \[6].                                     |

### 2. Advanced Hotkeys (Long Press - 3 Seconds)

For the **ST300/400, MINI PRO, MINI (Legacy)**, holding a key for 3 seconds triggers advanced maintenance functions:

| Key      | Function            | Description                                                                     |
| -------- | ------------------- | ------------------------------------------------------------------------------- |
| **\[1]** | **Reconnect**       | Restarts the USB connection without physical removal.                           |
| **\[3]** | **WP Reconnect**    | Reconnects with **Write-Protection** enabled for all drives.                    |
| **\[4]** | **Partition List**  | Displays all partitions; allows manual selection of the default data partition. |
| **\[7]** | **Detach All**      | Reconnects with all virtual drives (ISO/VHD/IMA) unmounted.                     |
| **\[9]** | **Sleep Mode**      | Safely detaches the USB connection and enters power-saving sleep mode.          |
| **\[0]** | **Temp Disable WP** | Reconnects with Write-Protection **temporarily disabled**.                      |

### 3. Startup Keys (Hold while connecting USB)

These keys must be held **before and during** the insertion of the USB cable:

| Key                 | Mode / Function       | Description                                                                 |
| ------------------- | --------------------- | --------------------------------------------------------------------------- |
| **\[1]**            | **Factory Reset**     | Resets all settings (LCD bright, standby time, etc.) to defaults.           |
| **\[3]**            | **WP Mode**           | Starts the device in a global Write-Protected state.                        |
| **\[5]**            | **Standalone**        | Operates the IODD using external power without a PC connection.             |
| **\[7]**            | **Unmount All**       | Ensures no virtual drives are loaded upon startup.                          |
| **\[M]**            | **Standalone Menu**   | Enters the system settings menu in Standalone Mode.                         |
| **\[0]**            | **Key Info**          | Displays a list of available startup keys on the screen.                    |
| **\[9] + \[Enter]** | **Firmware Recovery** | **Force Recovery:** Hold both keys for 7s to re-flash the current firmware. |

### For IODD 2531 (Jog Dial)

* **Jog Up/Down**: Moves the cursor through the file list or menu items.
* **Jog Click (Center)**: Selects a file or enters a folder.
* **Back Button (Side)**: Moves to the parent folder or exits the current menu.

### For IODD 2541 (Touch Keys)

The 2541 features a 12-button capacitive touch interface. Operation is identical to the physical keypad models, but requires a light touch rather than a press.

* **\[2] / \[8]**: Up / Down navigation.
* **\[6] / \[Enter]**: Select / Mount.
* **\[4]**: Back / Exit.

***

{% hint style="info" %}
**Correct Startup Sequence**

1. Hold the desired key firmly.
2. Plug in the USB cable.
3. Release the key once the IODD logo appears.
   {% endhint %}

***

### Terminal Verification

```bash
# Monitor kernel messages for USB reconnects/errors
$ dmesg -w | grep -i usb
```


# Menu Tree (MINI PRO/ST/LK)

Detailed map of the system settings and encryption management menus for IODD devices.

**Related Products**: ST300, ST400, LK100, MINI PRO

This page outlines the hierarchical menu structure of the IODD ST/LK and MINI PRO series.

### ⌨️ Menu Control

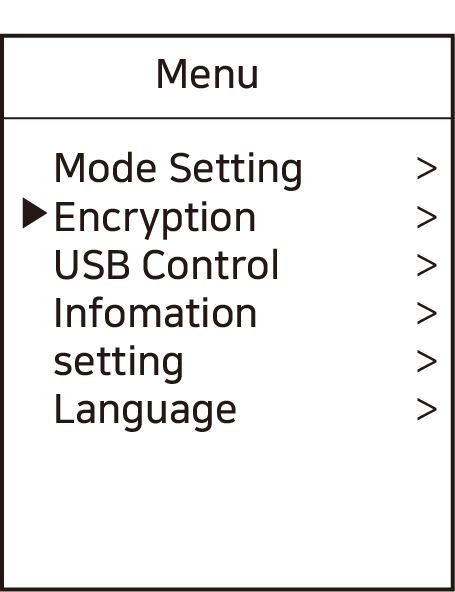
* **`2`** : Moves cursor **Up**.
* **`8`** : Moves cursor **Down**.
* **`6`** or **`⏎`** : **Execution / Select** key.

***

### 1. Mode Setting

Configure the device's operational mode. [Learn more](/bootable-virtual-drive/mode-configuration)

* <mark style="color:blue;">**`5`**</mark> <mark style="color:blue;">- Toggles</mark> <mark style="color:blue;">**Write Protection**</mark> <mark style="color:blue;">(On/Off). Icon changes accordingly.</mark>
* <mark style="color:blue;">**`6`**</mark> <mark style="color:blue;">- Toggles</mark> <mark style="color:blue;">**Fixed / Removable**</mark> <mark style="color:blue;">drive type. Icon changes accordingly.</mark>
* <mark style="color:blue;">**`3`**</mark> <mark style="color:blue;">- Moves selection</mark> <mark style="color:blue;">**Up**</mark><mark style="color:blue;">.</mark>
* <mark style="color:blue;">**`9`**</mark> <mark style="color:blue;">- Moves selection</mark> <mark style="color:blue;">**Down**</mark><mark style="color:blue;">.</mark>

**Enabled/Disabled Devices:** Toggle the following virtual drives:

1. **ODD**: Virtual CD Drive (\*.iso)
2. **HDD**: Physical Internal Drive
3. **VHD**: Virtual Drive (\*.vhd, \*.ima)

### 2. AES256 Encryption (Administrator Mode)

Manage hardware encryption settings. [Encryption Guide](/aes256-encryption-mini-pro-st-lk/encryption-guide)

{% hint style="danger" %}
**When setting or deleting the Admin password, all disk data will be permanently deleted. Please back up your data before proceeding.**
{% endhint %}

* **Admin Menu:**
  1. **Set 2nd P.W.**: Setup the **secondary password** (4-38 digits). This **must be done before** setting the 1st password.
  2. **Set Password**: Set the **primary administrator password**. (Data is deleted, but can be restored if released immediately after setting).
  3. **Del Password**: **Deletes the password** and **wipes all data**.
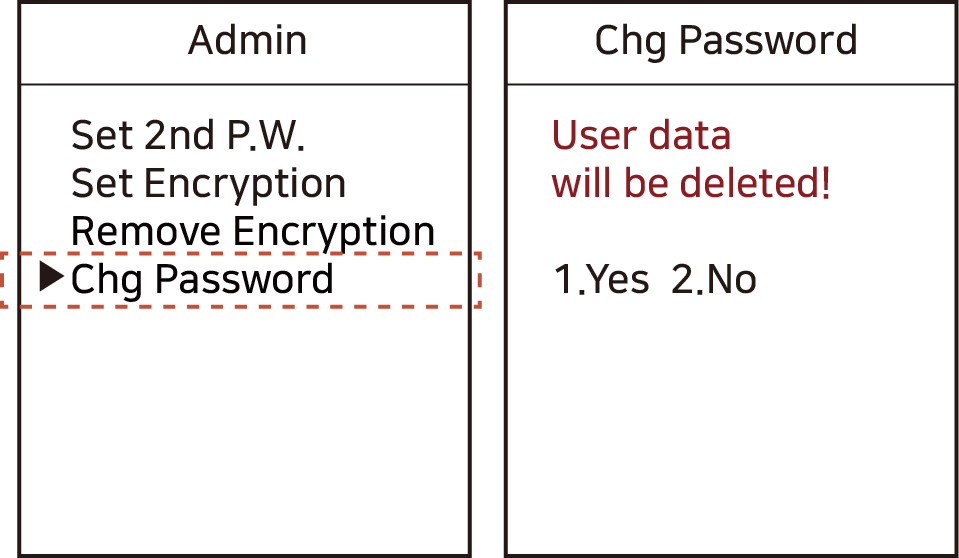
  4. **Chg Password**: **Changes** the existing password.
* **General User Management:**
  1. **User1 - User4**: Individual user slots.
     * **Set Password / Del Password**: Set or remove user-specific passwords.
     * **☑Read-only**: Enables **Write-protection** for the specific user.
     * **☑User Change**: Allows the user to **change their own** password.
     * **☑User Delete**: Allows the user to **delete their own** password.
  2. **Save Users**: **Saves** the configured user settings.

### 3. AES256 Encryption (User Mode)

Settings available for standard users. [User Guide](/user)

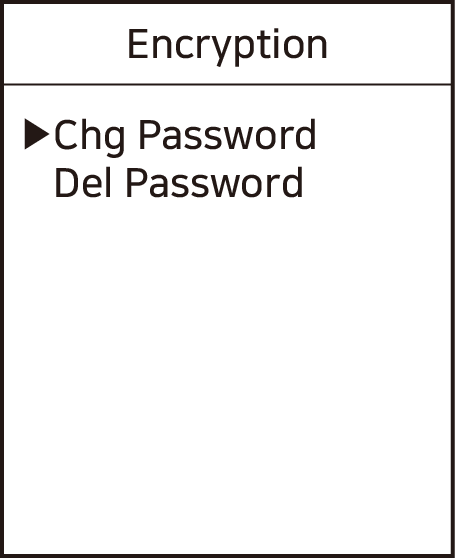
1. **Chg Password**: **Change** the current user password.
2. **Del Password**: **Delete** the current user password.

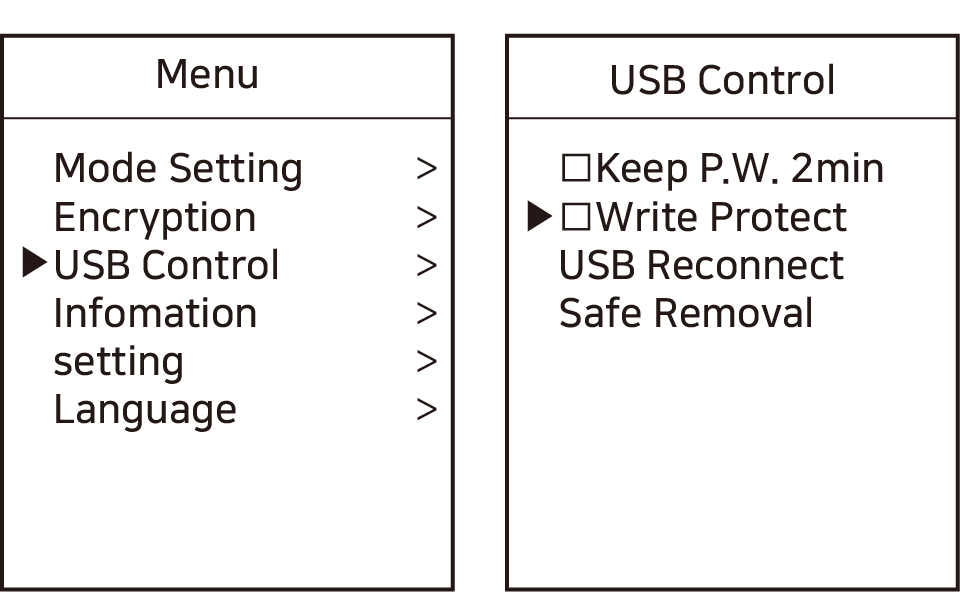
### 4. USB Control

Manage connection and safety settings.

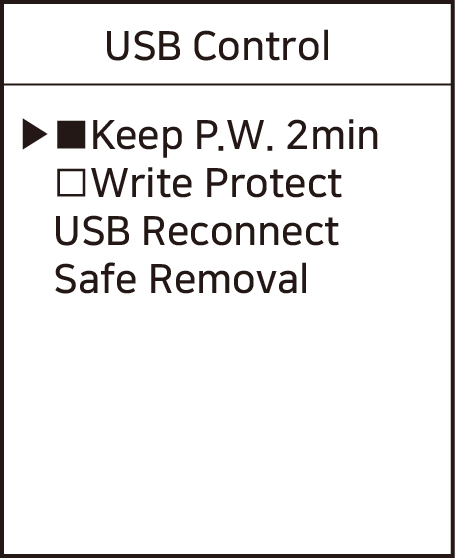
1. **Keep P.W. 2min**: Maintains the password for **2 minutes** after power-off for quick reconnection. [Details](/various-functions/keep-2min.pw)
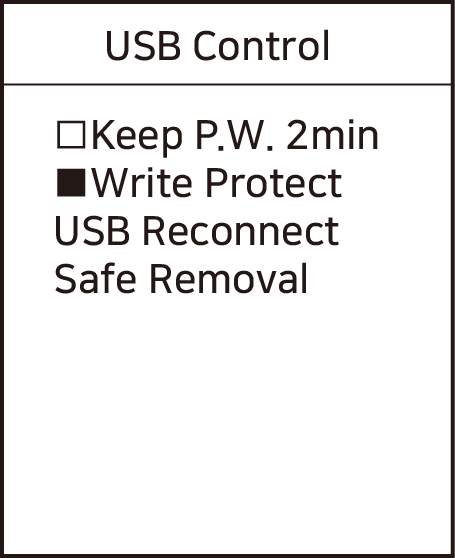
2. **Write Protect**: Enables **Write-protection** for all drives. [Details](/various-functions/write-protection)
3. **Refresh**: Software-based **reconnection** of the device.
4. **Safe Removal (HDD only)**:
   * **Stops the spindle motor** and enters power-saving mode.
   * **Note for SSD Users:** Hardware-side safe removal may not work depending on the PC. **Always use "Safely Remove Hardware" within your PC's OS.**

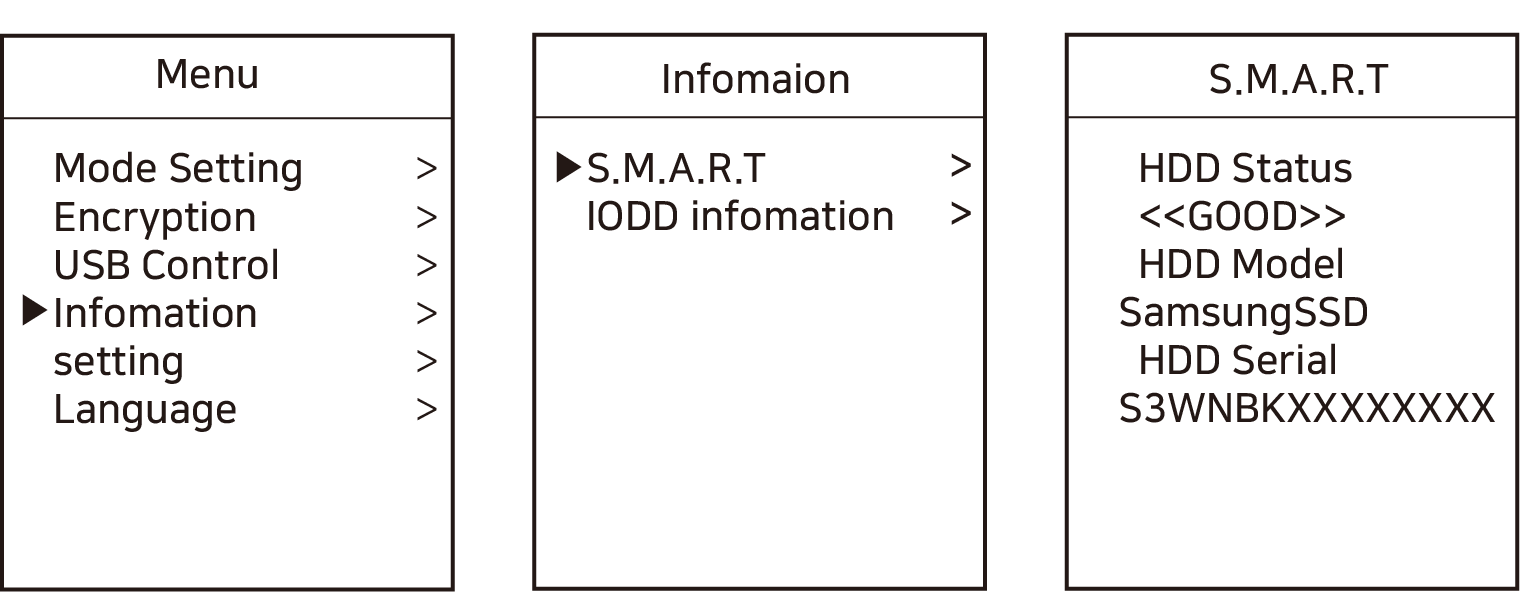
### 5. Information

View disk health and product details. [S.M.A.R.T. Info](/various-functions/s.m.a.r.t-information)

1. **S.M.A.R.T.**: Internal Drive status.
   * **HDD Health**: Shows **Good**, **Warning**, or **Bad**.
   * **HDD Model / Serial**: Displays drive identification info.
2. **Product Info**:
   * **Firmware Ver**: Current IODD firmware version.
   * **USB Speed**: Currently connected speed (Full/Hi/Super Speed).

### 6. Setting

Customize device behavior.

1. **LCD Bright**: Adjusts the **LCD backlight brightness**.
2. **Screen Saver**: Dims the screen after **2 minutes** of inactivity. For encrypted drives, the screen will **lock for security**.
3. **Load Default**: Restores all settings to **factory defaults**.

### 7. Language

Select the display language:

* English / 한글 / 简体中文 / 日本語 / Русский


# Display/Status Bar

IODD display and status bar icon guide for mounted ISO, VHD, write-protection, encryption, and USB speed indicators.

The IODD screen shows the current device state, mounted virtual drive information, write-protection status, AES256 encryption status, and USB connection speed. Use this guide to identify each status bar icon on ST400, MINI PRO, ST300, and related IODD models.
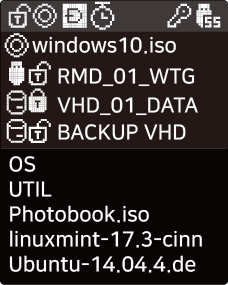
<figure><img src="/files/CpTZxQpU3L4p9GGBmfG0" alt="IODD Main Display"><figcaption><p>Main Display Overview</p></figcaption></figure>

## Status Bar

The status bar at the top of the screen shows the current operational state of the device.

<figure><img src="/files/2KUbbpnH9WGxFpR1rHHM" alt="Status Bar Indicator"><figcaption></figcaption></figure>

|                                           Icons                                          | Description                                                              |
| :--------------------------------------------------------------------------------------: | ------------------------------------------------------------------------ |
|                ![Physical write-protect icon](/files/3gaV99nXqN5rTVZCGPg2)               | Physical drive **Write-Protect** status (Enable/Disable).                |
|                 ![Global write-protect icon](/files/3cnOT4RxHhZztLJCfYOO)                | **Global Write-Protect** (Protects all disks, including virtual drives). |
|                   ![ISO mount status icon](/files/KkwRabKAG0WT4F1i0YKP)                  | **Mount / Unmount** status of the ISO file.                              |
|   <img src="/files/JrFYLONROkPkHbMblcqY" alt="IODD mode status icon" data-size="line">   | **Mode Status** (CD-ROM / Dual / HDD).                                   |
|                     ![Power status icon](/files/74cBoE5uLy1L8RTIKVTv)                    | **Power Status** (Timer / Sleep mode).                                   |
|               ![AES256 encryption active icon](/files/J9fHTCPHTp34hgP88drt)              | **AES256 Encryption** is active (On).                                    |
| <img src="/files/bgNbRzwDXYVKU1S2UOdn" alt="USB connection speed icon" data-size="line"> | **USB Connection Speed** (3.0 / 2.0 / 1.1).                              |

***

## Virtual Drive Indicators

This section displays information about the currently mounted virtual media.
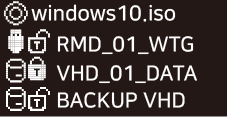
<figure><img src="/files/caXsCgGBO4EC6twWWcWU" alt="Virtual Drive Information"><figcaption></figcaption></figure>

|                                         Icons                                         | Description                                              |
| :-----------------------------------------------------------------------------------: | -------------------------------------------------------- |
| <img src="/files/RPmzcO6BgqGx57F9e6Jz" alt="Mounted file name icon" data-size="line"> | Name of the **mounted file** (ISO / VHD / RMD).          |
|                ![Virtual drive type icon](/files/4UQ9LsVH1BjddjAZxeNC)                | Type of the virtual drive (**Removable** or **Fixed**).  |
|            ![Virtual drive write-protect icon](/files/0ITWXZEdboBKdrWMzV2x)           | **Write-Protect** status for virtual drives (VHD / RMD). |

***

## File/Drive List
<figure><img src="/files/s20P2Gc9FvWbmetWYJlv" alt="File List View"><figcaption></figcaption></figure>

* Displays folders and compatible files in the currently selected directory.
* **To use a different partition:**
  1. Unmount all active virtual drives.
  2. Press and hold the **`4`** key for **3 seconds**.
  3. Select the desired partition from the **\[Partition Selection]** menu.

## Help Menu

* Users can access context-sensitive help at any time by pressing the **`0`** key on most screens or items.


# Drive Setup

IODD virtual drive setup guide for ISO, VHD, IMA, file system, partition selection, and folder limits.

This guide explains how to prepare the internal disk for IODD virtual drive functions such as ISO mounting, VHD booting, and IMA floppy image use. It covers partition requirements, supported file systems, folder limits, and when to set AES256 encryption before copying virtual drive files.

## Choose your configuration

* **Virtual Drive Only:** If you only plan to use the virtual drive functions, follow the instructions below.
* **AES Encryption Only:** If you will only use hardware encryption, you can skip this section and go directly to the [Encryption Guide](/aes256-encryption-mini-pro-st-lk/encryption-guide).
* **Using Both (Encryption + Virtual Drive):** You **must** complete the encryption setup first. Please refer to the [Encryption Guide](/aes256-encryption-mini-pro-st-lk/encryption-guide) before proceeding here.

***

## Drive Structure and Requirements

To ensure the IODD virtual drive functions correctly, your internal disk must meet the following partition and format requirements:

* **Partition Style:** Must be either **GPT** or **MBR**.
* **Partition Type:** Must be a **Normal/Primary** partition.
* **File System:** Supported formats include **NTFS**, **exFAT**, or **FAT32**.
* **Partition Selection:** The location of the partition does not matter. If you have multiple partitions, you can select the one containing your ISO files by pressing and holding the **`4`** key for 3 seconds.

***

## File Management and Limitations

{% hint style="warning" %}
**Important: 32-Item Limit per Folder** To ensure the IODD can index your files correctly, the number of files or subfolders within any single directory (that contains ISO/VHD/IMA files) **must not exceed 32 items**.
{% endhint %}

#### Recommended File Tree Structure

You can bypass the 32-item limit by organizing your files into subfolders. The limit only applies to the number of items *within* a single folder, not the total number of files on the entire drive.

```
J: (IODD Internal Drive Root) (Max 32 items)
├─ _ISO (Folder for ISO images) (Max 32 items)
│   ├─ Hiren’s BootCD 15.2.iso
│   ├─ ubuntu-22.04-desktop-amd64.iso
│   ├─ Windows 11.iso
│   └─ (Up to 32 files or subfolders)
│
├─ IMA_Floppy (Max 32 items)
│   ├─ Bios_updater.ima
│   └─ MS-DOS_6.0.ima
│
├─ VHD_Files (Max 32 items)
│   ├─ Windows_10_Win2Go.vhd
│   ├─ Linux_Mint.vhd
│   └─ Subfolders (Nested folders are allowed)
│
├─ Your_Personal_Folder_01 (No limit - non-ISO path)
└─ Your_Personal_Folder_02 (No limit - non-ISO path)
```


# Mode Configuration

Configure IODD virtual drive modes for HDD, ODD, VHD, removable drive, fixed drive, and write-protection behavior.

Mode Configuration controls how the PC recognizes your IODD device: physical HDD, virtual ODD for ISO files, and virtual VHD/IMA/RMD drives. Use this page to enable or disable device types, change drive order, and set fixed/removable or write-protected behavior.

{% hint style="warning" %}
Ensure that your disk drive is properly initialized before proceeding. [Drive Setup Guide](/bootable-virtual-drive/drive-setup)
{% endhint %}

***

## How to Enter Mode Setting

1. Press the **`Menu`** (or **`*`**) button.
2. Navigate to and select **\[Mode setting]**.

|                                                        |                                                             |
| :----------------------------------------------------: | :---------------------------------------------------------: |
| ![IODD mode setting menu](/files/NnmTUTBDtDX5wQeWv2mM) | ![IODD mode setting item list](/files/b6cPK2pINOCPJTibH5ZZ) |

***

## Item Descriptions

| Item    | Description                                                                                                                                                                     |
| ------- | ------------------------------------------------------------------------------------------------------------------------------------------------------------------------------- |
| **HDD** | The internal physical drive of the ST400/LK100/MINI PRO.                                                                                                                        |
| **ODD** | <p>Virtual Optical Disc Drive (CD/DVD/Blu-ray) used for mounting <strong>ISO</strong> files.<br><em>Note: ODD is always write-protected; manual toggle does not apply.</em></p> |
| **VHD** | Virtual drive used for mounting **VHD/IMA/RMD** files. It can act as a removable/fixed drive or a USB memory stick.                                                             |

***

## Mode Setting Controls

|      Key      | Function          | Description                                                                |
| :-----------: | ----------------- | -------------------------------------------------------------------------- |
| **`2` / `8`** | **Move Cursor**   | Moves the cursor (▶) **Up** and **Down** to select a drive.                |
| **`3` / `9`** | **Change Order**  | Moves the selected item's **priority order** (▶) Up and Down.              |
|    **`5`**    | **Write Protect** | Toggles **Write Protection** (On/Off) for the selected drive.              |
|    **`6`**    | **Drive Type**    | Toggles the selected drive's property between **Fixed** and **Removable**. |

{% hint style="warning" %}
**Disabling Items:** Items placed below the **\[----------Disable-----]** line will be deactivated. Use the **`3`** or **`9`** keys to move unwanted items below this line.
{% endhint %}

***

## Configuration Example

![IODD mode configuration example](/files/NGPDgdlKhzL3ehsBbR19)

If configured as shown in the image above, the PC will recognize the following devices:

1. **Physical HDD**
2. **Virtual ODD Drive**
3. **Removable Writable USB Drive**

***

{% hint style="warning" %}
**Error: \[No Extra Devices]** If you attempt to mount an ISO or VHD file and receive this message, it means no virtual drive (ODD/VHD) is currently active. **At least one virtual drive must be enabled in the Mode Setting menu.**
{% endhint %}

***

## Saving and Next Steps

Once you have finished your configuration, press the **`Menu`** (**`*`**) key to **save**. The IODD will automatically reconnect, and your new settings will be applied.

* **To mount an ISO file:** Proceed to [Virtual ODD (ISO) Guide](/bootable-virtual-drive/virtual-odd-iso).
* **To use Virtual USB/HDD:** Learn how to [Create VHD files with VHD Tools](/bootable-virtual-drive/virtual-drive-vhd/create-vhd-file-with-vhd-tools).


# Virtual ODD (ISO)

Follow the guide in order to set up your virtual ODD.

<details>

<summary>Step 1: Pre-check before use (Important)</summary>

* Are virtual drives enabled? [Mode Configuration](/bootable-virtual-drive/mode-configuration)
* Are you going to use encryption at the same time? If so, proceed with encryption first. [Encryption Guide](/aes256-encryption-mini-pro-st-lk/encryption-guide)
* The ISO file must be a bootable file.
* Since IODD works the same as physical ODD, an ISO file that does not boot from an actual ODD will not boot from IODD.
* If your PC only supports UEFI boot, you must boot using the Virtual Drive function. Some motherboards do not support ODD boot.
* Even in special cases (when installing an older OS on the latest generation board), the installation operation may fail due to a driver conflict. In this case, VHD files are mostly bootable and installable.

</details>

<details>

<summary>For macOS Users</summary>

* IODD cannot directly mount DMG/BIN/IMG files or disk images for MAC. Must convert to ISO file.
* You can change it directly in Terminal as shown below:

```bash
# 1. Start conversion (converts DMG to CDR format)
$ hdiutil convert [input.dmg] -format UDTO -o [output.iso]

# 2. Rename extension from .iso.cdr to .iso
$ mv [output.iso.cdr] [output.iso]
```

</details>

***

### **ISO file mount**

1. Prepare the ISO file.
2. Copy the ISO file to the IODD disk.
3. Safe removal and Reconnect, or **Long Press** the **`1`** key for 3 seconds.
4. Select the ISO file from the IODD screen and **Press** **`6`** or **`Enter`**.
   * If it is mounted normally, you can see that the virtual drive is recognized on the desktop or in the Finder.
5. **Save current state:** Reconnecting will bring up the virtual drive in its current saved state by **Pressing** the **`9`** key.
6. **No Booting Required:** If the installation does not require booting, double-click the virtual drive or autorun as it is to execute the operation.
7. **Booting Required:** If you need to boot from a virtual drive, continue with the BIOS settings below.

{% hint style="warning" %}
**File not visible?** Try selecting another partition by **Long Pressing** the **`4`** key (partition selection).
{% endhint %}

{% hint style="danger" %}
**If Virtual Drive is not enabled** Please refer to the [Mode Configuration](/bootable-virtual-drive/mode-configuration) to enable Virtual ODD.
{% endhint %}

***

### CMOS/BIOS Boot Order Setting

{% hint style="info" %}
Boot setup menus may differ depending on the board manufacturer/chipset configuration.
{% endhint %}

Enter the PC's CMOS/BIOS screen (typically using **`F2`** or **`DEL`** keys during booting).

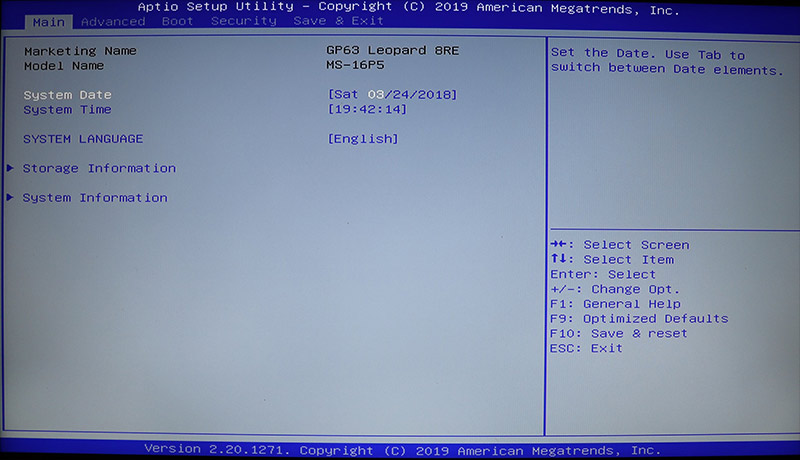
<figure><img src="/files/luzmwjWf0ZTxMALmiSIs" alt="BIOS Setup Entry"><figcaption><p>Enter BIOS setup to configure boot priority</p></figcaption></figure>

1. **Select the BOOT section:** This may be in a submenu like "Advanced" depending on the manufacturer.
2. **Set Boot Mode:** Set the boot mode to **Legacy** if required.
3. **Set Order:** Select **IODD Virtual ODD Drive** as the first priority in **Boot Order**.

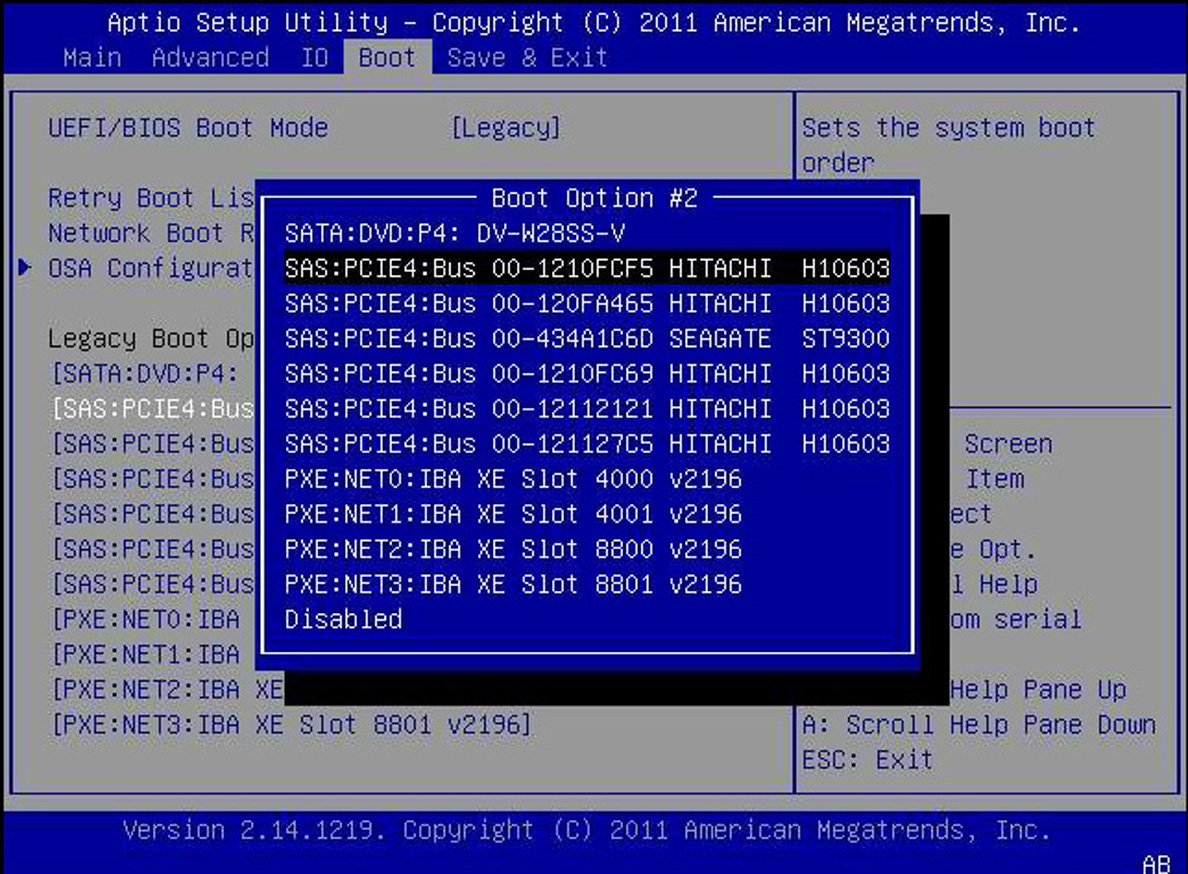
<figure><img src="/files/I4N6oJMfPC5zl9uxZ9jR" alt="Boot Order Priority"><figcaption><p>Set IODD Virtual ODD as the primary boot device</p></figcaption></figure>

{% hint style="info" %}
**Multi-Lun Support:** Some boards do not support Multi-Lun. In that case, enable only IODD Virtual Drive as the bootable drive (disable other drives in the Boot order).
{% endhint %}

{% hint style="warning" %}
**Legacy/UEFI:** If you are unable to select Legacy/UEFI, please contact the manufacturer or use VHD boot methods.
{% endhint %}

{% hint style="danger" %}
**Important:** To prevent accidental formatting of the IODD during OS installation, **Long Press** the **`3`** key for 3 seconds to enable **Write Protection**.
{% endhint %}

**Save & Exit (usually F10)**

If you have set the correct ISO at the top of the boot order, the PC will boot via the virtual ODD.

* **Windows:** You will be prompted to press a specific key on the boot screen (e.g., F6).
* **Mac:** For Intel or Silicon Macs, refer to Apple's official guide for booting from an external disk.


# Virtual Drive (VHD)

Guide to IODD Virtual Hard Disk (VHD) booting, VHD Tool++, Windows To Go, and portable OS setup.

IODD devices can mount VHD, RMD, VMDK, and IMA files as bootable virtual USB drives. This section explains how to create fixed-size VHD files, prepare portable operating systems, and keep virtual drive images compatible with IODD hardware.

Use these guides when you want to boot Windows, Linux, recovery tools, or Windows To Go from a virtual drive image stored on your IODD.

## VHD Guides

* [Create VHD File with VHD Tool++](/bootable-virtual-drive/virtual-drive-vhd/create-vhd-file-with-vhd-tools)
* [Advanced VHD Tool++ Functions](/bootable-virtual-drive/virtual-drive-vhd/advanced-vhd-tool-functions)
* [Convert ISO File to UEFI Bootable Drive](/bootable-virtual-drive/virtual-drive-vhd/convert-iso-file-to-uefi-bootable-drive)
* [WTG / Boot Camp for Mac OSX](/bootable-virtual-drive/virtual-drive-vhd/wtg-boot-camp-mac-osx)
* [Make Virtual Drive for Silicon Mac](/bootable-virtual-drive/virtual-drive-vhd/make-virtual-drive-for-silicon-mac)


# Create VHD file with VHD Tools

Guide for creating fixed-size VHD files using the IODD VHD Tool application.

#### Overview of Virtual Drive Creation

The VHD Tool is a **Windows-exclusive application** designed to create fixed-size VHD files, allowing your IODD device to function as a virtual drive.

{% hint style="info" %}
**Supported File Systems** The VHD Tool supports both **NTFS** and **exFAT** partitions for VHD creation.

**Recommended:** Use **exFAT**. VHD Tool++ relies on Microsoft's legacy `vhdtool.exe`, and on some Windows versions/region settings you may encounter occasional **time/timestamp format errors** when working on an NTFS partition.
{% endhint %}

#### Download VHD Tools

<details>

<summary>View Download Link</summary>

[Official IODD Download Center (https://dir.iodd.kr/)](https://dir.iodd.kr/)

**Tip**: To force the English version of the application, run the **`VHD_Tool++(en).bat`** file instead of the standard EXE.

</details>

#### Step-by-Step VHD Creation

1. Launch the **VHD Tool** application.
2. Navigate to the top menu and select the **\[Create]** tab.

   <figure><img src="/files/2Eq6ULaJ7WnBZK7GKxAY" alt="VHD Tool Create Tab"><figcaption><p>Initiate new virtual drive setup via the Create menu.</p></figcaption></figure>
3. In the **\[File name]** field, designate the save path (an NTFS or ExFAT partition on the IODD) and enter the desired filename.

   <figure><img src="/files/gsc6JU1asQSl7WIdJkBX" alt="File Path Selection"><figcaption><p>Select the internal IODD directory where the file will be stored.</p></figcaption></figure>
4. Enter the required capacity for the VHD file in the **\[Size]** field.

{% hint style="warning" %}
The allocated size must be less than or equal to the **\[Biggest linear Space]** (maximum contiguous free space) available on the disk.
{% endhint %}

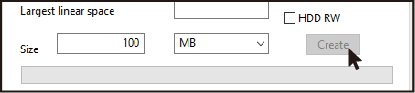
<figure><img src="/files/BVZ7cBWuK4HJssBXd2k8" alt="VHD Size Configuration"><figcaption><p>Assign the appropriate capacity after verifying the available disk space.</p></figcaption></figure>

5\. Click the \*\*\[Create]\*\* button at the bottom to begin generating the VHD file in the specified path.

{% hint style="warning" %}
**UEFI Installation Requirements** When creating a VHD for UEFI booting and installation purposes, the VHD file size must be larger than the size of the original ISO file.
{% endhint %}

{% hint style="info" %}
**Disk Optimization Recommended** Creating a VHD requires contiguous disk space. If creation fails due to insufficient contiguous space, please perform a **disk defragmentation** and try again.
{% endhint %}

***

#### Mounting and Persisting the VHD State

Once the creation process is complete, follow these steps to mount the VHD and ensure it remains loaded after a reboot.

1. Reconnect the IODD device to your PC.
2. Use the LCD screen on the IODD to locate and select the newly created VHD file.
3. Press the **\[6]** button or the **\[Enter]** key to mount the file.
4. **Important (Save State):** To maintain the mount status even after a reboot or reconnection, you must press the **\[9]** key (or **\[Enter]** for certain models) to **save the current state** before restarting your PC.

{% hint style="warning" %}
**Persisting Mount Status** If you do not save the state using the **\[9]** key, the VHD will be unmounted when the device loses power or the PC reboots. Ensure you save the state before proceeding to the boot sequence.
{% endhint %}

{% hint style="danger" %}
**Troubleshooting Mount Failures** The VHD will not mount if the Virtual Drive mode is disabled in the device settings. Please refer to the [Mode Configuration Guide](/bootable-virtual-drive/mode-configuration) to verify your configuration.
{% endhint %}

***

#### 🛠️ Advanced VHD Tool++ Functions

Beyond simple creation, VHD Tool++ provides several utility functions for managing virtual drives:

* **\[Convert]**: Converts a general disk dump image file into a fixed-size VHD file.
* **\[Extend]**: Increases the size of an existing fixed VHD file.
* **\[Defragment]**: Specifically defragments a single file on the IODD to ensure it is contiguous (0 fragments).
* **\[Upload]**: Copies a file from your PC to the IODD while ensuring it remains unfragmented during the transfer.
* **\[Write To HDD] (Expert Only)**: Performs a sector-to-sector physical duplication of an image file to the internal HDD. **Note**: This function only supports the **NTFS** file system.
  * <div data-gb-custom-block data-tag="hint" data-style="danger" class="hint hint-danger"><p><strong>WARNING</strong>: This will permanently delete ALL data on the internal drive. It is only recommended for advanced users performing raw disk operations.</p></div>


# Advanced VHD Tool++ Functions

Advanced VHD Tool++ functions for converting, extending, defragmenting, uploading, and writing IODD virtual drive images.

**VHD Tool++** is a **Windows-exclusive application** for managing fixed-size VHD files used by IODD virtual drive features. Beyond simple VHD creation, it includes maintenance tools for keeping ISO, VHD, and disk image workflows compatible with IODD boot and mount requirements.

Use these advanced functions when you need to convert a raw image, increase an existing VHD size, remove file fragmentation, or upload a virtual drive image to the IODD without breaking mount compatibility.

## Available Functions

* **\[Convert]**: Converts a general disk dump image file into a fixed-size VHD file.
* **\[Extend]**: Increases the size of an existing fixed VHD file.
* **\[Defragment]**: Specifically defragments a single file on the IODD to ensure it is contiguous (0 fragments).
* **\[Upload]**: Copies a file from your PC to the IODD while ensuring it remains unfragmented during the transfer.
* **\[Write To HDD] (Expert Only)**: Performs a sector-to-sector physical duplication of an image file to the internal HDD. **Note**: This function only supports the **NTFS**, **exFAT** file system.

## Write To HDD Warning

{% hint style="danger" %}
**WARNING**: This will permanently delete ALL data on the internal drive. It is only recommended for advanced users performing raw disk operations.
{% endhint %}


# Convert ISO file to UEFI bootable Drive

Guide for converting an ISO file into a UEFI-bootable virtual drive.

{% hint style="info" %}
This process converts an ISO file into a bootable virtual drive, functioning similarly to a USB flash drive or a Windows-To-Go (WTG) drive.
{% endhint %}

### Prerequisites

* **ISO File**: The source OS installation image.
* **Mounted VHD (Empty)**: A VHD file created and mounted via IODD.
  * Refer to: [Creating VHD Files](/bootable-virtual-drive/virtual-drive-vhd/create-vhd-file-with-vhd-tools)
* **Rufus Application**: Download from <https://rufus.ie/>

***

### Step-by-Step Conversion

#### 1. Mount the VHD File

Mount the prepared empty VHD file on your IODD device. It will appear as a "Virtual Drive" on your PC.

#### 2. Configure Rufus

Run the **Rufus** application with **Administrator privileges**.

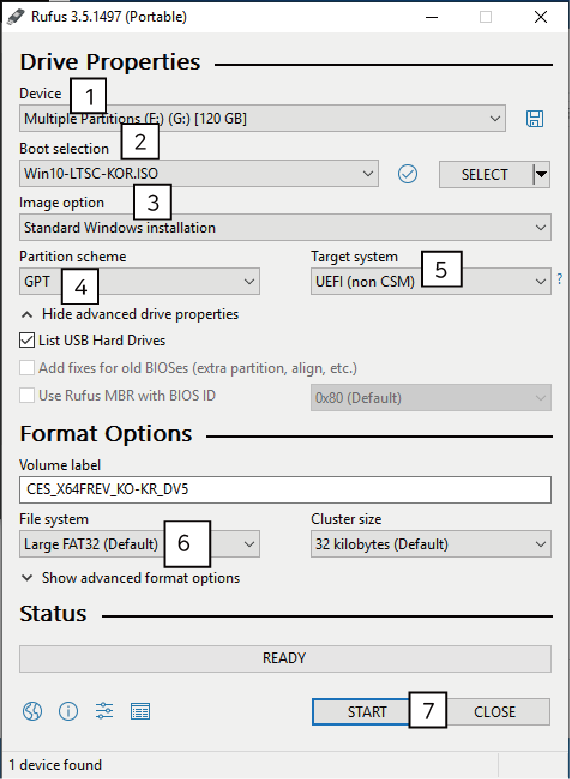
<figure><img src="/files/XvuCvp5Y0iIthxEC4EzH" alt="Rufus Configuration Screen"><figcaption><p>Configuring Rufus for VHD installation</p></figcaption></figure>

1. **\[Device]**: Select the **mounted VHD drive** (Ensure it is the virtual drive, not a physical disk).
2. **\[Boot selection]**: Click **SELECT** and choose your original ISO file.
3. **\[Image Option]**: Select **Standard Windows installation** (or **Windows To Go** if you wish to run the OS directly from the drive).
4. **\[Partition scheme]**: Set to **GPT**.
5. **\[Target system]**: Set to **UEFI (non CSM)**.

{% hint style="info" %}
For better compatibility with certain **Win-To-Go** installations on older systems, using **MBR** / **BIOS (or UEFI-CSM)** may be required.
{% endhint %}

6. **\[File system]** & **\[Cluster size]**: It is highly recommended to use the **default values**.
7. Click the **\[START]** button to begin the bootable file creation.

{% hint style="danger" %}
**Verify Target Drive Selection** Always double-check that the target drive is the **VHD-mounted "Virtual Drive."** Never select the physical IODD drive itself, as this will lead to data loss. Enabling **Write-Protection** on the physical drive before starting is a recommended safety measure.
{% endhint %}

***

### 3. Booting from the Virtual Drive

Once the process in Rufus is complete, you must configure your PC to boot from this virtual drive.

1. Save the current state of the IODD by pressing the **\[9]** key.
2. Follow the instructions in the **CMOS/BIOS Boot Order Setting** section:
   * [Go to BIOS Setup Guide](/bootable-virtual-drive/virtual-odd-iso#cmos-bios-boot-order-setting)

{% hint style="warning" %}
To ensure the virtual drive is recognized during the boot sequence, some motherboards may require the IODD to be set to **VHD-only mode** or have the specific VHD file pre-selected and saved as the primary boot state.
{% endhint %}


# WTG/Boot Camp (Mac OSX)

Guide for setting up Windows To Go (WTG) and Boot Camp for Intel/AMD PCs and Intel-based Macs.

{% hint style="danger" %}
**Compatibility Warning** Boot Camp installation via this method is **not supported on Apple Silicon Macs** (M1, M2, M3, etc.). This guide applies only to Intel-based Mac models.
{% endhint %}

<figure><img src="/files/L4VCvHGiXuAdyWTYAM6g" alt="WTG and Boot Camp Support"><figcaption><p>Portable Windows environment for PC and Mac</p></figcaption></figure>

The combination of IODD's WTG (Windows To Go) capability and encryption features allows for a secure, portable booting solution on both standard PCs and Intel-based Macs. For the full setup process, please also refer to the UEFI Booting guide.

{% hint style="info" %}
**Prerequisites** Since the VHD Tool and Rufus are **Windows-only applications**, you must have access to a Windows environment for the initial setup.

* **VHD Tool**: [Download and Guide](/bootable-virtual-drive/virtual-drive-vhd/create-vhd-file-with-vhd-tools)
* **Rufus**: [Download](https://rufus.ie/)
* **Windows ISO**: Windows 8.1, 10, or 11 (Professional / Enterprise recommended)
  {% endhint %}

***

### Preparations

1. **Boot Camp Support Software (Drivers)**:
   * Download the necessary drivers via the **Boot Camp Assistant** (Control Panel) on your Mac.
   * Store these drivers on an external USB drive or a separate VHD file.
2. **VHD File for Installation**:
   * A **Fixed-size VHD** is highly recommended for optimal performance.
   * Refer to: [Creating VHD Files](/bootable-virtual-drive/virtual-drive-vhd/create-vhd-file-with-vhd-tools)

***

### Rufus Configuration

The basic configuration follows the standard UEFI boot settings. Refer to the [ISO to UEFI Conversion Guide](/bootable-virtual-drive/virtual-drive-vhd/convert-iso-file-to-uefi-bootable-drive) for details.

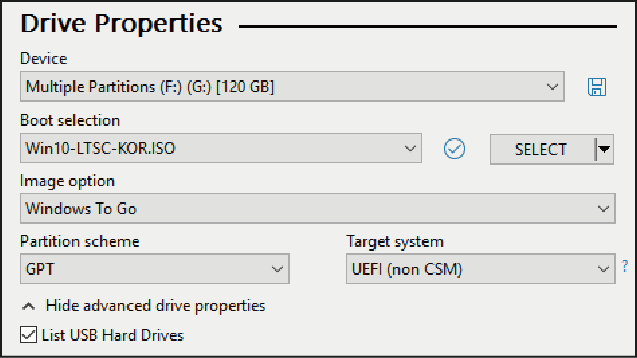
<figure><img src="/files/dAckOb2LNOYaI8VmBf5j" alt="Rufus Advanced Drive Properties"><figcaption><p>Configuring Rufus for VHD-based WTG installation</p></figcaption></figure>

1. **Enable Advanced Options**: In Rufus, navigate to **\[Advanced Drive Properties]** and check **\[List USB Hard Drives]**.
2. **Select Target**: Choose the **mounted VHD drive** (the fixed-size virtual disk) as the target device.
3. **Partition & System**: Set the partition scheme to **GPT** and the target system to **UEFI (non CSM)**.

{% hint style="danger" %}
**Critical Selection Check** Ensure the target drive is the **VHD-mounted "Virtual Drive."** Never attempt installation directly onto the physical IODD disk, as this will result in total data loss. It is strongly recommended to enable **Write-Protection** on the physical IODD device as a safeguard.
{% endhint %}

***

### Booting into Boot Camp

1. Ensure your Mac is completely turned off.
2. Connect the IODD to the Mac.
3. Press the **Power button** while holding down the **\[Option] (Alt)** key.
4. When the boot manager appears, select the **Yellow EFI Boot icon**.

{% hint style="info" %}
During the first-time installation, hold the **\[Control]** key while selecting the disk to set it as the default boot device.
{% endhint %}

5\. After the Windows setup completes, install the \*\*Boot Camp Support Software (drivers)\*\* prepared earlier.

***

### Additional Resources

For official information regarding Apple Boot Camp, please visit: [Apple Support: Install Windows on your Mac with Boot Camp](https://support.apple.com/en-us/HT201468)


# Make Virtual Drive for Silicon Mac

Guide for creating a virtual drive file on Apple Silicon Macs without using the Windows-only VHD Tool.

Since the Windows-based VHD Tool cannot be used directly on Apple Silicon Macs (M1, M2, M3, etc.), you can create a compatible virtual drive file using the macOS Terminal.

### Recommended Resources

For more details on dummy file creation, refer to the following technical guides:

* [Creating Large Dummy Files via macOS Terminal](https://code2care.org/2015/create-a-large-dummy-file-using-mac-os-x-terminal-command)
* [mkfile Command Reference (SS64)](https://ss64.com/osx/mkfile.html)

***

### Step-by-Step Creation Guide

You can create a dummy file using the `mkfile` command. The file extension must be set to **.DSK** to be recognized by the IODD as a virtual drive.

{% hint style="info" %}
**Command Syntax** Open the Terminal and use the following command structure: `$ mkfile [Size] [Path/Filename.DSK]`
{% endhint %}

#### Usage Examples:

* **Create a 10GB Virtual Drive:**

```bash
        $ mkfile 10G ~/VirtualHDD.DSK
```

```
*(Creates a 10GB virtual drive file named "VirtualHDD.DSK")*
```

* **Create a 100GB Virtual Drive:**

```bash
        $ mkfile 100G ~/ST400VD.DSK
```

```
*(Creates a 100GB virtual drive file named "ST400VD.DSK")*
```

***

### How to Prevent File Fragmentation (Critical for IODD)

The IODD hardware requires virtual drive files (DSK, ISO, VHD) to be stored in **physically contiguous space** (unfragmented). macOS does not have a built-in defrag utility, so follow these methods to ensure compatibility:

{% hint style="info" %}
**Method 1: Create Directly on the IODD Drive (Recommended)** To prevent fragmentation from the start, execute the `mkfile` command directly onto the IODD drive's path.

```bash
    # Example: Creating directly on the IODD volume
    $ mkfile 20G /Volumes/Your_IODD_Name/NewDisk.DSK
```

{% endhint %}

{% hint style="warning" %}
**Method 2: Ensure Sufficient Free Space** Before creating a file, ensure the IODD has much more free space than the file size you intend to create. This allows the file system to allocate a single contiguous block of data more easily.
{% endhint %}

{% hint style="danger" %}
**How to Fix "Defrag!" Errors on macOS** If the IODD displays a "Defrag!" error, macOS does not provide a tool to fix this in place. You must:

1. Copy the fragmented `.DSK` file to your Mac's desktop.
2. Delete the file from the IODD and **Empty the Trash**.
3. Copy the file back to the IODD.

If the error persists, the most effective solution is to **backup all data, format the IODD, and copy all files back** at once.
{% endhint %}

{% hint style="warning" %}
**Avoid Sparse Files** Do not use the `dd` command with `seek` to create files, as this creates "sparse files" that are highly likely to be fragmented and unrecognizable by the IODD hardware. Always use `mkfile`.
{% endhint %}


# Encryption Guide

IODD AES256 hardware encryption guide for ST400, MINI PRO, LK100, and legacy MINI devices.

IODD AES256 hardware encryption protects the entire internal disk before the operating system can access it. This guide compares encryption support for ST400, MINI PRO, LK100, and MINI, and explains the setup order for 2nd Password, administrator access, user access, and safe disk initialization.

## Hardware Model Comparison

The IODD provides robust hardware-based encryption. The following table summarizes the encryption capabilities by model:

| Feature                  |           ST400 / MINI PRO           |                 LK100                | IODD MINI |
| ------------------------ | :----------------------------------: | :----------------------------------: | :-------: |
| **Max Password Length**  |               38 Digits              |               38 Digits              | 16 Digits |
| **2nd Password Support** |                   O                  |                   O                  |     X     |
| **Admin Mode**           |                   O                  |                   O                  |     X     |
| **Random Keypad**        |                   O                  |                   O                  |     O     |
| **Keep 2 Min. PW**       | [O](/various-functions/keep-2min.pw) | [O](/various-functions/keep-2min.pw) |     X     |

{% hint style="info" %}
**ST300 Notice** The **ST300** model does not support hardware encryption features. For encryption support, please use the ST400, LK100, or MINI/MINI PRO series.
{% endhint %}

***

## Core Encryption Features

IODD employs **Full Disk Encryption (FDE)** on a hardware basis. This ensures that the entire disk is protected, and no data can be accessed or recovered without the correct password.

{% hint style="info" %}
**Random Keypad Security** For enhanced security, all encryption-related inputs utilize a **Random Keypad** system where the number positions change every time the screen is activated. This prevents fingerprint tracing on specific keys. **Always verify the keypad layout on the screen carefully** before entering or setting your password.
{% endhint %}

{% hint style="danger" %}
**Data Initialization Warning** Enabling or disabling the encryption feature will **completely initialize (erase) all data** on the disk. You **must back up** all critical data to a separate storage device before making any changes to encryption settings.
{% endhint %}

{% hint style="warning" %}
**Incompatibility & Conflicts**

* Encryption formats between **IODD 2541** and **ST400/LK100** are **not compatible**.
* Do not use IODD hardware encryption simultaneously with third-party software encryption solutions (e.g., **BitLocker**, VeraCrypt). Doing so may cause system instability or data corruption.
  {% endhint %}

***

## Getting Started

To use the encryption features safely, set up the **2nd Password** first. It is the administrator key used during encryption initialization and when moving an encrypted disk to another ST400/LK100/MINI PRO enclosure.

* [**2nd Password Setup Guide**](/aes256-encryption-mini-pro-st-lk/admin/2nd-password)

***

## Terminal Tips for Advanced Users

If you are managing drive paths or checking mount points on a Mac, you can use the following command:

```bash
    # List all connected disks to identify your IODD
    $ diskutil list
```


# Admin

Administrator setup for IODD AES256 encryption, user accounts, 2nd Password, and Duress PIN features.

The Admin menu controls the AES256 encryption settings on IODD ST400, MINI PRO, and LK100 devices. The administrator can set the 2nd Password, create or delete users 1 through 4, assign permissions, and manage recovery or emergency access features.

Start here when you are preparing a new encrypted IODD, changing administrator credentials, or managing multi-user access to an encrypted disk.

## Administrator Guides

* [2nd Password Setup](/aes256-encryption-mini-pro-st-lk/admin/2nd-password)
* [Set Admin Password](/aes256-encryption-mini-pro-st-lk/admin/set-admin-password)
* [User Management](/aes256-encryption-mini-pro-st-lk/admin/user-management)
* [Duress PIN](/aes256-encryption-mini-pro-st-lk/admin/duress-pin)
* [Remove Encryption or Change Admin Password](/aes256-encryption-mini-pro-st-lk/admin/remove-encryption-change-admin-password)


# 2nd Password

Advanced security feature providing definitive protection against Brute-Force attacks.

The **2nd Password** is a critical security layer required when initializing encryption on a drive or when migrating an encrypted drive to a different IODD ST/LK or MINI PRO device.

This password can be up to 38 digits long and is strictly managed by the **administrator**.

{% hint style="danger" %}
**Irrecoverable Password** If the 2nd password is lost, it cannot be retrieved, reset, or recovered through any means. Ensure this password is stored in a secure location.
{% endhint %}

***

### Why the 2nd Password is Essential

{% hint style="info" %}
**Enhanced Security Benefits**

* **Anti Brute-Force**: Prevents unauthorized access via mass-cloning or brute-force attacks by adding a secondary hardware-level validation.
* **Hardware Portability**: If your IODD enclosure is physically damaged, the 2nd password allows you to safely migrate your encrypted drive to a new IODD ST/LK or MINI PRO device.
  {% endhint %}

***

### Key Usage Guidelines

{% hint style="warning" %}
**Storage of the 2nd Password** The 2nd password is encrypted and stored within the **ST400/LK100/MINI PRO hardware**. You typically only need to set it once during the initial encryption setup unless you choose to change it later.
{% endhint %}

{% hint style="warning" %}
**Drive Migration Requirement** When connecting an encrypted drive to a new IODD device, you must provide the existing 2nd password to gain access. Without it, the drive remains inaccessible. Refer to: [Encrypted Disk Migration Guide](/encrypted-disk-change-mini-pro-st-lk)
{% endhint %}

***

### Setting the 2nd Password

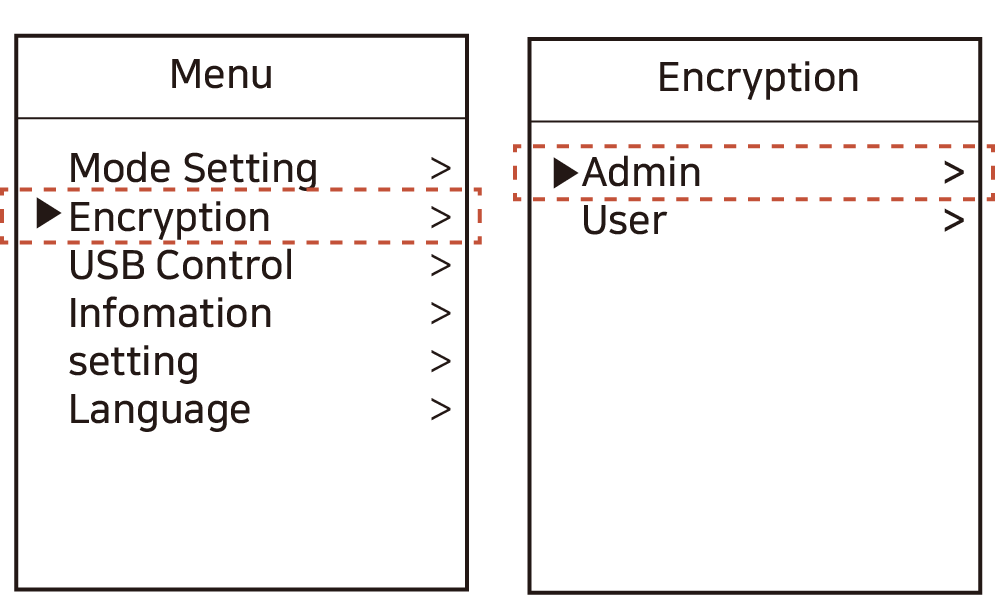
1. Press the **Menu button** and navigate to: **\[Encryption] - \[Admin]**.

   <figure><img src="/files/HBgfLyDPWDAksTI3x26h" alt="Encryption Admin Menu"><figcaption><p>Access the Administrative encryption settings.</p></figcaption></figure>
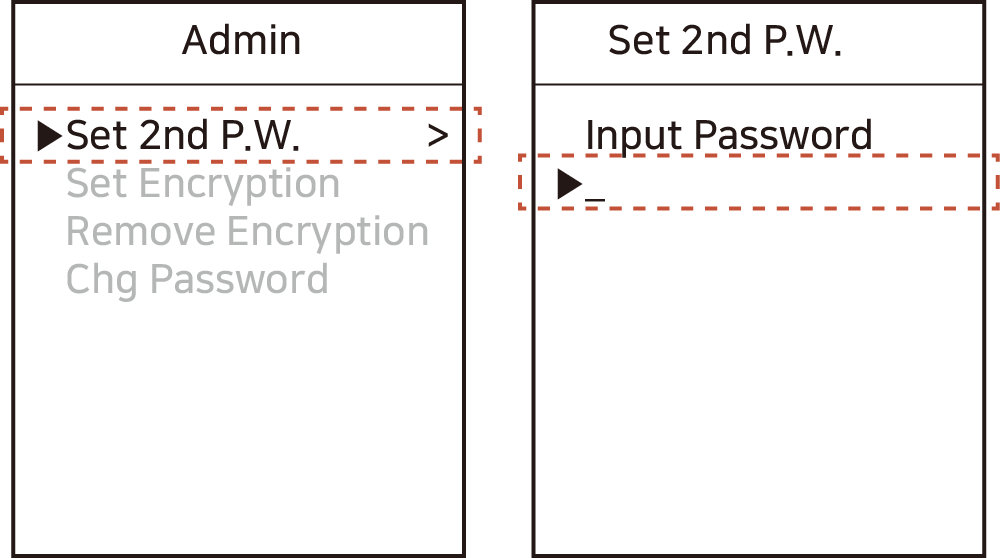
2. Select the **\[Set 2nd P.W]** option.

   <figure><img src="/files/MSkmvw7Pz2GOGUoRqAQm" alt="Set 2nd Password Screen"><figcaption><p>Input your desired 2nd password twice to confirm and set.</p></figcaption></figure>
3. Once the 2nd password is successfully configured, proceed to set the **Admin Password**. Refer to: [Setting the Admin Password](/aes256-encryption-mini-pro-st-lk/admin/set-admin-password)

{% hint style="warning" %}
**Encryption Activation** Hardware encryption functionality cannot be activated or utilized without first configuring a 2nd password.
{% endhint %}


# Set admin Password

Administrative control menu for managing multi-user passwords and disk permissions.

When multiple users share an IODD ST/LK device, the **Administrator Mode** allows for the management of individual user passwords and specific drive permissions. Administrators have the authority to reset user passwords and are the only ones capable of removing encryption from the entire device.

### Prerequisites

{% hint style="warning" %}
**2nd Password Requirement** You must configure the **2nd Password** before you can set the Admin Password. Refer to: [2nd Password Setup Guide](/aes256-encryption-mini-pro-st-lk/admin/2nd-password)
{% endhint %}

***

### Step-by-Step Setup

1. Press the **Menu button** and navigate to: **\[Encryption] - \[Admin]**.

   <figure><img src="/files/HBgfLyDPWDAksTI3x26h" alt="Encryption Admin Menu"><figcaption><p>Accessing the Administrative encryption settings.</p></figcaption></figure>
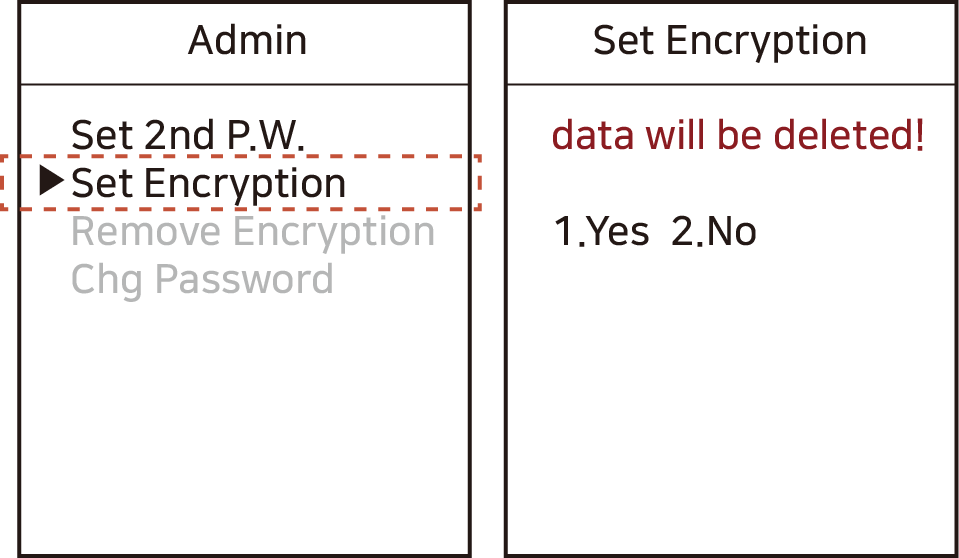
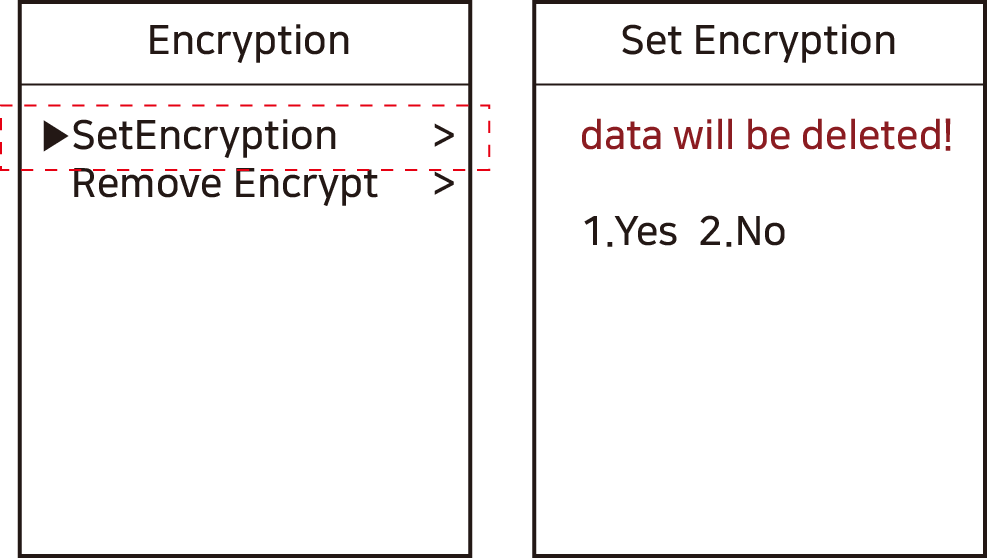
2. Select the **\[Set Encryption]** option and review the caution message.

{% hint style="danger" %}
**Data Loss Warning** Enabling or deleting the Admin password will **initialize (erase) all data on the disk**. Ensure all important files are backed up before proceeding.
{% endhint %}

<figure><img src="/files/7MIaci4KaTUAwMMb3KFQ" alt="Encryption Caution Message"><figcaption><p>Read the warning carefully before initiating encryption.</p></figcaption></figure>

3. Enter your desired **Admin Password twice** for confirmation.

   <figure><img src="/files/8FRpyto4XQk3Brq5dd9Q" alt="Admin Password Entry"><figcaption><p>Input the administrator password using the keypad.</p></figcaption></figure>
4. Wait for the process to complete. Once finished, the disk is initialized, and the screen may display **\[No appropriate partition]** because the drive is now unformatted.

   <figure><img src="/files/YkVXJdANp3mtqOsStwgW" alt="No Partition Message"><figcaption><p>Disk initialization successful; formatting is required for use.</p></figcaption></figure>
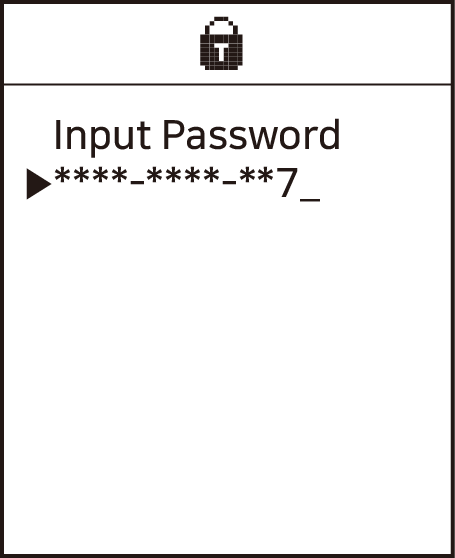
5. Reconnect the IODD. You will now be prompted for the password. To log in as the administrator, you must enter the **prefix "0"** followed by your password.

   <figure><img src="/files/WOOJjCRJxn014qEWuRjv" alt="Admin Login Screen"><figcaption><p>Log in using the 0 + [Admin Password] format.</p></figcaption></figure>

***

### Understanding the Password Structure

The IODD login system uses a prefix to distinguish between the administrator and general users.

{% hint style="info" %}
**Login Format: \[User ID] + \[Set Password]**

* **0**: Administrator Identification Digit
* **1–4**: User Identification Digits

**Example:** If you set the administrator password to `55447788`, the final login code is **0**55447788.
{% endhint %}

{% hint style="warning" %}
**Authentication Errors** If you receive a "Wrong Password" error despite entering the correct numbers, check if you omitted the **`0`** prefix. The system does not add the administrator ID automatically during the login prompt.
{% endhint %}

***

### Next Steps

After setting the password, you may need to format the drive or set up virtual drives.

* [Using Virtual Drives with Encryption](/bootable-virtual-drive/mode-configuration)


# User Management

Administrators can configure up to 4 individual user passwords and manage specific disk access permissions.

Administrators have the authority to create multiple user profiles, each with distinct access rights to the encrypted drive.

### Administrator Authentication

1. Access the menu and navigate to: **\[Encryption] - \[User]**.

   <figure><img src="/files/mGXhA1m0N4uvUstbHC4R" alt="Encryption User Menu"><figcaption><p>Navigate to the User settings under the Encryption menu.</p></figcaption></figure>
2. Enter **0** followed by the **Admin Password**.

{% hint style="info" %}
The prefix `0` identifies the input as an administrative login.
{% endhint %}

<figure><img src="/files/OfN0ANOKGSv21xP3pnwj" alt="Admin Password Entry"><figcaption><p>Example: 0 + [Admin Password]</p></figcaption></figure>

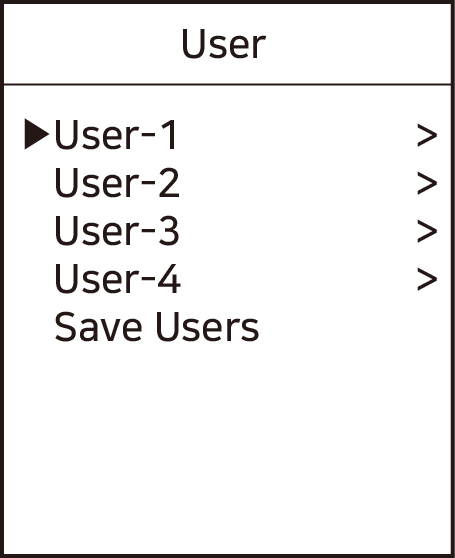
3. Select the specific user index (1–4) you wish to manage.

   <figure><img src="/files/kAIYI8crtg95sqChIkE1" alt="User Selection"><figcaption><p>Choose one of the four available user slots.</p></figcaption></figure>

***

### User Permissions and Password Setup

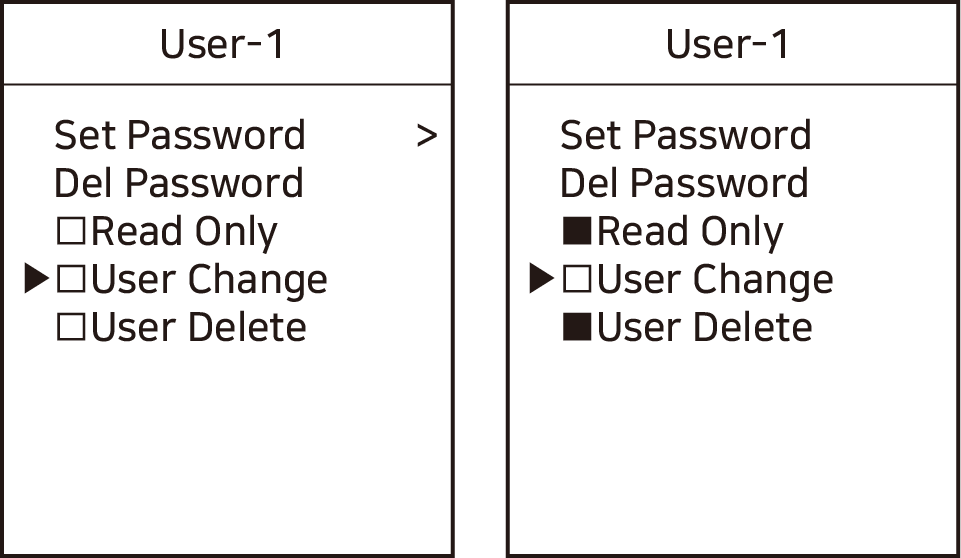
Configure the following options and set a password for the selected user:

<figure><img src="/files/MOQXYiW23wrywwT9kJOM" alt="User Permission Settings"><figcaption><p>Setting individual user rights.</p></figcaption></figure>

{% hint style="info" %}
**Understanding User Options**

* **Read Only**: The user can access files but cannot write, modify, or delete data on the drive.
* **User Change**: Permits the user to change their own password without administrative intervention.
* **User Delete**: Allows the user to delete their own account/password from the device.
  {% endhint %}

***

### Saving Changes

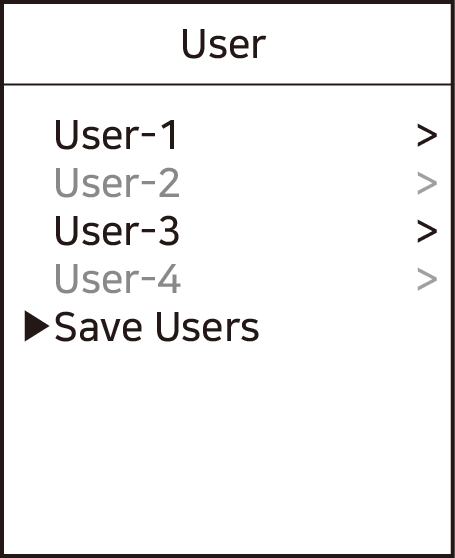
After configuring the user profile, you must confirm the settings.

<figure><img src="/files/gKXatS6MwgdcEzgxqx7h" alt="Save Users Option"><figcaption><p>Finalizing the user configuration.</p></figcaption></figure>

{% hint style="warning" %}
**Persistence of Settings** You must select **\[Save users]** to commit the changes. If you exit the menu without saving, all modifications will be discarded.
{% endhint %}

***

### Password Structure for Users (1-4)

To log in as a specific user, the password must be prefixed with the corresponding **User Identification Digit**.

{% hint style="info" %}
**Login Format** **\[User ID (1\~4)] + \[User Password (Up to 37 digits)]**

* If **User 1** sets the password to `55447788`, the login code is **1**55447788.
* If **User 4** sets the password to `55447788`, the login code is **4**55447788.
  {% endhint %}

{% hint style="info" %}
On supported **ST400** and **MINI PRO** firmware, the **User 4 PIN** can be used as the **Duress PIN** to show only a prepared `vhd4.vhd` volume on the PC. Refer to: [Duress PIN](/aes256-encryption-mini-pro-st-lk/admin/duress-pin)
{% endhint %}

***

### Advanced User Operations

For more details on specific encryption menus available to Users 1–4, please refer to: [User Encryption Menu](/user/user-menu-encryption)


# Duress PIN

Use the IODD Duress PIN, also known as a decoy PIN, to show only a prepared vhd4.vhd volume for plausibly deniable access.

The **Duress PIN** feature, also called a **decoy PIN**, lets an IODD **ST400** or **MINI PRO** present only a prepared `vhd4.vhd` virtual disk to the PC when the device is unlocked with the **User 4 PIN**.

This mode is useful when you need to expose a separate, shareable volume while keeping the normal storage area separate from the PC session. It can support a **plausibly deniable** access workflow by showing a prepared decoy volume instead of the normal physical partition.

{% hint style="warning" %}
**Supported Models and Firmware** Duress PIN with `vhd4.vhd` is supported on **ST400** and **MINI PRO** with firmware **version 82 or later**, updated using `iodd_firm_upd-0.8.2.0_xx.exe` or later.
{% endhint %}

***

### Terminology: Duress PIN, Decoy PIN, and Plausibly Deniable Access

In this guide, **Duress PIN** refers to the IODD feature name. **Decoy PIN** is a common search term for a PIN that opens a prepared alternate volume. **Plausibly deniable access** describes the user-facing result: the PC sees only the prepared `vhd4.vhd` disk during that session.

***

### How It Works

When the device is unlocked with a PIN other than **User 4**, the PC sees the normal physical partition. Use this state to create, delete, or update `vhd4.vhd`.

When the device is unlocked with the **User 4 PIN**, the PC sees only the disk mapped to `vhd4.vhd`. Other files from the physical partition are not shown in that session.

| Unlock Method         | Main Purpose                                                   | What the PC Sees          |
| --------------------- | -------------------------------------------------------------- | ------------------------- |
| PIN other than User 4 | File management, ISO/VHD management, `vhd4.vhd` setting update | Normal physical partition |
| User 4 PIN            | Duress PIN access                                              | Disk sized to `vhd4.vhd`  |

***

### Preparing `vhd4.vhd`

1. Unlock the device with a PIN other than the **User 4 PIN**.
2. On the PC, create a file named exactly `vhd4.vhd` in the **root folder** of the first partition.
3. Make sure the file is in the root folder, not in a subfolder.
4. Return to the root folder list on the device screen.
5. Rebuild the root folder list by pressing **Key 1**, rebooting the device, or entering a subfolder and returning to the root folder.
6. When `vhd4.vhd` appears in the list, the device updates the VHD setting.
7. Unlock the device again with the **User 4 PIN**.
8. The PC shows a disk whose size matches `vhd4.vhd`.

{% hint style="info" %}
When creating `vhd4.vhd`, use **VHD\_Tool++ v0.9.0.10 or later** from the [IODD Download Center](https://dir.iodd.kr/?dir=vhd_tools). VHD\_Tool++ is a Windows-only tool.
{% endhint %}

***

### `vhd4.vhd` Requirements

| Item                | Requirement                        |
| ------------------- | ---------------------------------- |
| File name           | `vhd4.vhd`                         |
| Location            | Root folder of the first partition |
| Format              | Fixed-size VHD file                |
| Unsupported formats | Dynamic VHD, VHDX                  |
| Placement           | Contiguous, without fragmentation  |

Select `vhd4.vhd` on the device and press **Key 5** to display the file information message. The `fragment` value must be `1`.

{% hint style="danger" %}
A fragmented `vhd4.vhd` cannot be used. If the LCD shows a defragmentation or `DEFRAG` message, recreate `vhd4.vhd` as a contiguous fixed-size VHD file, then unlock with a PIN other than User 4 and rebuild the root folder list.
{% endhint %}

***

### Updating the VHD Setting

The device checks whether `vhd4.vhd` exists when it builds the root folder list.

| State                                   | Device Behavior                                     |
| --------------------------------------- | --------------------------------------------------- |
| `vhd4.vhd` exists and is not fragmented | Updates the VHD setting for use with the User 4 PIN |
| `vhd4.vhd` exists but is fragmented     | Does not apply the VHD setting                      |
| `vhd4.vhd` does not exist               | Deletes the saved VHD setting                       |

{% hint style="warning" %}
Rebuild the root folder list only while unlocked with a PIN other than the **User 4 PIN**. A user with disk write protection cannot update the `vhd4.vhd` setting.
{% endhint %}

***

### Troubleshooting

#### The VHD Disk Does Not Appear After Unlocking With the User 4 PIN

1. Unlock the device with a PIN other than the User 4 PIN.
2. Check that `vhd4.vhd` exists in the root folder of the first partition.
3. Rebuild the root folder list by pressing **Key 1**, rebooting the device, or entering a subfolder and returning to the root folder.
4. Check that `vhd4.vhd` is not fragmented.
5. Unlock again with the User 4 PIN.

If the PIN used to update the setting has disk write protection enabled, the VHD setting cannot be updated.

#### The Device Does Not Recognize `vhd4.vhd`

* Make sure the file name is exactly `vhd4.vhd`.
* Make sure the file is in the root folder of the first partition.
* Make sure the root folder list was rebuilt after creating the file.
* Make sure the file is a fixed-size VHD, not a dynamic VHD or VHDX file.
* Make sure the file is not fragmented.

#### A Defragmentation or `DEFRAG` Message Appears

`vhd4.vhd` is not stored contiguously on the disk. Delete and recreate `vhd4.vhd` on the PC, or arrange it so it is stored in a contiguous area. Then unlock with a PIN other than the User 4 PIN and rebuild the root folder list.


# Remove Encryption/Change Admin Password

Procedures for removing hardware encryption or updating the administrative password.

Modifying the fundamental encryption settings of your IODD device has different impacts on your data depending on the command. Please review the following impact table carefully before proceeding.

{% hint style="info" %}
**Password Change & Data Safety** Changing your Admin password **does not delete the files** stored on the internal drive. It only resets the secondary User (1–4) profiles and administrative access credentials.
{% endhint %}

### Impact Table by Command

| Command               | Administrator Settings | User 1\~4 Settings | Internal Drive Data (Files) |
| --------------------- | :--------------------: | :----------------: | :-------------------------: |
| **Set Encryption**    |       Initialized      |     Initialized    |     **❌ All Data Lost**     |
| **Change Password**   |         Updated        |     **Removed**    |     **✅ Remains Intact**    |
| **Remove Encryption** |       **Removed**      |     **Removed**    |     **❌ All Data Lost**     |

***

### Step-by-Step Instructions

1. Press the **Menu button** and navigate to: **\[Encryption] - \[Admin]**.

   <figure><img src="/files/HBgfLyDPWDAksTI3x26h" alt="Encryption Admin Menu"><figcaption><p>Accessing the administrative security settings.</p></figcaption></figure>
2. Select either **\[Remove Encryption]** or **\[Chg Password]** based on your objective.
3. **Review the Caution Message** on the screen before confirming:
   * **Change Password**: This will reset the administrative password and delete all User 1–4 profiles. **The files on the drive will remain safe and accessible to the administrator.**

     <figure><img src="/files/JVKbgU64hfevOwH1EFfO" alt="Change Password Warning"><figcaption><p>Notice: User 1-4 data will be reset, but drive files are preserved.</p></figcaption></figure>
   * **Remove Encryption**:

{% hint style="danger" %}
This will permanently delete all passwords, user profiles, and **all files stored on the internal drive.** This action is irreversible.
{% endhint %}

```
    <figure><img src="../../.gitbook/assets/image (61).png" alt="Remove Encryption Warning"><figcaption>Warning: All data and settings will be permanently erased.</figcaption></figure>
```

***

{% hint style="warning" %}
**Verification After Action**

* **After Removing Encryption**: The device returns to a standard (non-encrypted) state. You must format the drive again to use it.
* **After Changing Password**: You must log in with the new password using the **0 + \[New Password]** format upon reconnection. Your existing files will be available immediately.
  {% endhint %}

{% hint style="warning" %}
**Unrecoverable Actions** For "Set Encryption" or "Remove Encryption," the deleted data **cannot be recovered** by any software or hardware tools once confirmed. Always maintain a backup of critical files.
{% endhint %}


# User

Standard user access and encryption permissions for IODD ST400, MINI PRO, and LK100 devices.

The User menu is for standard, non-administrator access on IODD devices that support AES256 hardware encryption, including ST400, MINI PRO, and LK100. A user PIN can unlock the encrypted disk with only the permissions granted by the administrator.

Use this section when you need to understand how a standard user logs in, which encryption functions are available, and how administrator-managed permissions affect daily operation.

## User Guides

* [User Menu for Encryption](/user/user-menu-encryption)


# User menu (Encryption)

Guide for User 1-4 on accessing and managing their individual encryption settings.

Standard users (User 1\~4) can manage their own security settings, such as changing or deleting their passwords, provided the Administrator has granted the necessary permissions.

{% hint style="info" %}
**Menu Visibility** If you cannot see the **Encryption** menu after pressing the Menu button, it means the Administrator has disabled your permission to change or delete your password.
{% endhint %}

***

### Accessing the Menu

1. Press the **\[Menu]** button on your IODD device.
2. Navigate to and select the **\[Encryption]** menu.

<figure><img src="/files/iJD5pc9QoJjmqTjaarD1" alt="User Encryption Menu"><figcaption><p>Accessing the encryption settings as a standard user.</p></figcaption></figure>

***

### Available User Functions

Depending on the **Permissions** assigned to you by the Administrator, the following options will be activated:

<figure><img src="/files/NeKWPMe5cF8l02u1msLl" alt="Activated User Options"><figcaption><p>The menu items shown will vary based on your specific user rights.</p></figcaption></figure>

{% hint style="info" %}
**User Menu Options**

* **Chg Password**: Allows User 1\~4 to independently change their own login password.
* **Del Password**: Allows User 1\~4 to delete their own account and password from the device.
  {% endhint %}

{% hint style="warning" %}
**Administrative Authority** Even if a user has the rights to manage their own password, the **Administrator** retains full control and can change or delete any user's password at any time via the Admin Mode.
{% endhint %}

***

### Security Recommendations

{% hint style="warning" %}
**Password Deletion** If you use the **Del Password** function, you will lose access to the encrypted drive immediately. You will need to contact the Administrator to have a new user profile and password assigned to you.
{% endhint %}

{% hint style="info" %}
**Changing Passwords** It is recommended to change your password periodically. When changing your password, ensure you remember your **User Identification Digit (1-4)**, as it must be entered as a prefix every time you log in.
{% endhint %}


# Encrypted Disk Change (MINI PRO/ST/LK)

Procedures for migrating an encrypted drive to a new IODD device while preserving data.

{% hint style="info" %}
**Drive Compatibility** An encrypted HDD/SSD can be moved to another ST400/LK100 device while maintaining the existing encrypted data, provided you synchronize the security settings correctly.
{% endhint %}

### Preparation

To migrate your encrypted data to a new device, you will need:

* **Existing Drive**: The original HDD/SSD containing your encrypted data.
* **Temp Drive**: A secondary or temporary drive used only for the initial setup of the new IODD.
* **New IODD**: The replacement ST400/LK100 enclosure.

{% hint style="danger" %}
**Safety First** **Do not install your Existing Drive** into the New IODD until you have completed the 2nd password configuration. This prevents any accidental data initialization during the setup phase.
{% endhint %}

***

### Migration Procedure

Follow these steps to synchronize your new hardware with the existing encryption:

#### 1. Initial Setup with the Temp Drive

Install the **Temp Drive** into your **New IODD** enclosure. This drive acts as a placeholder to safely initialize the encryption settings on the new hardware.

#### 2. Synchronize the 2nd Password

Navigate to the menu and set the **2nd Password** on the New IODD. Refer to: [2nd Password Setup Guide](/aes256-encryption-mini-pro-st-lk/admin/2nd-password)

{% hint style="warning" %}
**Password Consistency** You must set the **exact same 2nd password** that was used on the original device. If the drive is not recognized after the migration, you can simply re-run this process with the correct 2nd password to regain access.
{% endhint %}

#### 3. Hardware Swap

After successfully setting the 2nd password, power off the device and remove the **Temp Drive** from the enclosure.

#### 4. Final Migration

Install your **Existing Drive** into the New IODD. The device will now recognize the encryption, and you can unlock your data using your original administrator or user passwords.

***

{% hint style="info" %}
**Troubleshooting Access Issues** If your Existing Drive is not recognized after migration, it is likely that the 2nd password was entered incorrectly. In this case, re-insert the **Temp Drive**, use the **\[Chg Password]** menu in Admin mode to set the correct 2nd password, and then try the Existing Drive again.
{% endhint %}

{% hint style="warning" %}
**Encryption Prefix** Remember to enter the identification digit when prompted for a password:

* **0** + \[Admin Password]
* **1\~4** + \[User Password]
  {% endhint %}


# Admin Manager Application

Comprehensive guide for the Windows-exclusive IODD Admin Manager Application.

The Admin Manager is a specialized Windows application that allows administrators to manage encryption settings, user permissions, and device locking/unlocking directly from a PC.

### 🔐 Security & Mutual Authentication

The iODD Admin Manager performs Challenge-Response based mutual authentication upon device connection. It exchanges a non-reusable random number (Challenge) for each session and verifies the response calculated using the genuine key securely stored within the iODD hardware to mutually confirm the authenticity of both the device and the application. This process is designed to prevent replay attacks. Fake or modified devices that fail authentication cannot establish management communication, which ultimately helps verify hardware authenticity and minimize the attack surface.

{% hint style="warning" %}
**Supported Models Only**: ST400 / LK100 / MINI PRO. This application does **not** support: 2531, 2541, IODD MINI, ST300.
{% endhint %}

### Download Link

You can download the latest version of the Admin Manager from the official IODD Download Center.

{% hint style="info" %}
**IODD Download Center**\
<https://dir.iodd.kr>
{% endhint %}

***

### Application Layout

The application is divided into several functional zones to facilitate efficient device management.

<figure><img src="/files/5fQcwmsERvUEfa5YRVEQ" alt="Admin Manager Main Layout"><figcaption><p>Overview of the Admin Manager interface.</p></figcaption></figure>

***

### 🛡️ Admin Panel Area

This section allows the administrator to control the primary security state of the connected IODD.

<figure><img src="/files/caNIIi22wvwEeotFhz4h" alt="Admin Panel Interface"><figcaption><p>Controls for device lock/unlock and secondary password management.</p></figcaption></figure>

1. **\[Admin Password] Field**: All administrative actions require this password. Without it, changes will not be saved to the IODD hardware.
2. **\[Secondary Password (2nd Password)] Field**: Used for initial encryption setup or when migrating the drive to new hardware.
3. **\[Set] Button**: Commits the entered 2nd password (up to 38 digits) to the machine.
4. **\[Unlock] Button**: Unlocks the connected IODD from the PC.
5. **\[Lock] Button**: Manually engages the password lock on the device.
6. **\[Password Configuration] Tab**: Allows saving current user settings as a file.

{% hint style="info" %}
**Master Password**: Saving or loading configuration files requires a "Master Password." This is independent of the Admin Password and is used solely for protecting the configuration files.
{% endhint %}

***

### 👥 User Management Area

Administrators can configure up to four individual user profiles with specific access rights.

<figure><img src="/files/wdKALowV9HV9Y2qvUYQy" alt="User Management Section"><figcaption><p>Detailed configuration for Users 1 through 4.</p></figcaption></figure>

* **User Selection \[1]**: Check the box for the user (1-4) you wish to manage.
* **Password \[2] & Authority \[3]**: Set the individual password and check the desired permissions.
  * **Read Only**: User cannot write data.
  * **User Change**: User can modify their own password.
  * **User Delete**: User can remove their own credentials.
* **Execution Buttons**:
  * **\[Set Password]**: Applies the settings to the IODD.
  * **\[Do not reconnect]**: If checked, settings apply immediately without needing to physically reconnect the device.
  * **\[Empty]**: Clears all input fields in the user area for a fresh start.

{% hint style="warning" %}
**User Password Structure** User passwords must start with their designated User ID (1-4). The total length can be up to 38 digits (1 digit ID + 37 digit password).
{% endhint %}

***

### 📊 Status & Utility Areas

#### Current Status Area

Provides a real-time overview of the encryption lock status and active user permissions.

<figure><img src="/files/OqM1IsbydyAY0VE38NmO" alt="Current Status Display"><figcaption><p>Check the live status of the connected hardware.</p></figcaption></figure>

#### Log Area

Displays a chronological log of all actions and progress. Use the **\[Clear]** button to reset the view.

<figure><img src="/files/zdt0ZUpSB3dVAmE83Sn7" alt="Application Log"><figcaption><p>Monitor the progress of tasks and command results.</p></figcaption></figure>

#### Main Menu & Settings

Located under **\[Settings] - \[Preferences]**, you can close the program or change the interface language.

* **Supported Languages**: Korean, English, German, French, Chinese, Japanese, Russian.

***

{% hint style="info" %}
**Feature Availability** All encryption functions can be performed directly on the IODD device hardware. The Admin Manager application is required only for managing **Password Configuration Files** (.cfg) or for more convenient batch management via PC.
{% endhint %}

### Related Documentation

* [Administrative Encryption Settings](/aes256-encryption-mini-pro-st-lk/admin)


# IODD MINI Encryption

Hardware-based AES256 encryption features for the IODD MINI.

The IODD MINI features hardware-based AES256 encryption, ensuring that your data is protected and inaccessible without the correct authorization.

#### Hardware Model Comparison

While the IODD MINI provides powerful encryption, its feature set differs from the ST/LK and MINI PRO series. Please refer to the table below:

| Feature                     |       ST400 / LK100 / MINI PRO       | 2541 / MINI (Legacy) |
| --------------------------- | :----------------------------------: | :------------------: |
| **Max Password Length**     |               38 Digits              |       15 Digits      |
| **User ID Prefix (0, 1-4)** |              ✅ Supported             |    ❌ Not Supported   |
| **2nd Password Support**    |                   ✅                  |           ❌          |
| **Admin Mode**              |                   ✅                  |           ❌          |
| **Random Keypad**           |                   ✅                  |           ✅          |
| **Keep 2 Min. PW**          | [✅](/various-functions/keep-2min.pw) |           ❌          |

***

#### Core Security Information

{% hint style="info" %}
**ST300 Notice** The **ST300** model does not support hardware encryption features.
{% endhint %}

{% hint style="info" %}
**Random Keypad Entry** All password inputs utilize a **Random Keypad** system. The position of each number changes every time the screen is activated. **Carefully verify the keypad layout** on the IODD MINI screen before entering or setting your password.
{% endhint %}

{% hint style="danger" %}
**Data Initialization** Enabling or disabling the encryption feature will **completely erase (initialize) all data** on the internal drive. It is mandatory to back up your important files before making changes to the encryption state.

**Tip (Legacy MINI)**: On the older IODD MINI, if you perform **"Remove Encryption" immediately after "Set Encryption"** (before any new data is written to the drive), it is possible to return the drive to a standard state without destroying the original pre-encryption data.
{% endhint %}

{% hint style="warning" %}
**Encryption Incompatibility** Encryption formats are **not compatible** between different IODD generations. Drives encrypted on **IODD 2541** or **ST400/LK100/MINI PRO** cannot be read by an **IODD MINI**, and vice-versa.
{% endhint %}

{% hint style="warning" %}
**Third-Party Software Conflicts** Do not use IODD hardware encryption in conjunction with software-based Full Disk Encryption (FDE) solutions such as **BitLocker** or VeraCrypt. Simultaneous use may lead to critical system errors or data corruption.
{% endhint %}

***

#### Configuration Guide

Since the IODD MINI does not utilize a 2nd password system, you can proceed directly to the encryption setup and removal guide:

* [**Setting or Removing Encryption on IODD MINI**](/aes256-encryption-mini/set-remove-encryption-mini)


# Set/Remove Encryption (MINI)

How to set or remove AES256 hardware encryption on the legacy IODD MINI.

This guide explains how to enable or disable AES256 hardware encryption on the legacy IODD MINI. Use it when you need to set a new encryption PIN, remove encryption, or prepare the MINI before using virtual drive features.

{% hint style="danger" %}
Setting or removing encryption initializes the disk and deletes existing data. Back up all important files before continuing.
{% endhint %}

## Set Password

**1.** Press the Menu button to select the **\[Encryption] \[SetEncryption]** menu.

<figure><img src="/files/HyqeDrr8bg6mSmRegyw0" alt="IODD MINI SetEncryption menu"><figcaption></figcaption></figure>

**2.** Check Caution Message

{% hint style="danger" %}
**Data Deletion Warning** When setting or removing the password, all disk data will be deleted. Please back up all necessary data before proceeding.
{% endhint %}

<figure><img src="/files/DO2ouKp8if1NGsuY0EOe" alt="IODD MINI encryption caution message"><figcaption></figcaption></figure>

**3.** Enter the password **twice.**

<figure><img src="/files/8FRpyto4XQk3Brq5dd9Q" alt="IODD MINI password entry screen"><figcaption></figcaption></figure>

**4.** Enter the setup password twice and wait for the process to finish. The disk is initialized when setting the password, and the device may display **\[no appropriate partition]**.

<figure><img src="/files/YkVXJdANp3mtqOsStwgW" alt="IODD MINI no appropriate partition message"><figcaption></figcaption></figure>

**5.** When IODD is reconnected, it requires the ***password***.

<figure><img src="/files/WOOJjCRJxn014qEWuRjv" alt="IODD MINI password required screen"><figcaption></figcaption></figure>

## Remove Encryption

**1.** Press the Menu button to select the **\[Encryption] \[RemoveEncrypt]** menu.

<figure><img src="/files/3YWBfEP7tw6Xv6YYO4p4" alt="IODD MINI RemoveEncrypt menu"><figcaption></figcaption></figure>

**2.** Check Caution Message

{% hint style="danger" %}
**Data Deletion Warning** When setting or removing the password, all disk data will be deleted. Please back up all necessary data before proceeding.
{% endhint %}

<figure><img src="/files/dv1bxGFWbRmPkhHgRkAf" alt="IODD MINI remove encryption caution message"><figcaption></figcaption></figure>

**3.** Enter the password **twice.**

<figure><img src="/files/fdcSp21Vfv18adDzIphq" alt="IODD MINI remove encryption password entry screen"><figcaption></figcaption></figure>

**4.** Enter the password twice and wait for the process to finish. The disk is initialized when removing the password, and the device may display **\[no appropriate partition]**.

<figure><img src="/files/GGu0k8KMaI8ogeuQEM73" alt="IODD MINI no appropriate partition after removing encryption"><figcaption></figcaption></figure>

## Use Virtual Drive with Encryption

After encryption setup is complete, follow the [Drive Setup](/bootable-virtual-drive/drive-setup) guide to prepare ISO, VHD, or other virtual drive files.


# IODD TRIM Tool

IODD TRIM Tool is a Windows utility for sending TRIM commands to external USB SSDs connected through USB-SATA bridges.

**Platform**: Windows 64-bit\
**License**: Freeware

***

## Download

* [**Download the latest version of IODD TRIM Tool**](https://dir.iodd.kr/util/IODD_TRIM_Tool/)

***

## 1. Overview

IODD TRIM Tool is a Windows utility for sending TRIM commands to **external SSDs connected through USB-SATA bridges**.

Windows automatically performs TRIM for internal SATA/NVMe SSDs, but external SSDs behind USB bridges often do not receive the same automatic optimization path. This tool is designed to maintain external SSD performance and long-term health.

{% hint style="success" %}
**Universal Compatibility** This tool is not limited to IODD products. It can work with external USB SSDs from other manufacturers when the USB bridge and SSD support the required TRIM command path.
{% endhint %}

### Key Features

* **3-stage TRIM strategy**: DSM TRIM -> SCSI UNMAP -> ATA Pass-Through fallback
* **BOT/UASP support**: BOT prefers ATA Pass-Through, UASP prefers DSM/UNMAP path
* **Full Device TRIM**: TRIM over the entire device range
* **Free Space Only TRIM**: TRIM only unallocated file-system areas while preserving existing files
* **Real Test mode**: practical TRIM validation via write/delete/TRIM/verify workflow
* **Write speed chart**: 2-second time-series capture and post-run visualization
* **Drive inspection**: detailed partition, volume, and free-space analysis
* **Dry Run mode**: simulation without sending actual TRIM commands
* **Read-only drive awareness**: file output is disabled when running on read-only media
* **8 languages**: Korean, English, Japanese, Simplified Chinese, Spanish, German, French, Russian

### Quick Start Guide

1. Select the target disk.
2. Select the TRIM mode.
3. Review options such as **Dry Run**, **Flush Volumes before TRIM**, or **Initialize after TRIM**.
4. Click **Start**.
5. Confirm the target disk in the warning prompt.
6. Monitor progress and completion popup.

{% hint style="danger" %}
**Full Device TRIM is destructive.** It can make existing data unrecoverable. Back up first, and use this mode only when initializing or repurposing a drive.
{% endhint %}

***

## 2. System Requirements

| Item      | Requirement                                                 |
| --------- | ----------------------------------------------------------- |
| OS        | Windows 10 / 11 (64-bit)                                    |
| Privilege | **Administrator required** for low-level pass-through paths |
| Device    | SSD connected via USB-SATA bridge                           |
| USB Port  | **USB 3.0 or newer required**                               |
| Transport | BOT (Bulk-Only Transport) or UASP (USB Attached SCSI)       |

{% hint style="danger" %}
**Important** Run the tool as Administrator. Without elevated privilege, required storage commands can be blocked by Windows.
{% endhint %}

{% hint style="warning" %}
**USB note** Use a direct USB 3.x connection when possible. USB 2.0 links are often unstable or too limited for reliable command behavior on many bridges.
{% endhint %}

***

## 3. What is TRIM?

TRIM is an ATA command (`DATA SET MANAGEMENT`, `0x06`) that tells an SSD which logical blocks are no longer in use.

### Why TRIM matters

* **Sustains write performance** by giving the SSD cleaner free blocks
* **Reduces unnecessary write/erase cycles** and NAND wear
* **Improves long-run consistency** under repeated workloads
* **Helps internal garbage collection** work efficiently

### When to run TRIM

* After deleting a large amount of data
* When write speed has dropped noticeably
* After long use of an external USB SSD without maintenance
* When OS-level automatic optimization is not available for your external setup

***

## 4. UI Layout

The application consists of a top toolbar and three main tabs:

```
+------------------------------------------------------------------+
| [IODD Products] [IODD Manual] [License] [TRIM Info] [How To] [Language] |
+------------------------------------------------------------------+
| TRIM Execute | Drive Inspect | Real Test                         |
+------------------------------------------------------------------+
|                                                                  |
|                       (Tab Content Area)                         |
|                                                                  |
+------------------------------------------------------------------+
```

***

## 5. Top Toolbar

| Control               | Description                         |
| --------------------- | ----------------------------------- |
| **IODD Products**     | Opens the IODD product page         |
| **IODD Manual**       | Opens the IODD help site            |
| **License**           | Shows freeware license information  |
| **TRIM Info**         | Shows TRIM concept/benefit guidance |
| **How To**            | Shows quick usage guidance          |
| **Language selector** | Changes application UI language     |

***

## 6. TRIM Execute Tab

This is the main operation tab for TRIM execution.

### 6.1 Disk Selection

Select a target disk from the drop-down list. Typical item format:

```
PD8 | Samsung SSD 860 | 465.8 GiB | BOT | O:(FAT32) | TRIM:YES
PD6 | Generic         | 111.8 GiB | UAS | P:(NTFS), Q:(exFAT) | TRIM:YES
```

Displayed fields:

* **PD#**: PhysicalDrive number
* **Model**: storage model string
* **Capacity**: total disk size (GiB)
* **Transport**: BOT / UAS / Non-USB
* **Volumes**: drive letters + file systems
* **TRIM capability summary**: `TRIM:YES/NO`, `APT:N/A`, etc.

Use **Refresh** to rescan disk list.

### 6.2 Disk Information Panel

After selection, detailed information is shown:

* Model, serial, capacity, transport protocol
* Volume details (file system, offsets, partition length, cluster details)
* ATA Pass-Through capability
* TRIM capability indicators
* ATA model/firmware related fields, when available

### 6.3 TRIM Modes

| Mode                     | Description                                        |
| ------------------------ | -------------------------------------------------- |
| **Full Device TRIM**     | Sends TRIM over whole disk range. **Destructive.** |
| **Free Space Only TRIM** | Sends TRIM only for free-space bitmap ranges       |

{% hint style="danger" %}
**Warning** Full Device TRIM can make existing data unrecoverable. Back up first.
{% endhint %}

### 6.4 Command Path Strategy

The tool automatically uses staged fallback:

| Order | Method               | Description                                                    |
| ----- | -------------------- | -------------------------------------------------------------- |
| 1     | **DSM TRIM**         | Native Windows data-set management path                        |
| 2     | **SCSI UNMAP**       | Typical UASP path, with adaptive behavior on bridge rejections |
| 3     | **ATA Pass-Through** | Typical BOT primary path and final fallback                    |

Behavior depends on transport and bridge capabilities.

### 6.5 Main Options

| Option                        | Description                                                        |
| ----------------------------- | ------------------------------------------------------------------ |
| **Dry Run**                   | Simulate without sending TRIM                                      |
| **Flush Volumes before TRIM** | Flush file-system buffers before execution                         |
| **Initialize after TRIM**     | Optionally initialize disk as GPT/MBR after full TRIM              |
| **Windows ReTrim only**       | Skip hardware paths and run Windows `Optimize-Volume -ReTrim` path |

### 6.6 Advanced Settings

When **Show advanced options** is enabled:

| Setting                | Description                                  |
| ---------------------- | -------------------------------------------- |
| **Timeout (ms)**       | SCSI timeout per batch                       |
| **Retry**              | Retry count on failed submission             |
| **Batch entries**      | Number of TRIM ranges per command            |
| **Batch limit**        | Max batches for test-limiting options        |
| **Allow system disk**  | Enables TRIM on system/boot disk. Dangerous. |
| **Mask serial in log** | Masks serial output in logs                  |

### 6.7 Running TRIM

1. Select disk.
2. Select TRIM mode.
3. Review options.
4. Click **Start**.
5. Confirm target disk in warning prompt.
6. Monitor progress and completion popup.

Use **Cancel** to stop an active run.

### 6.8 USB Guide

The **USB Info** button explains protocol behavior and practical recovery steps for failed paths:

* BOT: mostly ATA Pass-Through path
* UASP: DSM/UNMAP-first path with fallback logic
* Reconnect and re-detect guidance when bridge behavior is unstable

***

## 7. Drive Inspect Tab

Provides detailed partition/volume/free-space diagnostics for the selected disk.

### Functions

* **Inspect**: gather and display volume-level details
* **Export free-space CSV**: export free-space LBA ranges

### Summary Data

* Disk model, size (GiB + sectors), volume count, file-system list
* Total/free/used statistics (bytes, clusters, sectors, ratios)
* Additional transport and probe metadata
* Free fragment count, free sectors, and last used LBA context

### Volume Grid Columns

| Column                   | Description                      |
| ------------------------ | -------------------------------- |
| Drive                    | Drive letter                     |
| FS                       | File system                      |
| Partition#               | Partition number                 |
| Style                    | GPT / MBR                        |
| Type                     | Partition type                   |
| Sec/Cluster              | Sectors per cluster              |
| Total Sectors            | Total sectors                    |
| Size (GB)                | Capacity in GB                   |
| Free Sectors             | Free sectors plus ratio          |
| Used Sectors             | Used sectors plus ratio          |
| Physical Start Sector    | Physical start offset in sectors |
| Partition Length Sectors | Partition length in sectors      |
| Cluster Bytes            | Cluster size in bytes            |

***

## 8. Real Test Tab

Real Test validates practical TRIM behavior by writing, deleting, trimming, and verifying files.

{% hint style="info" %}
**Validation mode** This mode is for validation, not routine maintenance. In most cases, one successful validation run is enough per bridge/SSD setup.
{% endhint %}

### 8.1 Test Workflow (STEP 1-4)

| Step       | Action               | Description                                                               |
| ---------- | -------------------- | ------------------------------------------------------------------------- |
| **STEP 1** | Pre-TRIM + file fill | Run free-space TRIM first, then fill about 1/3 with 500MB random files    |
| **STEP 2** | Delete + TRIM        | Delete every 10th file, flush, export free-space CSV, run free-space TRIM |
| **STEP 3** | Additional fill      | Fill remaining space with 1GB random files, leaving about 1GB free        |
| **STEP 4** | Verification         | CRC integrity check for 500MB files                                       |

### 8.2 Real Test Options

| Option              | Description                                                                              |
| ------------------- | ---------------------------------------------------------------------------------------- |
| **Start Step**      | Start from step 1-4                                                                      |
| **End Step**        | End at step 1-4                                                                          |
| **Target Drive**    | Logical drive to use for real test workspace                                             |
| **Speed drop wait** | Wait time in minutes when write speed drops below threshold. `0` disables this behavior. |

### 8.3 Speed Drop Detection

The tool tracks speed using moving-average logic and:

* records speed every 2 seconds
* compares short-window speed against average trend
* inserts wait periods when configured and drop condition is met
* records wait intervals as zero-speed segments

### 8.4 Real Test Buttons

| Button                 | Description                                                     |
| ---------------------- | --------------------------------------------------------------- |
| **Start TRIM Test**    | Runs configured steps                                           |
| **Verify Only**        | Runs verification-only flow                                     |
| **Stop**               | Stops active test                                               |
| **Delete Test Folder** | Removes `trim_real_test` data set                               |
| **Export FileMap CSV** | Exports physical mapping info                                   |
| **Speed Chart**        | Opens time-series write speed chart. Enabled after data exists. |
| **Clear Log**          | Clears log and re-shows guide text                              |

### 8.5 Speed Chart

After a test run, **Speed Chart** displays:

* X-axis: elapsed time
* Y-axis: write speed (MB/s)
* sampled data every 2 seconds
* step boundary markers
* optional CSV export of chart data

### 8.6 Status Indicators

* **Status**: current operation/phase text
* **Speed**: current write throughput
* **Elapsed**: total run time
* **Step**: elapsed time within current step

### 8.7 TRIM Result Logs

Typical examples:

```
TRIM completed: batches=32/32, sectors=63,560,392
TRIM failed: success=0, failed=32, planned=32
```

### 8.8 Completion Results

* **Success**: integrity verification passed
* **Failure**: CRC mismatch detected
* **Canceled**: user stopped test

***

## 9. Multi-language Support

Select language from the top-right drop-down. OS language is auto-detected at startup.

Supported UI languages:

| Language           | Display Name |
| ------------------ | ------------ |
| Korean             | 한국어          |
| English            | English      |
| Japanese           | 日本語          |
| Simplified Chinese | 简体中文         |
| Spanish            | Español      |
| German             | Deutsch      |
| French             | Français     |
| Russian            | Русский      |

As of 0.2.0.28, speed-chart and real-test related labels/tooltips are fully connected to the translation table across supported languages.

***

## 10. FAQ

<details>

<summary>Q: TRIM fails on UASP devices. What should I do?</summary>

The tool automatically attempts staged fallback. If all paths fail:

1. Reconnect the device directly. Avoid unstable hubs.
2. Try another cable or port.
3. Use **Windows ReTrim only** mode when appropriate.
4. Check whether the bridge itself supports required commands.

</details>

<details>

<summary>Q: Why does `TRIM:NO` appear?</summary>

Either the SSD/bridge does not report TRIM capability, or capability is blocked or masked in the current transport path.

</details>

<details>

<summary>Q: Free Space mode says no bitmap ranges are available.</summary>

Check whether the file system is supported for bitmap/free-range extraction and whether volume metadata is accessible.

</details>

<details>

<summary>Q: Speed Chart button is disabled.</summary>

No speed data has been collected yet. Run at least one Real Test pass first.

</details>

<details>

<summary>Q: Full Device TRIM completed and disk layout looks gone.</summary>

Expected in destructive mode. Reinitialize the disk as GPT or MBR and recreate partitions.

</details>

***

## 11. Troubleshooting

| Symptom                    | Possible Cause                  | Suggested Action                                              |
| -------------------------- | ------------------------------- | ------------------------------------------------------------- |
| Disk not listed            | Connection, cable, or hub issue | Reconnect, then refresh                                       |
| Admin privilege warning    | App not elevated                | Run as Administrator                                          |
| Repeated batch failures    | Timeout or bridge compatibility | Increase timeout, reduce batch pressure                       |
| Device disconnect behavior | Unstable bridge path            | Reconnect physically, wait for re-detection                   |
| CRC mismatch in Real Test  | Data path reliability issue     | Re-test with stable USB path; review bridge/SSD compatibility |
| No CSV/log output          | Read-only execution path        | Run from writable location/device                             |

***

## 12. License

IODD TRIM Tool is **Freeware**.

* Free to use and redistribute
* Provided **AS IS**, without warranty
* Commercial resale is prohibited
* Developer is not liable for damages, including data loss
* Reverse engineering, decompilation, and source extraction are prohibited

Copyright (c) 2025-2026 IODD. All rights reserved.

***

*This manual is based on IODD TRIM Tool v0.2.0.28.*


# Write Protection

Advanced forensic-grade hardware write protection for complete data integrity.

IODD provides robust write protection that can be applied **globally** to the entire device or **individually** to specific virtual drives. This ensures your data remains untampered when connected to external systems.

{% hint style="danger" %}
**Emergency Security Connection** When connecting the IODD to an **unverified or insecure system**, always **press and hold the \[3] key while plugging it in.** This forces the device into Write-Protect mode immediately, preventing any malware or unauthorized system from modifying your data.
{% endhint %}

***

### Quick Hotkeys

| Action                     | Result                                                                        |
| -------------------------- | ----------------------------------------------------------------------------- |
| **Hold \[3] for 3s**       | Triggers a **reconnection** with **Write-Protection enabled**.                |
| **Hold \[0] for 3s**       | Triggers a **reconnection** with **Write-Protection temporarily disabled**.   |
| **Boot with \[3] pressed** | Starts the device in **Write-Protection mode** from the moment of connection. |

***

### Global Write Protection Setup

To apply write protection to the entire IODD device, follow these steps:

1. Press the **\[Menu]** button and navigate to: **\[USB Control]**.

   <figure><img src="/files/tqlPQ8msSEJHJJ03s9HU" alt="USB Control Menu"><figcaption><p>Access the hardware control settings.</p></figcaption></figure>
2. Locate **\[Write Protect]** and toggle it using the **\[6]** key or **\[Enter]**.

   <figure><img src="/files/TntzNsqUPbDGYgui2wHZ" alt="Enable Write Protect"><figcaption><p>Activating the global write protection lock.</p></figcaption></figure>
3. Press the **\[Menu]** key to save the current configuration.

   <figure><img src="/files/EBN6oVyFoV7it53oUhMF" alt="Save Settings"><figcaption><p>Confirming and saving your changes.</p></figcaption></figure>

{% hint style="info" %}
**Status Indicator** Once Global Write Protection is active, the **padlock icon** at the top of the IODD display will be **highlighted in red**, indicating the drive is in a read-only state.
{% endhint %}

***

### Individual Drive Configuration

If you need to set write protection for a specific virtual drive (VHD/DSK) rather than the whole device, please refer to the Mode Configuration guide:

* [**Individual Mode Configuration**](/bootable-virtual-drive/mode-configuration)

***

### Terminal Verification (macOS/Linux)

You can verify the read-only status of your IODD via terminal:

```bash
    # On macOS, check the "Read-Only" status in the disk info
    $ diskutil info /dev/diskX | grep "Read-Only"
```


# TXT Viewer

Directly view TEXT files on your IODD screen. Ideal for checking serial keys or installation notes during work.

The TEXT Viewer is a highly convenient tool that allows you to read text files directly on the IODD's built-in display without needing to connect to a operating system.

### Supported Formats

To ensure proper rendering of text on the small display, please check the encoding of your files:

* **Supported Encodings**: **UTF-16 (UCS-2 LE)** and **ASCII**.
* **Incompatibility**: Certain Asian character codes and complex encodings may **not be supported**.

{% hint style="info" %}
**Encoding Tip** If a text file appears garbled or shows broken characters, try re-saving the file on your PC using **UTF-16 Little Endian** encoding for the best compatibility.
{% endhint %}

***

### How to Use

1. Navigate through your IODD's file list to find the desired `.txt` file.
2. Highlight the file and press the **\[Enter]** (or **\[5]**) key to open it.

***

### Navigation Controls

Use the hardware keypad to scroll through and read your documents:

|                                                 Key                                                 | Action        | Description                                   |
| :-------------------------------------------------------------------------------------------------: | ------------- | --------------------------------------------- |
|      <img src="/files/cB683jSVBXhak23059V5" alt="IODD key 2 for line up" data-size="original">      | **Line Up**   | Scroll up by a single line.                   |
|     <img src="/files/YyA7oAH99iBV4QLj4CDG" alt="IODD key 8 for line down" data-size="original">     | **Line Down** | Scroll down by a single line.                 |
|      <img src="/files/ejknFAVleTS00OmGmJTP" alt="IODD key 3 for page up" data-size="original">      | **Page Up**   | Jump to the previous page.                    |
|     <img src="/files/NlsFouWt9HTBbee1t7Hu" alt="IODD key 9 for page down" data-size="original">     | **Page Down** | Jump to the next page.                        |
|   <img src="/files/0oGOlwTGucTb0Emg6DCf" alt="IODD menu key to exit viewer" data-size="original">   | **Exit**      | Close the viewer and return to the file list. |
| <img src="/files/72xk15vH1VIDBp3y2Gi0" alt="IODD Enter key to open text file" data-size="original"> | **Open**      | Open the selected TXT file.                   |

***

{% hint style="info" %}
**Practical Use Case** This feature is particularly useful for storing **Windows Serial Keys**, **IP addresses**, or **step-by-step installation instructions** that you need to reference while the host computer is being formatted or offline.
{% endhint %}

### Advanced Maintenance

If you need to manage many text files, you can verify their presence and encoding via your terminal before disconnecting the IODD:

```bash
    # Check file encoding on macOS/Linux
    $ file -I /Volumes/IODD/_ISO/notes.txt
```


# Keep 2min.PW

A convenient security bypass function that allows the device to remain unlocked during system reboots.

The **Keep 2min.PW** feature is designed to streamline the operating system installation process. When enabled, the IODD remains in an unlocked state for **2 minutes** after a power cycle or system reboot, eliminating the need to re-enter your password repeatedly.

{% hint style="info" %}
**How it Works** Once you unlock the device with your password, the IODD stores the "unlocked" state in its temporary memory. If the computer reboots and the IODD regains power within 120 seconds, it will bypass the password prompt automatically.
{% endhint %}

{% hint style="info" %}
**Recommended Use Case** This feature is highly effective during **Windows or Linux installations**, where the system may need to restart several times to complete the setup or driver updates.
{% endhint %}

***

### How to Enable the Feature

1. Press the **\[Menu]** button on the IODD and navigate to: **\[USB Control]**.
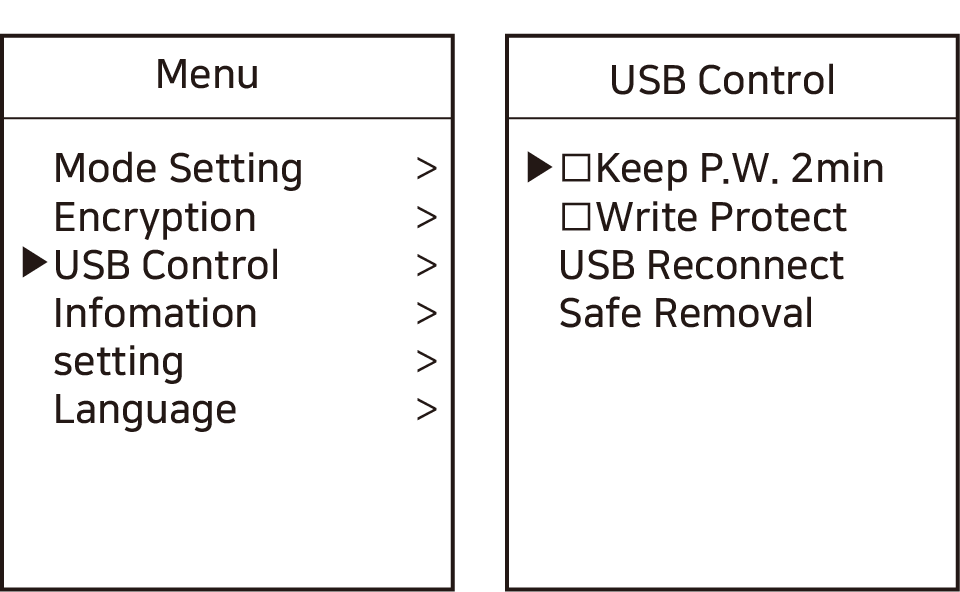
   <figure><img src="/files/6gItLJfOF1jMtBrQHr0g" alt="USB Control Menu"><figcaption><p>Navigate to the hardware control settings.</p></figcaption></figure>
2. Locate **\[Keep P.W. 2min]** and toggle it using the **\[6]** or **\[Enter]** key.

   <figure><img src="/files/BucKfTfP6dEafK3EoOlv" alt="Enable Keep PW Feature"><figcaption><p>Activating the 2-minute password retention.</p></figcaption></figure>
3. Press the **\[Menu]** button again to save your settings.

***

### Operational Safety

{% hint style="danger" %}
**Security Reminder** While this feature is active, anyone who reboots your computer or reconnects the IODD within the 2-minute window can access your data without a password. **Disable this feature** once your installation work is complete to maintain maximum security.
{% endhint %}

{% hint style="warning" %}
**Power Loss Limitation** If the IODD remains without power (unplugged) for more than 2 minutes, the temporary unlock state will expire, and you must enter your password again to gain access.
{% endhint %}

***

### Related Troubleshooting

If the device is not being recognized quickly enough during reboot to trigger this function, you can check the USB initialization speed in your PC's BIOS:

```bash
    # (Conceptual) Ensure 'Fast Boot' or 'USB Initialization' is set to Full in BIOS
```


# S.M.A.R.T / Information

Comprehensive guide for monitoring internal disk health and IODD device status.

Maintaining the health of your internal drive and staying updated with the latest firmware is crucial for data integrity. The IODD provides built-in tools to monitor these statuses directly on its display.

### S.M.A.R.T. Disk Information

S.M.A.R.T (Self-Monitoring, Analysis, and Reporting Technology) allows you to check the diagnostic health of your internal HDD or SSD.

1. Press the **\[Menu]** button and navigate to: **\[Information] - \[S.M.A.R.T]**.

   <figure><img src="/files/bKRkFRPJGjWone7gynbp" alt="S.M.A.R.T Menu"><figcaption><p>Accessing the disk diagnostic tool.</p></figcaption></figure>

{% hint style="info" %}
**Understanding Health Status**

* **HDD Health**:
  * `<< Good >>`: The drive is healthy and operating normally.
  * `<< Warning >>`: Potential issues detected. Back up your data and consider replacement.
  * `<< Bad >>`: Critical failure imminent. Replace the drive immediately.
* **HDD Model**: Displays the manufacturer's model name.
* **HDD Serial**: Displays the unique serial number of the drive.
  {% endhint %}

{% hint style="danger" %}
**Power Stability Warning** If the **USB voltage is insufficient or unstable**, S.M.A.R.T. information may be displayed incorrectly or fail to load. Always ensure a stable connection. For more details, refer to: [Voltage Check](/disk-initialization#voltage-check)
{% endhint %}

***

### IODD Information

You can check the specific details of your IODD hardware, including the current firmware version and hardware revision.

1. Press the **\[Menu]** button and navigate to: **\[Information] - \[Product Info]**.

   <figure><img src="/files/YJZW9Nz56UOWDiCSjbd0" alt="IODD Information Menu"><figcaption><p>Checking the device hardware and firmware version.</p></figcaption></figure>

{% hint style="info" %}
**Key Device Status Indicators**

* **Firmware Ver**: Current IODD firmware version.
* **USB Speed**: Currently connected speed (Full/Hi/Super Speed).
* **USB Lowest Volt**: The absolute lowest voltage detected since the device was connected. This is the most important indicator of power stability.
* **Current Voltage**: The real-time BUS voltage currently being supplied.
  {% endhint %}

***

### Advanced Hardware Check (Linux/macOS)

If you need a more detailed diagnostic log while the IODD is connected to a computer, you can use terminal commands:

```bash
    # On macOS, check disk utility list for basic health info
    $ diskutil list
    
    # On Linux, use smartctl for detailed reports (requires smartmontools)
    $ sudo smartctl -a /dev/sdX
```


# Booting Error

Troubleshooting guide for common booting issues and hardware compatibility.

If your computer fails to boot from the IODD, please follow this troubleshooting checklist to identify and resolve the issue.

### 📋 Troubleshooting Checklist

{% hint style="info" %}
**ISO & Media Validation**

* **Verify Bootability**: Ensure that the ISO file you are using is a bootable image. Non-bootable data ISOs will not trigger a boot sequence.
* **Hardware Comparison**: If a bootable ISO fails, try testing it with a physical USB DVD-ROM to confirm if the issue is with the ISO file itself or the system's compatibility.
  {% endhint %}

{% hint style="warning" %}
**Drive & System Configuration**

* **Multi-LUN Support**: Some older PCs do not support multiple Logical Unit Numbers (LUN). If the IODD is not recognized, configure it as a single drive in the **Mode Configuration** settings.
* **Internal DVD Conflict**: If your laptop has an internal DVD-ROM, it may conflict with the IODD. Disable the internal drive in the BIOS settings or physically remove it if necessary.
  {% endhint %}

{% hint style="danger" %}
**Power Supply Issues** The IODD is a high-performance, bus-powered USB device. If your computer's USB port provides unstable power, the boot process may fail.

* **Solution**: Use a **USB Y-Cable** to draw additional power from a second USB port.
  {% endhint %}

{% hint style="warning" %}
**OS & Platform Compatibility** Newer hardware platforms may lack the necessary drivers for older operating systems.

* **Example**: You cannot install a genuine Windows 7 on the **Skylake** (or newer) platform using a USB DVD-ROM device without injecting proper USB 3.0/XHCI drivers into the ISO.
  {% endhint %}

***

### Advanced Hardware Check (Linux/macOS)

You can check if the IODD is correctly being recognized as a bootable optical or mass storage device via the terminal:

```bash
    # On macOS, check if the disk is listed as external and bootable
    $ diskutil list
    
    # On Linux, check the device type and partitions
    $ lsblk
```


# IODD Drive Initialization

OS-level partitioning and formatting guide for IODD drives using MBR, GPT, NTFS, exFAT, or FAT32.

Before using your IODD, the internal drive must be partitioned and formatted correctly in Windows, macOS, or another operating system. This troubleshooting guide focuses on MBR/GPT selection, NTFS/exFAT formatting, safe removal, and refresh steps after copying ISO or VHD files.

For the full first-time setup order, including when to set AES256 encryption before formatting, see [IODD Disk Initialization](/disk-initialization).

## 1. Initialize the Disk

Connect the IODD to your PC and initialize the drive using your operating system's disk management tool.

* **Modern Models (ST, MINI PRO, LK100):** Supports both **MBR** and **GPT**. GPT is recommended for drives over 2TB.
* **Legacy Models (2531, 2541, MINI Legacy):** Supports **MBR only**. GPT is **not supported** (Legacy models have a hardware limit that only recognizes the first **2TB** of a drive).

### Partition Styles

* **MBR (Master Boot Record)**: Best for maximum compatibility with legacy BIOS systems. Required for all legacy IODD models.
* **GPT (GUID Partition Table)**: Recommended for modern UEFI-based systems and drives larger than 2TB (Modern models only).

{% hint style="info" %}
**Fixing Initialization Failures (MBR → GPT → MBR Trick)** If the drive fails to initialize or displays errors, try this cycle:

1. Connect the HDD/SSD directly to a PC (if possible) or via IODD.
2. Initialize it as **GPT**.
3. Then, immediately re-initialize it back to **MBR**. This process can often clear corrupted partition table metadata that simple formatting cannot fix.
   {% endhint %}

{% hint style="danger" %}
**For Encryption Users** If you plan to use AES256 encryption, you must first set a new 2nd Password via the Admin menu. After setting the password, you **must repeat the initialization process**, as the hardware encryption changes the disk structure.

* Refer to: [2nd Password Setup Guide](/aes256-encryption-mini-pro-st-lk/admin/2nd-password)
  {% endhint %}

***

## 2. Formatting Partitions (Recommended File Systems)

For the best experience with IODD, we highly recommend using either **NTFS** or **exFAT**. Both support large files (over 4GB) and are fully compatible with IODD tools.

| File System | Best For                         | Key Advantages                                                                         |
| ----------- | -------------------------------- | -------------------------------------------------------------------------------------- |
| **NTFS**    | **Windows-centric environments** | Highly stable, supports journaling (error recovery), and is the native Windows format. |
| **exFAT**   | **Cross-platform use (Mac/Win)** | Excellent compatibility between macOS and Windows without file size restrictions.      |
| **FAT32**   | ❌ **Not Recommended**            | **4GB file size limit** and **Incompatible with VHD Tool++**.                          |

{% hint style="warning" %}
**Comparison: NTFS vs. exFAT**

* Both file systems are **fully supported by VHD Tool++** and IODD's virtual drive functions.
* Choose **NTFS** if you primarily work on Windows and need robust data recovery features.
* Choose **exFAT** if you frequently move the IODD between Windows and Mac computers.
  {% endhint %}

***

## 3. File Transfer and Safe Removal

1. **Copy Files**: Transfer your ISO, VHD, or document files to the IODD drive.
2. **Safely Remove**: This is **essential** for both NTFS and exFAT to prevent filesystem corruption.
   * Use the "Safely Remove Hardware" icon in your system tray before physical disconnection.

***

## 4. Reconnection and Refreshing

After reconnecting the IODD, the screen should display your updated file list.

{% hint style="info" %}
**Manual Refresh (Force Scan)** If the file list on the IODD screen does not match what you copied:

* **Modern Models (ST, MINI PRO, LK100):** **Hold the \[4] key for 3 seconds**. This forces a re-scan and allows you to manually select the correct partition if multiple are present.
* **Legacy Models (2531, 2541, MINI Legacy):** Manual partition selection via hotkey is **not supported**.
  * For **2541/MINI**, long-pressing **\[4]** only rescans the current folder.
  * For **2531**, long-press **Jog Up** to rescan.
    {% endhint %}

***

## Technical Verification

You can check the partition status and file system type using the following command:

```bash
    # On Windows (PowerShell), check partition and filesystem info
    $ Get-Volume | Where-Object {$_.DriveLetter -ne $null} | Select-Object DriveLetter, FileSystem, Size, HealthStatus
```


# Error Messages

Troubleshooting common error messages and status codes displayed on the IODD screen.

### 💾 Partition & File System Errors

**`"1st Partition: XX"`** (1st Partition: XX) / **`"Unsupported Partition"`** (Unsupported Partition)

* **For 2541 / 2531 Models**: Check your firmware version (ending in **N** or **F**).
  * **N** version: Supports **NTFS** only.
  * **F** version: Supports **exFAT / FAT32** only.
* **For ST400 / ST300 / MINI PRO**: Unified firmware supporting both MBR and GPT.

**`"ChkDsk"`** (ChkDsk) / **`"gErr: xxx"`** (Legacy Only)

* These are equivalent to the "Drive Error" or "Check HDD" messages on newer models.
* **Solution**: Perform a **Disk Check (chkdsk)** on your PC to repair filesystem metadata.

**`"Too Many Files"`** (Too Many Files)

* The IODD supports a maximum of **32 files or subfolders** within a single folder.
* **Solution**: Organize your files into nested subfolders.

**`"Enc Ver Err ???"`** (2541 Only)

* Encryption version mismatch (e.g., drive encrypted with 6.x firmware but device using 7.x).
* **Solution**: Restore firmware to the matching version or re-initialize the drive (Back up data first!).

{% hint style="info" %}
**Multi-Partition Support** ST/MINI models can mount ISOs from any primary partition. **Hold the \[4] key for 3 seconds** to manually select a different partition.
{% endhint %}

**`"ASSERT Fails ArrayOffset"`** (ASSERT Fails ArrayOffset)

* **Primary Cause**: This error typically occurs when the IODD is **unplugged without using "Safely Remove Hardware"** (Safe Ejection). Failure to eject safely can lead to corrupted filesystem metadata or unwritten cached data.
* **First Action (Data Preservation)**: Connect the IODD to a PC and perform a **Disk Check (chkdsk)** to repair the metadata errors caused by improper disconnection.
* **Second Action**: If the error persists, you must re-initialize the drive. Refer to [Drive Initialization](/disk-initialization).

{% hint style="danger" %}
**Importance of Safe Removal** To prevent the "ASSERT" error, always use your operating system's **Safely Remove Hardware** or **Eject** function before physically disconnecting the USB cable. This is especially critical when using the **NTFS** file system.
{% endhint %}

***

### 🛡️ Security & Access Errors

**`"Not Match..."`** (Not Match...)

* The entered password does not match.
* **Solution**: Ensure you are using the correct admin/user prefix.
  * **Admin**: `0` + `[Password]` (e.g., `01234`)
  * **User**: `1~4` + `[Password]`

**`"No Extra Devices"`** (No Extra Devices)

* No virtual drives are active.
* **Solution**: Use the [Mode Configuration](/bootable-virtual-drive/mode-configuration) to enable VHD/ISO drives.

***

### ⚙️ Hardware & Performance Errors

**`"Check HDD"`** (Check HDD) / **`"Drive Error"`** (Drive Error)

* Communication failure with the internal drive.
* **Causes**: Physical disk error or **Low Voltage** (unstable power).
* **Solution**: Try a different USB port or a Y-cable for stable power.

**`"DEFRAG"`** (DEFRAG)

* The ISO/VHD file is too fragmented to load (Max 24 fragments for ISO; 0 for VHD).
* **Solution**: Use defragmentation utilities like [MyDefrag](http://www.mydefrag.net/) or [Defraggler](https://www.ccleaner.com/defraggler).

***

### 🖥️ LCD Status Message Table

Below is a combined table of LCD status and error messages found across various IODD models (ST, MINI, 2541, 2531).

| Message                                               | Meaning / Action Required                                                                                                   | Affected Models      |
| ----------------------------------------------------- | --------------------------------------------------------------------------------------------------------------------------- | -------------------- |
| **`"Please Wait"`** (Please Wait)                     | Operation in progress. Wait for the message to disappear.                                                                   | All                  |
| **`"Plug Out / Disconnect"`** (Plug Out / Disconnect) | Safely disconnect the device from the USB port.                                                                             | All                  |
| **`"Data Saving..."`** (Data Saving...)               | Writing configuration or data to the internal drive. **Do not disconnect.**                                                 | All                  |
| **`"Flash Update..."`** (Flash Update...)             | Updating internal flash memory (Firmware/Font). **Do not disconnect.**                                                      | All                  |
| **`"Reconnect USB"`** (Reconnect USB)                 | Please disconnect and reconnect the USB cable.                                                                              | Modern (ST/MINI PRO) |
| **`"Replug USB..."`** (Replug USB...)                 | Connection error detected. Please disconnect and reconnect the USB cable.                                                   | 2541                 |
| **`"Check HDD"`** (Check HDD)                         | Drive check required. A drive error has been detected.                                                                      | All                  |
| **`"1st partition"`** (1st partition)                 | Partition mismatch with firmware. The firmware version (NTFS/FAT32/exFAT) does not match the first partition's file system. | All                  |
| **`"bad or N/S HDD"`** (bad or N/S HDD)               | Unsupported or faulty drive. The device cannot read the internal drive (check cable or HDD).                                | All                  |
| **`"NO _ISO Folder"`** (NO \_ISO Folder)              | The required directory named `_ISO` was not found in the root.                                                              | All                  |
| **`"NO - DISC"`** (NO - DISC)                         | No compatible files or subfolders were detected inside the `_ISO` folder.                                                   | All                  |
| **`"Disc Locked"`** (Disc Locked)                     | The operating system or an application has locked the virtual drive.                                                        | All                  |
| **`"Already Hit"`** (Already Hit)                     | The selected file is already mounted as a virtual drive.                                                                    | All                  |
| **`"Input Limit..."`** (Input Limit...)               | PIN retry limit exceeded. Reconnect the device to try again.                                                                | 2541 / MINI          |
| **`"Not Match..."`** (Not Match...)                   | The entered PIN does not match the stored credentials.                                                                      | 2541 / MINI          |
| **`"NO DEVICE !!!"`** (NO DEVICE !!!)                 | Internal HDD/SSD not detected. Check the physical SATA connection.                                                          | All                  |
| **`"HDD ERROR !!!"`** (HDD ERROR !!!)                 | Critical drive read error or hardware failure.                                                                              | All                  |
| **`"HDD WARNING ???"`** (HDD WARNING ???)             | Drive health warning. Bad sectors detected. **Back up data immediately.**                                                   | All                  |
| **`"Enc Ver Err ???"`**                               | Encryption version mismatch (e.g., 6.x vs 7.x firmware).                                                                    | 2541                 |
| **`"Too Many Files"`** (Too Many Files)               | Maximum of 32 files/subfolders per folder exceeded.                                                                         | All                  |
| **`"vDISK Limit"`** (vDISK Limit)                     | Maximum number of virtual drives (LUNs) exceeded.                                                                           | 2531 / 2541          |
| **`"Product Mismatch"`** (Product Mismatch)           | Incorrect firmware model selected during update.                                                                            | All                  |
| **`"DEFRAG"`** (DEFRAG)                               | File fragmentation detected (Max 24 fragments for ISO, 0 for VHD).                                                          | All                  |
| **`"No Use Dynamic"`** (No Use Dynamic)               | Dynamic VHD files are not supported. Only fixed-size VHD is allowed.                                                        | All                  |
| **`"No Use Sparse"`** (No Use Sparse)                 | Sparse files are not supported by the IODD system.                                                                          | All                  |

#### 📁 "Excep\_code" Error Reference

Some newer models (ST/MINI PRO) may display a red popup with an **`"Excep_code"`**. Follow the specific instructions in the message:

| Exception Code                              | Meaning / Action Required                                                                                         |
| ------------------------------------------- | ----------------------------------------------------------------------------------------------------------------- |
| **`"Excep_code - Please Reconnect"`**       | Often caused by poor connection or insufficient power. Try a different USB port.                                  |
| **`"Excep_code - Please Check Disk"`**      | File system corruption detected. Run `chkdsk X: /f` on your PC.                                                   |
| **`"Excep_code - Please update firmware"`** | Critical system error. Re-flash the firmware using the [Firmware Update Guide](/troubleshooting/firmware-update). |

***

### Terminal Diagnostics (Windows)

If you encounter the "ASSERT" error, run the following command in Command Prompt (Admin) to repair the filesystem:

```bash
    # Replace 'X:' with your IODD drive letter
    chkdsk X: /f
```


# FAQ

Frequently asked questions and solutions for IODD devices.

### 🔐 Password & Security

<details>

<summary>I entered the correct password, but it says "Incorrect."</summary>

You must enter the user identification prefix before your password.

* **Admin**: Enter **0** + \[Your Password]. (e.g., if your password is '1234', enter '01234')
* **Users**: Enter **1\~4** + \[Your Password]. Refer to: [Encryption Guide](/aes256-encryption-mini-pro-st-lk/encryption-guide)

</details>

<details>

<summary>I forgot my password. Can I recover my data?</summary>

**No.** It is absolutely impossible for anyone, including the manufacturer, to recover or find a forgotten password. The data is hardware-encrypted.

</details>

<details>

<summary>I forgot my password. How can I reuse the IODD?</summary>

The only way to reuse the device is to **Reset Password**. All existing data will be permanently lost during this process.

* 2541 : [2541 Reset Password](/troubleshooting/iodd2541-reset-password)
* MINI : [MINI Reset Password](/troubleshooting/iodd-mini-reset-password)
* ST400, LK100 : [ST400 Reset Password](/troubleshooting/st400-lk100-password-reset-sa)

</details>

<details>

<summary>After entering my password, the screen shows "PLEASE WAIT" and then stops.</summary>

For **ST300, ST400, MINI PRO, and MINI** models, if the device stops responding on the **PLEASE WAIT** screen after password entry, use the following procedure to re-flash the firmware:

Hold **`9`** and **`Enter`** while connecting the USB cable. Continue holding both keys for **7 seconds** to force a re-flash.

Refer to the [Firmware Update Guide](/troubleshooting/firmware-update) for the updater download and full procedure.

</details>

***

### 💻 Booting & Virtual Drive

<details>

<summary>The IODD will not boot from the PC.</summary>

Please refer to the [Booting Error Guide](/troubleshooting/booting-error) for detailed troubleshooting steps.

</details>

<details>

<summary>When I mount a VHD, the mode changes to CD-MODE automatically.</summary>

This is often caused by the filename or default settings. Legacy models (2531/2541) use filename extensions like `.VHD` (Fixed) and `.RMD` (Removable) to control mode behavior. Refer to the [VHD Advanced Naming Guide](/appendix/appendix#vhd-advanced).

</details>

<details>

<summary>How can I unmount virtual drives?</summary>

* **ST/MINI PRO**: Navigate to the file and press the select key, or use the **\[7]** eject hotkey.
* **Legacy**: Press and hold **\[7]** for 3 seconds, or use the **Menu -> Advanced -> Umount VHDD** option.

</details>

***

### 🛠️ Hardware & Maintenance

<details>

<summary>My SSD write speed has become noticeably slow.</summary>

If your SSD's write speed has degraded, performing a **TRIM** operation will greatly improve performance.

* **Why TRIM?**: USB-connected external SSDs typically do not receive automatic TRIM commands from Windows. Running TRIM manually clears unused data blocks, preventing speed degradation and extending the SSD's lifespan.
* **How to fix**: Use the [**IODD TRIM Tool**](/various-functions/iodd-trim-tool) to perform a "Free Space TRIM" (safely optimizes without losing data) or a "Full TRIM".
* **SLC Cache Tip**: Most modern SSDs use an "SLC Cache" for fast initial writes. Once the cache is full, speeds drop significantly. After a large file transfer, **leave the IODD connected to USB power for about 10 minutes** before unplugging. This gives the SSD controller enough idle time to flush the cache and reorganize data, ensuring fast speeds for your next use.

</details>

<details>

<summary>The LCD only displays "IODD [Model Name]" and does not progress.</summary>

This indicates a system hang or corrupted firmware. Please perform a [Firmware Update](/troubleshooting/firmware-update) or use the **Emergency Recovery Procedure** (Section 15.2 in the [Appendix](/appendix/appendix#legacy-details)).

</details>

<details>

<summary>The touch sensitivity of the buttons is poor (2541).</summary>

For older units, placing a thin piece of paper or plastic film between the internal drive and the front body (not the cover) can improve responsiveness.

</details>

<details>

<summary>The firmware update fails repeatedly.</summary>

Ensure you are using a stable USB port (rear of the PC) and have only one IODD connected. Refer to the [Firmware Update Guide](/troubleshooting/firmware-update).

</details>


# Firmware Update

Official firmware update guide and release notes for IODD devices.

{% hint style="info" %}
**Current Firmware Status** Currently sold products use the latest firmware, so no additional update is required. If there is a new update after **May 29, 2024**, we will announce it here.
{% endhint %}

Keeping your IODD firmware up to date ensures the best compatibility with the latest hardware and fixes known bugs. Please read the version-specific warnings carefully before proceeding.

### 📢 Release Notes

{% hint style="info" %}
**Version 0.8.1 Highlights**

* **ST300**: Fixed slow reboot issues after mode changes and resolved Write Protect toggle bugs.
* **ST400 / LK100**: Added a dedicated password reset feature.
  * [ST400/LK100/MINI PRO Password Reset Guide](/troubleshooting/st400-lk100-password-reset-sa)
    {% endhint %}

{% hint style="info" %}
**Version 0.8.0.1 Update Log**

* **SECURE 2.0 ➡ 2.5**: Improved encryption hardware logic.
* **LUN Fix**: Resolved an issue where setup could proceed without a Single LUN in mode settings.
* **4TB Support**: Fixed errors for 4TB drives (NTFS/exFAT).
* **NTFS Clusters**: Supports up to 62KB clusters.
* Code optimization and general compatibility improvements.
  {% endhint %}

{% hint style="danger" %}
**Critical Warning for Encryption Users (ST400 / LK100)** Passwords created in **Version 0.7 or earlier** are NOT compatible with **Version 0.8 or later** due to the encryption logic upgrade (Secure 2.5). **You MUST back up all data and disable encryption before updating.** Failure to do so will result in total data loss.
{% endhint %}

***

### 🛠️ How to Update

**Requirements:** Windows PC, USB Port, and a high-quality USB cable.

{% hint style="info" %}
**🎥 Video Guide** If you prefer a visual walkthrough, check out our [**Firmware Update Tutorial Video**](https://youtu.be/FcGsOyGAX1g) on YouTube.
{% endhint %}

{% hint style="warning" %}
**Pre-Update Checklist**

* **Single Connection**: Connect only **one** IODD device to your PC at a time.
* **Model Match**: Ensure you have downloaded the exact firmware matching your IODD model. If you flash the wrong firmware, simply retry with the correct version.
  {% endhint %}

1. **Download** the latest firmware file from the [Official Directory](https://dir.iodd.kr/iodd_firmware_updater).
2. **Uncompress** the ZIP file to a local folder. **Do not run the updater directly inside the ZIP file.**
3. **Run the EXE** file as Administrator.
4. If the message **`"Device is Detected"`** (Device is Detected) appears, click the **Update** button.

**If the device is not detected:**

* Try a different USB port or cable.
* **Manual Recovery Mode**: Hold **\[9] + \[Enter]** while connecting the IODD to your PC. Release the buttons once connected and run the updater again.

**Finalizing the Update:** Once the transfer is complete, click **Exit**. Reconnect the IODD and **wait for 2–3 minutes** for the internal processing to finish.

{% hint style="warning" %}
**Do NOT disconnect the IODD while the LCD is blinking.** This indicates the internal firmware is being written to flash memory. Interrupting this can leave the device unable to boot normally and may require a recovery/force-update procedure.
{% endhint %}

***

### 🔄 Troubleshooting: Version Not Changing (ST300 / ST300 / LK100 / MINI PRO / MINI)

If your version number remains the same even after a successful PC transfer, follow this mandatory "Force Update" procedure:

1. Run the firmware update on your PC.
2. After the transmission is finished, the IODD will reconnect and show a **white screen**.
3. **Force Mode**: Disconnect the IODD. Press and hold **\[9] + \[Enter]** for at least **6 seconds** while reconnecting it to the PC.
4. The firmware update will continue internally.
5. Reconnect once more and verify the version in the Information menu.

***


# ST400/LK100/MINI PRO Password Reset

Password reset and data initialization guide for ST400, LK100, and MINI PRO models.

These models share the same keypad interface and menu structure. If you have forgotten your password, use one of the three methods below.

{% hint style="warning" %}
**Total Data Erasure** All methods listed below will **permanently delete all data** on the drive. Recovery is impossible. Proceed only if you have a backup or do not need the existing data.
{% endhint %}

***

### Method 1: Using IODD Admin Manager (Recommended)

This is the simplest method and does not require disassembling the device or manual keypad cycles.

1. Connect your IODD to a Windows PC.
2. Launch the **IODD Admin Manager** application.
3. Navigate to the **Emergency** tab.
4. Follow the prompts to complete the **Confirmation Procedure** (Click counting).
5. Execute **Erase All Data**.
   * This will wipe the password, encryption keys, and all stored data, returning the device to its factory state.

***

### Method 2: Keypad Sequence (The "1 to 0" Cycle)

*Supported Models: ST400 / LK100 / MINI PRO*

If you don't have access to a PC with Admin Manager, you can force a hardware reset via the keypad.

1. Power on the device to the **Password Input Screen**.
2. Enter the sequence: `1` → `2` → `3` → `4` → `5` → `6` → `7` → `8` → `9` → `0`.
3. **Repeat this entire 10-digit cycle 15 times.**
4. If you make a single mistake during the 15 cycles, you must restart from the very beginning.
5. **Success**: When the screen displays **`"1st Partition"`** (1st Partition) or **`"No Supported Partition"`** (No Supported Partition), the encryption has been successfully wiped.

***

### Method 3: Physical Wipe (Requires Disassembly)

This method bypasses the keypad cycles by connecting the internal drive directly to a PC.

1. **Disassemble**: Open the case and remove the internal HDD/SSD.
2. **Connect**: Plug the drive into a PC via a SATA-to-USB adapter or internal SATA port.
3. **The "GPT-First" Principle**:
   * Encryption metadata is stored in the GPT area. You must initialize the disk as **GPT** first to clear the lock.
   * After the GPT wipe, you can re-initialize it to your preferred style (MBR or GPT).
4. **Format**: Create at least one partition and format it as **NTFS** or **exFAT**.

#### **Terminal Command (Windows Diskpart)**

```bash
# Run Command Prompt as Administrator
$ diskpart
$ list disk
$ select disk N  # Check the size to select the correct IODD disk!
$ clean

# Force wipe encryption by converting to GPT
$ convert gpt

# Optional: Re-convert to MBR if needed
$ convert mbr

$ create partition primary
$ format fs=ntfs quick  # or fs=exfat quick
$ exit
```

***

### 📝 Summary of Methods

| Feature          | 1. Admin Manager | 2. Keypad Cycle     | 3. Physical Wipe     |
| ---------------- | ---------------- | ------------------- | -------------------- |
| **Tools Needed** | PC + Software    | None                | Tools + SATA Adapter |
| **Effort**       | Very Low         | High (150+ presses) | Medium (Disassembly) |
| **Best For**     | Most Users       | No PC Access        | Advanced Users       |

{% hint style="warning" %}
**Post-Reset Setup** After the wipe, the device is in a factory-new state. You must set a new password and perform [Drive Initialization](/disk-initialization) before use.
{% endhint %}

{% hint style="danger" %}
**Safe Removal** To prevent filesystem corruption (ASSERT errors) in the future, always use the OS **Safely Remove Hardware** function.
{% endhint %}

***


# IODD MINI Password Reset

Comprehensive guide for resetting a forgotten iodd MINI password using two different methods.

If you have forgotten your password for the iodd MINI, you must initialize the drive to reuse the device. There are two primary ways to achieve this.

{% hint style="warning" %}
**Total Data Loss** Both methods will **permanently erase all data** on the internal SSD. Data recovery is impossible once the process begins.
{% endhint %}

***

### Method 1: Password Reset via Firmware (No Disassembly)

This method allows you to reset the password using specialized firmware and hardware button inputs without opening the device.

#### **Step 1: Install Reset Firmware**

1. Download the **Reset Firmware**: [iodd MINI Password Reset Firmware](https://dir.iodd.kr/Archive/ioddmini/IODD_MINI_Password_Reset/)
2. Run `iodd_firm_upd-0.1.0.11-Del-Password.exe` and complete the update.

#### **Step 2: Execute Deletion**

1. Reconnect the iodd MINI to your PC.
2. On the password input screen, **press the \[Menu] button repeatedly (at least 300 times)**.
3. Wait for the **`"Password is deleted"`** (Password is deleted) message.

#### **Step 3: Restore Standard Firmware (Mandatory)**

1. Download the **Standard Firmware**: [iodd MINI Standard Firmware](https://dir.iodd.kr/Archive/ioddmini/)
2. Run `iodd_firm_upd-0.1.0.13.exe` to return the device to its normal state.

***

### Method 2: Manual Initialization (Requires Disassembly)

This method involves connecting the internal SSD directly to a PC to wipe the encryption metadata. This is a "Two-Step Wipe" process.

#### **Step 1: Disassemble and Connect**

1. Open the MINI case and remove the internal SSD.
2. Connect the SSD directly to a Windows PC via a SATA/M.2 adapter.

#### **Step 2: Initialize via GPT → MBR (Diskpart Recommended)**

The encryption data is stored in the GPT area. You must initialize as GPT first to ensure the lock is cleared.

```bash
# Run Command Prompt as Administrator
$ diskpart
$ list disk
$ select disk N  # CAUTION: Ensure N is the correct MINI disk
$ clean

# Step 1: Wipe encryption data by converting to GPT
$ convert gpt

# Step 2: Re-convert to MBR (Preferred for 2541/Compatibility)
$ convert mbr

# Step 3: Create partition and format
$ create partition primary
$ format fs=ntfs quick  # You may also use 'fs=exfat quick'
$ assign
$ exit
```

***

### 📝 Comparison & Summary

| Feature           | Method 1 (Firmware)   | Method 2 (Disassembly)      |
| ----------------- | --------------------- | --------------------------- |
| **Effort**        | Low (No tools needed) | High (Requires disassembly) |
| **Complexity**    | 300+ button clicks    | Command line (Diskpart)     |
| **Success Rate**  | Very High             | Absolute (Hardware reset)   |
| **Admin Manager** | Not Supported         | Not Supported               |

{% hint style="warning" %}
**Post-Reset Setup** After either method is complete, reassemble the device (if needed) and reconnect it. You will be prompted to perform the **Initial Setup** and set a new password as if it were a brand-new device.
{% endhint %}

{% hint style="danger" %}
**Always use "Safely Remove Hardware"** after copying files to prevent the "ASSERT Fails ArrayOffset" error in the future.
{% endhint %}

***


# IODD 2541 Password Reset

Password reset and disk initialization guide for IODD 2541 across Windows, macOS, and Linux.

If the password is lost, you must bypass the IODD controller and connect the internal drive directly to a computer to wipe it. **This will erase all data.**

{% hint style="danger" %}
**Hardware Support Notice** IODD Admin Manager does not support the 2541 model. Manual initialization is the only solution to reset a forgotten password.
{% endhint %}

### 1. Hardware Preparation

1. Disconnect the IODD 2541.
2. Remove the internal 2.5" HDD/SSD from the 2541 case.
3. Connect the drive to your computer using a SATA-to-USB adapter or an internal SATA port.

***

### 2. Initialization by Operating System

#### **Option A: Windows (GUI)**

1. Open **Disk Management** (`diskmgmt.msc`).
2. Delete all existing volumes on the target disk.
3. Right-click the Disk Name (left panel) and select **Initialize Disk** as **GPT**.
4. Right-click again and select **Convert to MBR Disk**. (2541 requires **MBR**).
5. Create a **New Simple Volume** formatted as **NTFS** or **exFAT**.

#### **Option B: macOS (Terminal)**

On macOS, perform a two-step wipe to ensure all encrypted security metadata is removed:

```bash
    # 1. List all disks to find the IODD drive identifier (e.g., /dev/disk4)
    $ diskutil list

    # 2. Step 1: Initialize as GPT first to clear metadata
    # Replace 'diskX' with your actual disk number!
    $ diskutil eraseDisk ExFAT TEMP GPT /dev/diskX

    # 3. Step 2: Re-initialize as MBR (Required for 2541)
    $ diskutil eraseDisk ExFAT IODD MBR /dev/diskX
```

#### **Option C: Linux (Terminal)**

```bash
    # 1. Identify the drive (e.g., /dev/sdb)
    $ lsblk

    # 2. Wipe and create GPT label first
    $ sudo parted /dev/sdX mklabel gpt

    # 3. Finalize with MBR (msdos) label
    $ sudo parted /dev/sdX mklabel msdos

    # 4. Format the partition
    $ sudo mkfs.exfat /dev/sdX1
```

***

### 3. Reassembly & Verification

1. Place the drive back into the IODD 2541 case.
2. Connect it to your PC. The IODD will now act as a "New" device, prompting you to set a fresh password.

{% hint style="warning" %}
**Final Checklist for 2541**

* **Partition Style**: The final state must be **MBR**.
* **File System**: **NTFS** or **exFAT** is highly recommended.
* **Safe Removal**: Always use "Safe Eject" to prevent the **`"ASSERT Fails ArrayOffset"`** (ASSERT Fails ArrayOffset) error.
  {% endhint %}

***


# IODD-2531

IODD 2531 product reference covering virtual ODD, VHD support, jog dial controls, specifications, firmware, and manuals.

The IODD 2531 is a legacy 2.5-inch SATA virtual drive enclosure with ISO mounting, VHD/RMD/IMA support, multi-LUN operation, jog dial controls, and write-protection features. This reference page collects product specifications, menu behavior, usage notes, firmware links, and manuals for the IODD 2531.

## Appearance

![Iodd2531-01](/files/T4YE0EMGsMxfshgVWhy8) ![Iodd2531-03](/files/nmLsfmWDR2kEv3GWg8Ln) ![Iodd2531-04](/files/ErmLCrOs18QO6entCWHT) ![Iodd2531-contents](/files/NO8OlBYs7ri2PTxLdL11)

## Functions

1. **Bootable Virtual CD-ROM, DVD-ROM, and Blu-ray Drive**
   * Eliminates the need for physical optical drives and blank media for OS installations.
   * Supports [ISO](https://en.wikipedia.org/wiki/ISO_image) images (CD, DVD, Blu-ray).
2. **Bootable Virtual USB and Flash Drive**
   * Supports OS installation and multi-booting (including "Windows-To-Go").
   * Operates as a [Virtual Disk Drive](https://en.wikipedia.org/wiki/Virtual_disk) with full USB flash drive functionality.
   * Supports [VHD](https://docs.microsoft.com/en-us/windows-server/storage/disk-management/manage-virtual-hard-disks) and [VMDK](https://en.wikipedia.org/wiki/VMDK) (Virtual Hard Disk), RMD (Virtual Removable Disk), and [IMA](https://en.wikipedia.org/wiki/IMG_\(file_format\)) (Virtual Floppy Disk) formats.
3. **Multi-LUN Support**
   * Simultaneously supports up to one optical drive, one physical hard drive, and four virtual drives.
4. **Hotkey for Safe Removal**
   * Provides a dedicated hardware key for safe device disconnection.
5. **Write Protection**
   * A logical and physical safeguard to protect data from unauthorized modification or virus infection.
   * Includes an optional, hard-wired Write Blocker.
6. **Real-time AES 256-bit XTS Encryption (Note: Hardware Encryption is supported on iODD-2541)**
   * Optional encryption using a 4-15 digit PIN (6 digits recommended).
7. **Loading State Retention**
   * Automatically saves and restores the loading state and menu settings for subsequent boots.

### Menu

1. ***`Mode-Select`*** - Configure USB operation mode
   1. *`Dual Mode`* - Concurrently mounts one physical disk and one virtual optical drive.
   2. *`HDD Mode`* - Mounts the physical disk only.
   3. *`CD Mode`* - Mounts the virtual optical drive only.
2. ***`Setting`*** - Device configuration
   1. *`LCD Bright`* - Adjusts the LCD backlight brightness.
   2. *`Idle Bright`* - Adjusts the LCD backlight brightness in power-saving mode.
   3. *`Standby time`* - Configures the duration of inactivity before entering power-saving mode.
   4. *`Load Default`* - Resets all settings to factory default values.
3. ***`Information`*** - System and drive information
   1. *`S.M.A.R.T.`* - Displays internal drive health status.
      1. *`HDD Temp`* - Current drive temperature.
      2. *`HDD Health`* - Overall drive health rating.
   2. *`HDD Model`* - Internal drive model name.
   3. *`HDD Serial`* - Internal drive serial number.
   4. *`Firmware Ver`* - Current device firmware version.
   5. *`USB Speed`* - Current USB connection speed.
   6. *`USB Input Volt`* - USB bus voltage (minimum and current).
4. ***`USB Connect`*** - Connection management
   1. *`Refresh`* - Reconnects the device.
   2. *`Safe Removal`* - Safely stops the internal drive and enters power-saving mode.
5. ***`Advanced`*** - Advanced features
   1. *`Umount VHDD`* - Unmounts all active virtual disk drives.
   2. *`Write Protect`* - Toggles write-protection for the drive.
      * When a virtual drive is mounted, this setting applies to the virtual drive rather than the physical disk.
   3. *`Instant Save`* - Manually saves current configuration.
   4. *`Force USB 3.0`* - Enforces a USB 3.0 connection in environments with poor connectivity.

## Specifications

1. **External Interface**: USB 1.1 / 2.0 / 3.0 (up to 5 Gbps).
2. **Internal Interface**: SATA I / II / III (backward compatible).
3. **Drive Compatibility**: Supports 2.5-inch SATA HDDs and SSDs (up to 9.5mm height). Supports 4TB+ capacities.
   * Note: While using virtual drive functions, the maximum partition size is limited to 2TB.
   * 7mm drives require a spacer for proper installation.
4. **Controls**: 3-way jog dial, Back/Up button.
5. **Display**: 128 x 32 dot LCD.
6. **Materials**: Aluminum and Polycarbonate (PC).
7. **Architecture**: Successor to the ZM-VE300, sharing the same architecture with optimized hardware and ongoing firmware support.

## Usage Guide

Before using the device, please refer to the [Manual](#manuals) section.

### Basic Functions

#### Sample Folder Structure

Create a folder named `_ISO` in the root directory. The following folder tree is an example; any filenames or subfolders within `_ISO` are permitted.

```
J:
├─ _ISO
│  │  Hiren’s BootCD 15.2.iso
│  │  ubuntu-14.04.4-desktop-amd64.iso
│  │  Windows 10.iso
│  │  Windows XP sp3.iso
│  │  (Maximum of 32 files or subfolders per directory)
│  │  
│  ├─ IMA for Floppy
│  │      Bios updater.ima
│  │      MS-DOS 6.0.ima
│  │      Symantec Ghost.ima
│  │      
│  ├─ RMD for Setup
│  │      Win 7Ent_x86_x64+8.1Pro+10Pro vol2.RMD
│  │      Win7_Ult_SP1_Russian_x64.RMD
│  │      Windows 10.RMD
│  │      
│  └─ VHD for Booting
│      │  linuxmint-17.3-cinnamon-32bit.vhd
│      │  Windows 10 Win2Go.vhd
│      │  Windows 7 OS Booting.vhd
│      │  
│      └─ Nested subfolders are supported
├─ Your Folder 01
├─ Your Folder 02
├─ Your Folder 99
│  Your files 01.txt
│  Your files 02.txt
│  Your files 99.txt
```

#### 2531 Key Operations

1. **Navigation**
   * `Jog Dial` Up/Down: Browse the file list.
   * `Jog Dial` Click: Select a file.
   * `Back/Up` Button: Move to the parent directory.
2. **Menu Access**
   * Long press `Jog Dial` (3 seconds): Enter Menu mode.
   * `Back/Up` Button: Exit Menu mode.
3. **Advanced Hotkeys (3-second press)**
   * `Jog Dial` Up: Refresh the file list.
   * `Jog Dial` Down: [Enter Power-Saving Mode](#power-saving-mode).
   * `Jog Dial` Click: Enter Menu mode.
   * `Back/Up` Button: Reboot device and detach all virtual drives.
4. **Startup Hotkeys (Hold while connecting)**
   * `Jog Dial` Up: Start in **CD-MODE**.
   * `Jog Dial` Down: Start in **HDD-MODE**.
   * `Jog Dial` Click: Reset loading state and start in **DUAL-MODE**.
   * `Back/Up` Button: Start in **Write-Protected** mode.

#### 2541 Key Operations

1. **Navigation**
   * `2` / `8`: Browse up/down.
   * `5` (or `6`): Select file (`6` maintains loading state on supported firmware).
2. **Menu Access**
   * `Menu`: Enter or exit the Menu.
   * `4`: Return to parent directory.
3. **Advanced Hotkeys (3-second press)**
   * `1`: [Enter Power-Saving Mode](#power-saving-mode).
   * `3`: Reboot device.
   * `4`: Refresh file list.
   * `7`: Reboot and detach all virtual drives.
   * `0`: Reboot and temporarily disable Write-Protection.
4. No startup hotkeys are available for the 2541.

#### Power-Saving Mode

In power-saving mode, the drive's spindle motor stops and the LCD dims. The current virtual disk loading state is preserved.

* **2531**: Long press `Jog Dial` down (3 seconds).
* **2541**: Long press `1` (3 seconds).

#### File Selection and State Retention

To ensure that the selected file remains loaded after a reboot, the state must be saved.

* **2531**: Loading state is saved automatically on firmware 1558 or higher. For older versions, manual saving is required via [Power-Saving Mode](#power-saving-mode).
* **2541**: Using key `6` requires firmware 6(7)9-05 or higher to maintain the loading state.

#### Safely Removing the Hardware in OS

When the IODD partition is formatted as NTFS, it is mandatory to use the OS ejection feature before disconnection to prevent data corruption.

* Perform [Safely Remove Hardware](http://windows.microsoft.com/en-US/windows7/Safely-remove-devices-from-your-computer) before physical disconnection.
* If a write-protection error occurs during ejection, disable the Write-Protect setting and retry.

### Drive Initialization

The device supports two firmware types: NTFS and FAT32/exFAT. The NTFS version is installed by default.

1. Install the HDD or SSD into the IODD.
2. Connect the device to a PC.
3. Initialize the disk using the [MBR](https://en.wikipedia.org/wiki/Master_boot_record) partition style.
4. Format the primary partition as **NTFS** (for NTFS firmware) or **FAT32/exFAT** (for FAT firmware).
   * Note: FAT32 has a 4GB file size limitation.
5. Create an `_ISO` folder in the root directory.
6. Copy ISO, VHD, RMD, or IMA files into the `_ISO` folder.
7. Perform a "Safely Remove Hardware" operation (mandatory for NTFS).
8. If the device is in power-saving mode, reconnect the USB cable. Otherwise, enter [Power-Saving Mode](#power-saving-mode) and then reconnect.
9. The LCD will display the device model followed by the filename of the selected image.

#### Full Hardware Reset

If initialization is unsuccessful, follow these steps:

1. Disconnect the USB cable.
2. Remove the drive from the IODD and connect it directly to a PC.
3. Initialize the disk as [GPT](https://en.wikipedia.org/wiki/GUID_Partition_Table).
4. Repeat the [Drive Initialization](#drive-initialization) process from the beginning (this forces a conversion from MBR → GPT → MBR).
5. **Follow these steps to perform a forced firmware update:**
   1. Open the back cover.
   2. Locate and hold the tact switch on the PCB.
   3. Connect the USB cable.
   4. Wait for approximately 7 seconds.
   5. Release the tact switch.
6. Wait for approximately 1 minute for the process to complete.

### Troubleshooting (First Aid)

If the device malfunctions unexpectedly, try the following steps:

1. **2531**: Hold the `Jog Dial` while connecting the device to a PC.
2. Perform a "Safely Remove Hardware" operation in the OS.
3. Run a [Disk Check (CHKDSK)](https://en.wikipedia.org/wiki/CHKDSK) on the drive.
4. Rename the `_ISO` folder, create a new `_ISO` folder, and copy the files back into it (do not use "move").
5. Back up your data and perform a [Full Hardware Reset](#full-hardware-reset).

If hardware issues persist:

1. Restart your PC.
2. Replace the USB cable.
3. Connect the device to a motherboard USB port (rear panel).
4. Test the device on a different computer.
5. Replace the internal HDD/SSD.

### Virtual Optical Drive (ISO)

1. Copy ISO images to the `_ISO` folder.
2. Eject the device from the OS (mandatory for NTFS).
3. Enter [Power-Saving Mode](#power-saving-mode) or disconnect/reconnect.
4. Configure BIOS/UEFI to set the IODD or "USB CD-ROM" as the primary boot priority.
5. Select the desired ISO file from the device list.
6. If the computer fails to detect the boot device, restart the PC (Ctrl+Alt+Del).

#### Booting Errors

* Verify that the ISO image is bootable.
* If the PC does not support Multi-LUN, select **CD-MODE** or **ODD-MODE**.
* Test the ISO on a known-working system.
* If booting works with a real USB DVD drive but not the IODD, use a USB Y-cable for additional power.
* Disable or physically remove internal optical drives in the BIOS if conflicts occur.
* Ensure the OS being installed includes the necessary drivers for the target hardware platform (e.g., standard Windows 7 may lack drivers for Skylake platforms).

### Virtual Hard Disk (VHD)

* Only **fixed-size** VHD and VMDK files are supported. Dynamic VHD/VHDX formats are not compatible.
* Use [VHD Tool++](/product-reference-wiki/vhd-tool-plus-plus) to create unfragmented VHD files directly on the IODD.
* Renaming a `.VHD` file to `.VMDK` will allow it to be recognized as a VMDK disk.
* Upon selecting a VHD, the device may reboot and mount it as a standard USB disk.
* You can mount up to four virtual drives simultaneously by selecting files successively within 3 seconds.

1. Create a VHD file using the [VHD Tool++](/product-reference-wiki/vhd-tool-plus-plus).
2. Safely remove the device from the OS.
3. Enter [Power-Saving Mode](#power-saving-mode) and reconnect.
4. Select the VHD file from the device menu.
5. Configure the BIOS to boot from the mounted virtual drive.

### Virtual Removable Disk (RMD)

The process is identical to VHD usage, but the file extension must be changed to `.RMD`.

### Virtual Floppy Drive (IMA)

* Not supported on all hardware platforms.
* Supports uncompressed images: IMA, IMG, BIF, and VFD.
* Non-IMA extensions must be renamed to `.IMA`.
* Usage follows the same procedure as VHD/ISO mounting.

## Manuals

* [Iodd-2531 Quick Guide](https://dir.iodd.kr/Archive/iodd2531/manual)
* [Iodd Virtual Drive Guide](/product-reference-wiki/vhd-tool-plus-plus)

## System Messages

### Status Reference

1. **`"Please Wait"`** (Please Wait): Operation in progress.
2. **`"Plug Out ..."`** (Plug Out ...): Safe to disconnect the device.
3. **`"Data Saving..."`** (Data Saving...): Writing configuration changes to memory.
4. **`"Flash Update..."`** (Flash Update...): Firmware or font update in progress. **Do not disconnect the cable.**

### Error Codes

<details>

<summary><code>".."</code> (..)</summary>

Navigation to the parent directory. This message indicates that the current folder contains no subfolders or supported file formats.

</details>

<details>

<summary><code>"ChkDsk (or gErr) : xxx"</code> (ChkDsk (or gErr) : xxx)</summary>

Follow the [Troubleshooting (First Aid)](#troubleshooting-first-aid) steps.

</details>

<details>

<summary><code>"Check HDD"</code> (Check HDD)</summary>

A disk error has occurred. Refer to the [Troubleshooting (First Aid)](#troubleshooting-first-aid) section.

</details>

<details>

<summary><code>"1st partition" or "unsupported partition"</code> (1st partition or unsupported partition)</summary>

Firmware mismatch with the first partition's file system. Refer to the [Drive Initialization](#drive-initialization) section to align the partition type with the firmware version.

</details>

<details>

<summary><code>"bad or N/S HDD"</code> (bad or N/S HDD)</summary>

Internal drive read failure. Check the HDD/SSD connection or replace the USB cable.

</details>

<details>

<summary><code>"Too Many Files"</code> (Too Many Files)</summary>

Limit of 32 files/folders per directory reached. Organize files into subfolders.

</details>

<details>

<summary><code>"NO _ISO Folder"</code> (NO _ISO Folder)</summary>

The required `_ISO` directory was not found. Create it in the root directory.

</details>

<details>

<summary><code>"NO - DISC"</code> (NO - DISC)</summary>

No compatible files detected inside the `_ISO` folder.

</details>

<details>

<summary><code>"Disc Locked"</code> (Disc Locked)</summary>

The virtual drive is locked by the OS or an application. Close accessing programs or reconnect the device.

</details>

<details>

<summary><code>"DEFRAG"</code> (DEFRAG)</summary>

File fragmentation detected. ISO files support up to 24 fragments; VHD/RMD files must be unfragmented. Perform a [Disk Defragmentation](https://en.wikipedia.org/wiki/Disk_Defragmenter_\(Windows\)).

</details>

<details>

<summary><code>"vDISK Limit"</code> (vDISK Limit)</summary>

Maximum limit of 4 concurrent virtual drives reached. Unmount an active drive to mount a new one.

</details>

<details>

<summary><code>"Already Hit"</code> (Already Hit)</summary>

The selected file is already mounted.

</details>

<details>

<summary><code>"No Use Dynamic"</code> (No Use Dynamic)</summary>

Dynamic VHD files are not supported. Use fixed-size VHDs.

</details>

<details>

<summary><code>"No Use Sparse"</code> (No Use Sparse)</summary>

Sparse images are not supported.

</details>

### FAQ

<details>

<summary>The device does not boot.</summary>

Refer to the [Booting Errors](#booting-errors) section.

</details>

<details>

<summary>The LCD only displays "IODD 2531".</summary>

Refer to the [Troubleshooting (First Aid)](#troubleshooting-first-aid) section.

</details>

<details>

<summary>Mode automatically changes to CD-MODE when mounting a virtual drive.</summary>

This behavior is controlled by the filename properties. Refer to the [VHD Tool++](/product-reference-wiki/vhd-tool-plus-plus) documentation for naming conventions.

</details>

<details>

<summary>How to unmount virtual drives?</summary>

1. Press the side button for 3 seconds (Firmware 1555+).
2. Navigate to **Menu** -> **Advanced** -> **Umount VHDD**.

</details>

<details>

<summary>Firmware update fails repeatedly.</summary>

Refer to the [Firmware Update Instructions](#firmware-update-instructions).

</details>

## Firmware

### Update Instructions

**Requirements**: Windows PC and a high-quality USB cable. **Warning**: Connect only one IODD device during the update. The firmware version must match the file system of the first partition (NTFS or FAT/exFAT).

1. Download the appropriate firmware package.
2. Extract the ZIP file to a local folder (do not run from within the archive).
3. Execute the updater application as Administrator.
4. If the device is detected, click **Update**.
   * If not detected:
     * Try a different PC or USB port.
     * Replace the USB cable.
     * **2541**: Hold the internal tact switch for 1 second while connecting.
     * **2531**: Hold the internal tact switch until the device is detected (approx. 5 seconds).
5. Upon successful completion, click **Exit** and reconnect the device.

### Downloads

* [Latest Firmware Directory](https://dir.iodd.kr/iodd_firmware_updater)


# IODD-2541

IODD 2541 product reference covering virtual ODD, VHD support, AES256 encryption, touch keys, specifications, firmware, and manuals.

The IODD 2541 is a legacy 2.5-inch SATA virtual drive enclosure with ISO mounting, VHD/RMD/IMA support, multi-LUN operation, touch key controls, write protection, and AES256 hardware encryption. This reference page collects product specifications, menu behavior, usage notes, firmware links, and manuals for the IODD 2541.

## Appearance

## Functions

1. **Bootable Virtual CD-ROM, DVD-ROM, and Blu-ray Drive**
   * Eliminates the need for physical optical drives and blank media for OS installations.
   * Supports [ISO](https://en.wikipedia.org/wiki/ISO_image) images (CD, DVD, Blu-ray).
2. **Bootable Virtual USB and Flash Drive**
   * Supports OS installation and multi-booting (including "Windows-To-Go").
   * Operates as a [Virtual Disk Drive](https://en.wikipedia.org/wiki/Virtual_disk) with full USB flash drive functionality.
   * Supports [VHD](https://docs.microsoft.com/en-us/windows-server/storage/disk-management/manage-virtual-hard-disks) and [VMDK](https://en.wikipedia.org/wiki/VMDK) (Virtual Hard Disk), RMD (Virtual Removable Disk), and [IMA](https://en.wikipedia.org/wiki/IMG_\(file_format\)) (Virtual Floppy Disk) formats.
3. **Multi-LUN Support**
   * Simultaneously supports up to one optical drive, one physical hard drive, and four virtual drives.
4. **Hotkey for Safe Removal**
   * Provides a dedicated hardware key for safe device disconnection.
5. **Write Protection**
   * A logical and physical safeguard to protect data from unauthorized modification or virus infection.
   * Includes an optional, hard-wired Write Blocker.
6. **Real-time AES 256-bit XTS Hardware Encryption**
   * Optional encryption using a 4-15 digit PIN (6 digits recommended for optimal security).
   * Encryption features are fully compatible with all device functions.
7. **Loading State Retention**
   * Automatically saves and restores the loading state and menu settings for subsequent boots.

### Menu

1. ***`Mode-Select`*** - Configure USB operation mode
   1. *`Dual Mode`* - Concurrently mounts one physical disk and one virtual optical drive.
   2. *`HDD Mode`* - Mounts the physical disk only.
   3. *`ODD Mode`* - Mounts the virtual optical drive only.
2. ***`USB Control`*** - Connection management
   1. *`Write Protect`* - Toggles write-protection for the drive.
      * When a virtual drive is mounted, this setting applies to the virtual drive rather than the physical disk.
   2. *`Refresh`* - Reconnects the device.
   3. *`Safe Removal`* - Safely stops the internal drive and enters power-saving mode.
   4. *`Umount VHDD`* - Unmounts all active virtual disk drives.
3. ***`Information`*** - System and drive information
   1. *`S.M.A.R.T.`* - Displays internal drive health status.
      1. *`HDD Health`* - Overall drive health rating.
      2. *`HDD Temp`* - Current drive temperature.
      3. *`HDD Model`* - Internal drive model name.
      4. *`HDD Serial`* - Internal drive serial number.
   2. *`Product Info`* - Device technical details.
      1. *`Firmware Ver`* - Current device firmware version.
      2. *`USB Speed`* - Current USB connection speed.
      3. *`USB Lowest Volt`* - Minimum recorded USB bus voltage.
      4. *`Current Voltage`* - Current real-time USB bus voltage.
4. ***`Setting`*** - Device configuration
   1. *`LCD Bright`* - Adjusts the LCD backlight brightness.
   2. *`Idle Bright`* - Adjusts the LCD backlight brightness in power-saving mode.
   3. *`Standby time`* - Configures the duration of inactivity before entering power-saving mode.
   4. *`Load Default`* - Resets all settings to factory default values.
5. ***`Encryption`*** - Hardware encryption management
   * **WARNING: The following actions will result in permanent data loss.**
   * Note: Performing *`Remove Encryption`* immediately after *`Set Encryption`* (before writing data) will not destroy disk contents.
   1. *`Set Encryption`* - Enables AES-256 hardware encryption (requires a 4-15 digit PIN).
   2. *`Remove Encryption`* - Disables hardware encryption and restores standard disk operation.

## Specifications

1. **External Interface**: USB 1.1 / 2.0 / 3.0 (up to 5 Gbps).
2. **Internal Interface**: SATA I / II / III (backward compatible).
3. **Drive Compatibility**: Supports 2.5-inch SATA HDDs and SSDs (up to 9.5mm height). Supports 4TB+ capacities.
   * Note: While using virtual drive functions, the maximum partition size is limited to 2TB.
   * 7mm drives may require a spacer for proper installation.
4. **Controls**: 12-key capacitive touch panel.
   * Touch performance has been optimized in the latest revisions. Refer to the [FAQ](#faq).
5. **Display**: 128 x 32 dot LCD.
6. **Materials**: Aluminum and Polycarbonate (PC).
7. **Architecture**: Successor to the ZM-VE400, sharing the same architecture with optimized hardware and ongoing firmware support.

## Usage Guide

Before using the device, please refer to the [Manual](#manuals) section.

### Basic Functions

#### Sample Folder Structure

Create a folder named `_ISO` in the root directory. The following folder tree is an example; any filenames or subfolders within `_ISO` are permitted.

```
J:
├─ _ISO
│  │  Hiren’s BootCD 15.2.iso
│  │  ubuntu-14.04.4-desktop-amd64.iso
│  │  Windows 10.iso
│  │  Windows XP sp3.iso
│  │  (Maximum of 32 files or subfolders per directory)
│  │  
│  ├─ IMA for Floppy
│  │      Bios updater.ima
│  │      MS-DOS 6.0.ima
│  │      Symantec Ghost.ima
│  │      
│  ├─ RMD for Setup
│  │      Win 7Ent_x86_x64+8.1Pro+10Pro vol2.RMD
│  │      Win7_Ult_SP1_Russian_x64.RMD
│  │      Windows 10.RMD
│  │      
│  └─ VHD for Booting
│      │  linuxmint-17.3-cinnamon-32bit.vhd
│      │  Windows 10 Win2Go.vhd
│      │  Windows 7 OS Booting.vhd
│      │  
│      └─ Nested subfolders are supported
├─ Your Folder 01
├─ Your Folder 02
├─ Your Folder 99
│  Your files 01.txt
│  Your files 02.txt
│  Your files 99.txt
```

#### 2541 Key Operations

1. **Navigation**
   * `2` / `8`: Browse the file list up/down.
   * `5` (or `6`): Select a file (`6` maintains the loading state on supported firmware).
2. **Menu Access**
   * `Menu`: Enter or exit the Menu.
   * `4`: Return to the parent directory.
3. **Advanced Hotkeys (3-second press)**
   * `1`: [Enter Power-Saving Mode](#power-saving-mode).
   * `3`: Reboot the device.
   * `4`: Refresh the file list.
   * `7`: Reboot and detach all virtual drives.
   * `0`: Reboot and temporarily disable Write-Protection.
4. No startup hotkeys are available for the 2541.

#### Power-Saving Mode

In power-saving mode, the drive's spindle motor stops and the LCD dims. The current virtual disk loading state is preserved.

* **2531**: Long press `Jog Dial` down (3 seconds).
* **2541**: Long press `1` (3 seconds).

#### File Selection and State Retention

To ensure that the selected file remains loaded after a reboot, the state must be saved.

* **2531**: Loading state is saved automatically on firmware 1558 or higher. For older versions, manual saving is required via [Power-Saving Mode](#power-saving-mode).
* **2541**: Using key `6` requires firmware 6(7)9-05 or higher to maintain the loading state.

#### Safely Removing the Hardware in OS

When the IODD partition is formatted as NTFS, it is mandatory to use the OS ejection feature before disconnection to prevent data corruption.

* Perform [Safely Remove Hardware](http://windows.microsoft.com/en-US/windows7/Safely-remove-devices-from-your-computer) before physical disconnection.
* If a write-protection error occurs during ejection, disable the Write-Protect setting and retry.

### Drive Initialization

The device supports two firmware types: NTFS and FAT32/exFAT. The NTFS version is installed by default.

1. Install the HDD or SSD into the IODD.
2. Connect the device to a PC.
3. Initialize the disk using the [MBR](https://en.wikipedia.org/wiki/Master_boot_record) partition style.
4. Format the primary partition as **NTFS** (for NTFS firmware) or **FAT32/exFAT** (for FAT firmware).
   * Note: FAT32 has a 4GB file size limitation.
5. Create an `_ISO` folder in the root directory.
6. Copy ISO, VHD, RMD, or IMA files into the `_ISO` folder.
7. Perform a "Safely Remove Hardware" operation (mandatory for NTFS).
8. If the device is in power-saving mode, reconnect the USB cable. Otherwise, enter [Power-Saving Mode](#power-saving-mode) and then reconnect.
9. The LCD will display the device model followed by the filename of the selected image.

#### Full Hardware Reset

If initialization is unsuccessful, follow these steps:

1. Disconnect the USB cable.
2. Remove the drive from the IODD and connect it directly to a PC.
3. Initialize the disk as [GPT](https://en.wikipedia.org/wiki/GUID_Partition_Table).
4. Repeat the [Drive Initialization](#drive-initialization) process from the beginning (this forces a conversion from MBR → GPT → MBR).
5. **Follow these steps to perform a forced firmware update:**
   1. Open the back cover.
   2. Locate and hold the tact switch on the PCB.
   3. Connect the USB cable.
   4. Wait for approximately 7 seconds.
   5. Release the tact switch.
6. Wait for approximately 1 minute for the process to complete.

### Troubleshooting (First Aid)

If the device malfunctions unexpectedly, try the following steps:

1. **2531**: Hold the `Jog Dial` while connecting the device to a PC.
2. Perform a "Safely Remove Hardware" operation in the OS.
3. Run a [Disk Check (CHKDSK)](https://en.wikipedia.org/wiki/CHKDSK) on the drive.
4. Rename the `_ISO` folder, create a new `_ISO` folder, and copy the files back into it (do not use "move").
5. Back up your data and perform a [Full Hardware Reset](#full-hardware-reset).

If hardware issues persist:

1. Restart your PC.
2. Replace the USB cable.
3. Connect the device to a motherboard USB port (rear panel).
4. Test the device on a different computer.
5. Replace the internal HDD/SSD.

### Virtual Optical Drive (ISO)

1. Copy ISO images to the `_ISO` folder.
2. Eject the device from the OS (mandatory for NTFS).
3. Enter [Power-Saving Mode](#power-saving-mode) or disconnect/reconnect.
4. Configure BIOS/UEFI to set the IODD or "USB CD-ROM" as the primary boot priority.
5. Select the desired ISO file from the device list.
6. If the computer fails to detect the boot device, restart the PC (Ctrl+Alt+Del).

#### Booting Errors

* Verify that the ISO image is bootable.
* If the PC does not support Multi-LUN, select **CD-MODE** or **ODD-MODE**.
* Test the ISO on a known-working system.
* If booting works with a real USB DVD drive but not the IODD, use a USB Y-cable for additional power.
* Disable or physically remove internal optical drives in the BIOS if conflicts occur.
* Ensure the OS being installed includes the necessary drivers for the target hardware platform (e.g., standard Windows 7 may lack drivers for Skylake platforms).

### Virtual Hard Disk (VHD)

* Only **fixed-size** VHD and VMDK files are supported. Dynamic VHD/VHDX formats are not compatible.
* Use [VHD Tool++](/product-reference-wiki/vhd-tool-plus-plus) to create unfragmented VHD files directly on the IODD.
* Renaming a `.VHD` file to `.VMDK` will allow it to be recognized as a VMDK disk.
* Upon selecting a VHD, the device may reboot and mount it as a standard USB disk.
* You can mount up to four virtual drives simultaneously by selecting files successively within 3 seconds.

1. Create a VHD file using the [VHD Tool++](/product-reference-wiki/vhd-tool-plus-plus).
2. Safely remove the device from the OS.
3. Enter [Power-Saving Mode](#power-saving-mode) and reconnect.
4. Select the VHD file from the device menu.
5. Configure the BIOS to boot from the mounted virtual drive.

### Virtual Removable Disk (RMD)

The process is identical to VHD usage, but the file extension must be changed to `.RMD`.

### Virtual Floppy Drive (IMA)

* Not supported on all hardware platforms.
* Supports uncompressed images: IMA, IMG, BIF, and VFD.
* Non-IMA extensions must be renamed to `.IMA`.
* Usage follows the same procedure as VHD/ISO mounting.

## Manuals

* [Iodd-2541 Quick Guide](https://dir.iodd.kr/Archive/iodd2541/manual)
* [Iodd-2541 Guide](https://dir.iodd.kr/Archive/iodd253141-manual)
* [Iodd Virtual Drive Guide](/product-reference-wiki/vhd-tool-plus-plus)

## System Messages

### Status Reference

1. **`"Please Wait"`** (Please Wait): Operation in progress.
2. **`"Plug Out ..."`** (Plug Out ...): Safe to disconnect the device.
3. **`"Data Saving..."`** (Data Saving...): Writing configuration changes to memory.
4. **`"Flash Update..."`** (Flash Update...): Firmware or font update in progress. **Do not disconnect the cable.**
5. **`"Input Limit..."`** (Input Limit...): Maximum PIN retry attempts exceeded. Reconnect the device to retry.
6. **`"Replug USB..."`** (Replug USB...): Connection error detected. Please disconnect and reconnect the USB cable.
7. **`"Not Match..."`** (Not Match...): The entered PIN is incorrect.
8. **`"NO DEVICE !!!"`** (NO DEVICE !!!): Internal drive (HDD/SSD) not detected. Check physical connections.
9. **`"HDD ERROR !!!"`** (HDD ERROR !!!): Critical drive read error or hardware failure.
10. **`"HDD WARNING ???"`** (HDD WARNING ???): Drive health warning. Bad sectors have been detected.

### Error Codes

<details>

<summary><code>".."</code> (..)</summary>

Navigation to the parent directory. This message indicates that the current folder contains no subfolders or supported file formats.

</details>

<details>

<summary><code>"Check HDD"</code> (Check HDD)</summary>

A disk error has occurred. Refer to the [Troubleshooting (First Aid)](#troubleshooting-first-aid) section.

</details>

<details>

<summary><code>"1st partition" or "unsupported partition"</code> (1st partition or unsupported partition)</summary>

Firmware mismatch with the first partition's file system. Refer to the [Drive Initialization](#drive-initialization) section to align the partition type with the firmware version.

</details>

<details>

<summary><code>"bad or N/S HDD"</code> (bad or N/S HDD)</summary>

Internal drive read failure. Check the HDD/SSD connection or replace the USB cable.

</details>

<details>

<summary><code>"Too Many Files"</code> (Too Many Files)</summary>

Limit of 32 files/folders per directory reached. Organize files into subfolders.

</details>

<details>

<summary><code>"NO _ISO Folder"</code> (NO _ISO Folder)</summary>

The required `_ISO` directory was not found. Create it in the root directory.

</details>

<details>

<summary><code>"NO - DISC"</code> (NO - DISC)</summary>

No compatible files detected inside the `_ISO` folder.

</details>

<details>

<summary><code>"Disc Locked"</code> (Disc Locked)</summary>

The virtual drive is locked by the OS or an application. Close accessing programs or reconnect the device.

</details>

<details>

<summary><code>"DEFRAG"</code> (DEFRAG)</summary>

File fragmentation detected. ISO files support up to 24 fragments; VHD/RMD files must be unfragmented. Perform a [Disk Defragmentation](https://en.wikipedia.org/wiki/Disk_Defragmenter_\(Windows\)).

</details>

<details>

<summary><code>"vDISK Limit"</code> (vDISK Limit)</summary>

Maximum limit of 4 concurrent virtual drives reached. Unmount an active drive to mount a new one.

</details>

<details>

<summary><code>"Already Hit"</code> (Already Hit)</summary>

The selected file is already mounted.

</details>

<details>

<summary><code>"No Use Dynamic"</code> (No Use Dynamic)</summary>

Dynamic VHD files are not supported. Use fixed-size VHDs.

</details>

<details>

<summary><code>"No Use Sparse"</code> (No Use Sparse)</summary>

Sparse images are not supported.

</details>

<details>

<summary><code>"Enc Ver Err ???"</code> (Enc Ver Err ???)</summary>

Encryption version mismatch. The drive's encryption structure is incompatible with the current firmware. Backup data before updating firmware on an encrypted drive.

</details>

### FAQ

<details>

<summary>The device does not boot.</summary>

Refer to the [Booting Errors](#booting-errors) section.

</details>

<details>

<summary>The touch sensitivity of the buttons is poor.</summary>

Touch sensitivity issues have been resolved in current hardware revisions. For older units, placing a thin piece of paper or plastic film between the internal drive and the device enclosure may improve responsiveness. (Do not cover the entire drive; ensure a proper fit).

</details>

<details>

<summary>I forgot my password. Can I reset it?</summary>

Yes, but resetting the password will permanently erase all data. Refer to the [Full Hardware Reset](#full-hardware-reset) section.

</details>

<details>

<summary>I forgot my password. Can I recover the PIN or my data?</summary>

No. Due to high-level AES-256 hardware encryption, password recovery and data restoration are impossible, even for the manufacturer.

</details>

<details>

<summary>The LCD only displays "IODD 2541".</summary>

This indicates a firmware hang. Please update to the latest firmware version.

</details>

<details>

<summary>Mode automatically changes to CD-MODE when mounting a virtual drive.</summary>

This behavior is controlled by the virtual drive's properties. You can modify these settings by changing the filename or using specialized tools. Refer to the [VHD Tool++](#virtual-hard-disk-vhd) section for details.

</details>

<details>

<summary>How can I unmount active virtual drives (VHD, RMD, IMA)?</summary>

1. Press and hold button `7` for 3 seconds (available in firmware 69+ or 79+).
2. Navigate to **Menu** -> **USB Control** -> **Unmount VHDD**.

</details>

<details>

<summary>Firmware update fails repeatedly.</summary>

Ensure you are using a stable USB port and the correct model firmware. Refer to the [Firmware Update Instructions](#firmware-update-instructions).

</details>

## Firmware

1. The firmware is available in two versions: FAT (supporting FAT32/exFAT) and NTFS.
2. There are two encryption generations: **6x** and **7x**.
   * **7x** offers enhanced protection against brute-force attacks.
   * Generations **6x** and **7x** are incompatible. Backup all data before switching between them.

### Update Instructions

**Requirements**: Windows PC and a high-quality USB cable. **Warning**: Connect only one IODD device during the update. The firmware version must match the file system of the first partition (NTFS or FAT/exFAT).

1. Download the appropriate firmware package.
2. Extract the ZIP file to a local folder (do not run from within the archive).
3. Execute the updater application as Administrator.
4. If the device is detected, click **Update**.
   * If not detected:
     * Try a different PC or USB port.
     * Replace the USB cable.
     * **2541**: Hold the internal tact switch for 1 second while connecting.
     * **2531**: Hold the internal tact switch until the device is detected (approx. 5 seconds).
5. Upon successful completion, click **Exit** and reconnect the device.

### Downloads

* [Latest Firmware Directory](https://dir.iodd.kr/iodd_firmware_updater)


# IODD Mini

IODD Mini product reference covering M.2 SATA 2242 storage, virtual ODD, VHD booting, AES256 encryption, controls, firmware, and manuals.

The IODD Mini is a legacy M.2 SATA 2242 virtual drive device with ISO mounting, VHD/RMD/IMA support, multi-LUN operation, hardware hotkeys, write protection, and AES256 hardware encryption. This reference page summarizes IODD Mini functions, menu structure, specifications, firmware, and manuals.

## Appearance

## Functions

1. **Bootable Virtual CD-ROM Drive (DVD-ROM, Blu-ray)**
   * Eliminates the need for physical optical drives and blank media for OS installations.
   * Supports [ISO](https://en.wikipedia.org/wiki/ISO_image) images (CD, DVD, Blu-ray).
2. **Bootable Virtual USB and Flash Drive**
   * Supports OS installation and multi-booting (including "Windows-To-Go").
   * Supports [\*.VHD](https://en.wikipedia.org/wiki/VHD_\(file_format\)), [\*.VMDK](https://en.wikipedia.org/wiki/VMDK), \*.RMD (Virtual HDD), and [\*.IMA](https://en.wikipedia.org/wiki/IMG_\(file_format\)) (Virtual Floppy Disk) formats.
   * Allows independent write-protection for each mounted drive.
   * Supports toggling between Fixed and Removable disk functions for each drive.
3. **Multi-LUN Support**
   * Simultaneously mounts up to three VHDs, one virtual optical drive (ODD), and one physical drive.
4. **Hardware Hotkeys**
   * Includes dedicated startup keys and hotkeys for optimized workflow and system control.
5. **Enhanced Data Protection**
   * Features include logical Write Protection, Safe Removal, and Loading State retention (Save/Restore).
6. **Real-time AES 256-bit XTS Hardware Encryption**
   * Optional encryption using a 4-15 digit PIN (6 digits recommended for optimal security).
   * Includes a random security keypad to prevent unauthorized access via fingerprint tracing.

### Menu

* `2`: Move cursor up.
* `8`: Move cursor down.
* `6` or `⏎`: Select / Execute.

1. ***`Mode Setting`*** - Device configuration
   * `5`: Toggles Write Protection On/Off (icon updates to reflect status).
   * `6`: Toggles Fixed / Removable drive mode (icon updates to reflect status).
   * `3`: Move selection up.
   * `9`: Move selection down.
   * ***`---disabled---`*** - Use this menu to disable specific device types:
     1. *`ODD`*: Virtual CD Drive (\*.iso).
     2. *`HDD`*: Physical Drive.
     3. *`VHD`*: Virtual Disk Drives (\*.vhd, \*.ima).
2. ***`USB Control`*** - Connection management
   * *`Write Protect`*: Enable write-protection for all active drives.
   * *`Refresh`*: Reconnects the device.
   * *`Safe Removal`*: Safely stops the internal drive and enters power-saving mode.
3. ***`Information`*** - System and drive information
   * *`S.M.A.R.T.`*: Displays internal drive health telemetry.
     * *`HDD Health`*: Overall status (`<< Good >>`, `<< Warning >>`, or `<< Bad >>`).
     * *`HDD Model`*: Internal drive model name.
     * *`HDD Serial`*: Internal drive serial number.
   * *`Product Info`*: Device technical details.
     * *`Firmware Ver`*: Current device firmware version.
     * *`USB Speed`*: Current connection speed (Full-speed, Hi-speed, or Super-speed).
4. ***`Setting`*** - General configuration
   * *`LCD Bright`*: Adjusts the LCD backlight intensity.
   * *`Standby time`*: Sets the duration of inactivity before the drive enters sleep mode to reduce wear and power consumption.
   * *`Load Default`*: Resets all device settings to factory defaults.
5. ***`Encryption`*** - Hardware encryption management
   * **WARNING: The following actions will result in permanent data loss.**
   * Note: Performing *`Remove Encryption`* immediately after *`Set Encryption`* (before writing data) will not destroy disk contents.
   1. *`Set Encryption`*: Enables AES-256 hardware encryption (requires a 4-16 digit PIN).
   2. *`Remove Encryption`*: Disables hardware encryption and restores standard disk operation.
6. ***`Language`*** - Select the display language (English, Korean, Chinese, Japanese, or Russian).

### Basic Functions

#### Supported Partition Styles

* Compatible with [MBR](https://en.wikipedia.org/wiki/Master_boot_record) and [GPT](https://en.wikipedia.org/wiki/GUID_Partition_Table) partition tables.
* Supported File Systems: FAT32, exFAT, and NTFS.
* Supports multiple partitions; there are no specific root folder name requirements (e.g., `_ISO` is not mandatory).

#### Sample Folder Structure

The following structure is provided as an example; any filenames or directory names are permitted.

```
J:
├─ _ISO
│  │  Hiren’s BootCD 15.2.iso
│  │  ubuntu-14.04.4-desktop-amd64.iso
│  │  Windows 10.iso
│  │  Windows XP sp3.iso
│  │  (Maximum of 32 files or subfolders per directory)
│  │  
│  ├─ IMA for Floppy
│  │      Bios updater.ima
│  │      MS-DOS 6.0.ima
│  │      Symantec Ghost.ima
│  │      
│  ├─ RMD Files
│  │      Win 7Ent_x86_x64+8.1Pro+10Pro vol2.RMD
│  │      Win7_Ult_SP1_Russian_x64.RMD
│  │      Windows 10.RMD
│  │      
│  └─ VHD Files
│      │  linuxmint-17.3-cinnamon-32bit.vhd
│      │  Windows 10 Win2Go.vhd
│      │  Windows 7 OS Booting.vhd
│      │  
│      └─ Nested subfolders are supported
├─ Your Folder 01
├─ Your Folder 02
├─ Your Folder 99
│  Your files 01.txt
│  Your files 02.txt
│  Your files 99.txt
```

#### Key Definitions

1. **Navigation**
   * `2` / `8`: Browse the file list up/down.
   * `6` or `⏎`: Select a file or enter a directory.
   * `4`: Return to the parent directory.
2. **Menu Access**
   * `⚙`: Enter or exit the system menu.
3. **Hotkeys (Single Press)**
   * `1`: Rescan the root directory.
   * `3`: Display real-time telemetry (VBUS voltage, drive temperature, and health).
   * `5`: View detailed file information (filename, size, and fragmentation).
   * `7`: Eject the most recently loaded virtual drive.
   * `9`: Manually save the current loading status.
   * `0`: View contextual help or active error message details.
4. **Advanced Hotkeys (3-second press)**
   * `1`: Reconnect the device.
   * `3`: Reconnect with Write-Protection enabled.
   * `4`: View the partition list (Select the default partition).
   * `7`: Reconnect with all virtual drives detached.
   * `9`: Disconnect from USB and enter Sleep Mode.
   * `0`: Reconnect with Write-Protection temporarily disabled.
5. **Startup Hotkeys (Hold while connecting)**
   * `1`: Reset device to factory settings.
   * `3`: Start with Write-Protection enabled.
   * `5`: Start in **Standalone Mode** (configure settings without a PC).
   * `7`: Start with all virtual drives unmounted.
   * `⚙`: Enter Menu in Standalone Mode.
   * `0`: Display startup hotkey reference in Standalone Mode.

#### Power-Saving and Disconnection

To ensure data integrity and preserve the current configuration:

* Save the loading state and enter Sleep Mode by long-pressing key `9` (3 seconds) before physical disconnection.

#### Selecting Files

To ensure that the selected file remains loaded after a reboot, you must save the state manually using the hotkeys defined above.

#### Safely Removing the Hardware in OS

When the IODD partition is formatted as NTFS, it is mandatory to use the OS ejection feature before physical disconnection to prevent file system corruption.

* Perform [Safely Remove Hardware](http://windows.microsoft.com/en-US/windows7/Safely-remove-devices-from-your-computer) before disconnection.

### Drive Initialization

1. Initialize the disk using [MBR](https://en.wikipedia.org/wiki/Master_boot_record) or [GPT](https://en.wikipedia.org/wiki/GUID_Partition_Table).
2. Format partitions as **NTFS**, **exFAT**, or **FAT32**.
   * Note: FAT32 has a 4GB file size limit.
   * The IODD-compatible partition does not need to be the first primary partition.
3. Copy files and directories to the drive.
4. Eject the device from the OS (mandatory for NTFS).
5. Reconnect the IODD.
6. If the file list does not update, long-press key `4` (3 seconds) to refresh or manually select the partition.

### Troubleshooting

If the device malfunctions, try the following steps in order:

1. **Temporary Reset**: Hold key `7` while connecting to the PC.
2. **Factory Reset**: Hold key `1` while connecting to the PC.
3. **File System Repair**: Run [Disk Check (CHKDSK)](https://en.wikipedia.org/wiki/CHKDSK) on Windows.
4. **Re-initialization**: Backup data and repeat the [Drive Initialization](#drive-initialization) process.

For suspected hardware issues:

1. Restart the PC and try a different USB port (preferably a motherboard port).
2. Replace the USB cable.
3. **Forced Firmware Recovery**: Connect the device while holding `9` and `⏎` for approximately 7 seconds to re-flash the firmware.

### Configuring Multi-LUN Devices

1. Navigate to **Menu** -> **Mode Setting**.
2. Independently enable or disable up to 5 virtual device slots.

### Virtual Optical Drive (ISO)

1. Ensure an ODD device is enabled in the Mode Setting menu.
2. Copy ISO images to any directory on the IODD.
3. Safely eject the device from the OS.
4. Reconnect and select the desired ISO file.
5. Press key `9` to save the loading status.
6. If the PC fails to boot, restart the system (Ctrl+Alt+Del).

#### Booting Errors

* Verify that the ISO image is bootable.
* If the PC does not support Multi-LUN, enable only one virtual drive at a time.
* Compare behavior with a physical USB DVD drive.
* Use a USB Y-cable if additional power is required.
* Disable internal optical drives in the BIOS to prevent conflicts.
* Ensure the OS being installed is compatible with the target hardware drivers.

### Virtual Hard Disk (VHD)

* Only **fixed-size** VHD and VMDK files are supported. Dynamic VHD/VHDX formats are not compatible.
* Use [VHD Tool++](/product-reference-wiki/vhd-tool-plus-plus) to create unfragmented VHD files directly on the IODD.
* Up to three VHD drives can be mounted simultaneously.

1. Create a VHD file using [VHD Tool++](/product-reference-wiki/vhd-tool-plus-plus).
2. Reconnect and select the VHD file from the menu.
3. Press key `9` to save the loading status.
4. Use an imaging tool to install an OS to the mounted virtual disk.

### Virtual Floppy Drive (IMA)

* Supports uncompressed images: IMA, IMG, BIF, and VFD (rename extensions to `.IMA`).
* Usage follows the same procedure as ISO/VHD mounting.

## Specifications

1. **External Interface**: USB 3.0 / 2.0 / 1.1 (up to 5 Gbps).
2. **Internal Interface**: SATA I / II / III (backward compatible).
3. **Drive Compatibility**: M.2 (NGFF) 2242 SATA SSD.
4. **Controls**: 12 tactile switches, USB 3.0 Micro-B connector.
5. **Display**: Color LCD (128 x 160 dots).
6. **Material**: Plastic.

## Manuals

* [Official IODD Web Manual](https://help.iodd.kr/)
* [Iodd Mini Quick Guide](https://dir.iodd.kr/Archive/ioddmini)
* [Iodd Virtual Drive Guide](/product-reference-wiki/vhd-tool-plus-plus)

## Usage Precautions

* **Power Supply**: Connect the device directly to motherboard USB ports (rear of the PC). Front panels and unpowered hubs may provide insufficient voltage.
* **Data Integrity**: Always use the OS "Safely Remove Hardware" function or the device's "Safe Removal" menu before disconnection.
* **Physical Protection**: Protect the device from strong impacts.
* **Cables**: Use the original high-quality USB cable to prevent voltage drops.
* **Security**: Enable Write-Protect mode when using the device on untrusted or public computers.
* **Backups**: Maintain regular backups of important data.

## System Messages

### Status Reference

1. **`"Please Wait ..."`** (Please Wait ...): Operation in progress.
2. **`"Disconnect ..."`** (Disconnect ...): Safe to disconnect the device.
3. **`"Saving data ..."`** (Saving data ...): Writing changes to the drive.
4. **`"Updating Flash ..."`** (Updating Flash ...): Firmware/font update in progress. **Do not disconnect the cable.**
5. **`"Input Limit..."`** (Input Limit...): PIN retry limit reached.
6. **`"Reconnect USB"`** (Reconnect USB): Connection error detected.
7. **`"Not Match..."`** (Not Match...): Incorrect password entered.
8. **`"NO DEVICE !!!"`** (NO DEVICE !!!): Internal drive not detected.
9. **`"HDD ERROR !!!"`** (HDD ERROR !!!): Critical drive failure or excessive bad sectors.
10. **`"HDD WARNING ???"`** (HDD WARNING ???): Drive health warning (bad sectors detected).

### Error Codes

<details>

<summary><code>"Check HDD"</code> (Check HDD) (Red Screen)</summary>

Internal drive error detected. Refer to the [Troubleshooting](#troubleshooting) section.

</details>

<details>

<summary><code>"No appropriate partition"</code> (No appropriate partition)</summary>

No valid partition found. The drive must be initialized and formatted with NTFS, exFAT, or FAT32. Refer to the [Drive Initialization](#drive-initialization) section.

</details>

<details>

<summary><code>"Drive Error"</code> (Drive Error)</summary>

Communication failure with the internal drive. Test with a different USB port or cable.

</details>

<details>

<summary><code>"Too Many Files"</code> (Too Many Files)</summary>

Directory limit of 32 items reached. Organize files into subfolders.

</details>

<details>

<summary><code>".."</code> (..)</summary>

Navigation to the parent directory. This message indicates that the current folder contains no subfolders or supported file formats.

</details>

<details>

<summary><code>"Disc Locked"</code> (Disc Locked)</summary>

Virtual drive is in use. Close accessing applications or reconnect the device to force an unlock.

</details>

<details>

<summary><code>"DEFRAG"</code> (DEFRAG)</summary>

File fragmentation detected. ISOs allow up to 24 fragments; VHDs must be contiguous. Use a [Disk Defragmenter](https://en.wikipedia.org/wiki/Disk_Defragmenter_\(Windows\)).

</details>

<details>

<summary><code>"Not Use Dynamic"</code> (Not Use Dynamic)</summary>

Dynamic VHDs are not supported. Use fixed-size VHD files.

</details>

<details>

<summary><code>"Not Use Sparse"</code> (Not Use Sparse)</summary>

Sparse image files are not supported by the device.

</details>

<details>

<summary><code>"Product Mismatch"</code> (Product Mismatch)</summary>

Firmware compatibility error. Hold `9` and `⏎` while connecting to enter recovery mode and re-flash the correct firmware.

</details>

### FAQ

<details>

<summary>The device does not boot.</summary>

Refer to the [Booting Errors](#booting-errors) section.

</details>

<details>

<summary>I forgot my password. Can I remove it?</summary>

Yes, but resetting the password will result in **total data loss** as the encryption keys are destroyed. You can perform a password reset using specialized firmware without disassembling the device:

1. **Install Reset Firmware**:
   * Download the [Password Reset Firmware](https://dir.iodd.kr/Archive/ioddmini/IODD_MINI_Password_Reset/).
   * Run `iodd_firm_upd-0.1.0.11-Del-Password.exe` and complete the update.
2. **Execute Password Deletion**:
   * Reconnect the IODD Mini to your PC.
   * At the password input screen, **press the \[Menu] button repeatedly (at least 300 times)**.
   * Wait for the **`"Password is deleted"`** (Password is deleted) message to appear.
3. **Restore Standard Firmware (Mandatory)**:
   * Download the [Standard Firmware](https://dir.iodd.kr/Archive/ioddmini/).
   * Run `iodd_firm_upd-0.1.0.13.exe` to restore the device to its standard operating state.

If this method is not applicable, you must re-initialize the device as described in the [Drive Initialization](#drive-initialization) section.

</details>

<details>

<summary>The LCD only displays "IODD MINI".</summary>

This indicates a system hang. Please perform a firmware update.

</details>

<details>

<summary>How can I unmount active virtual drives (VHD, RMD, IMA)?</summary>

1. **Unmount All**: Long-press key `7` (3 seconds).
2. **Unmount Single**: Navigate to the drive in the menu and press Select.
3. **Unmount Most Recent**: Single-press key `7`.

</details>

<details>

<summary>What should I do if a red "Excep_code-" popup appears?</summary>

Follow the on-screen instruction:

* **`"Please Reconnect"`** (Please Reconnect): Check the USB connection and power supply.
* **`"Please Check Disk"`** (Please Check Disk): Run `chkdsk` on a PC.
* **`"Please update firmware"`** (Please update firmware): Install the latest firmware version.

</details>

## Firmware

The IODD Mini uses a unified firmware that supports all compatible file systems.

### Update Instructions

**Requirements**: Windows PC and a high-quality USB cable. **Warning**: Connect only one IODD device during the update. Retrying with the correct version will recover the device if the wrong firmware is flashed.

1. Download the firmware package.
2. Extract the ZIP file locally (do not run from the archive).
3. Execute the updater application as Administrator.
4. If the device is detected, click **Update**.
   * If not detected, try different USB ports (motherboard rear ports recommended) or cables.
5. The process takes 2-3 minutes. **Do not disconnect the cable during screen activity.**
6. If the update finishes instantly without activity (due to being up-to-date), use the **Force Update** method:
   * Hold `9` and `⏎` while connecting the USB cable. Continue holding for 7 seconds to force a re-flash.

### Downloads

* [Latest Firmware Directory](https://dir.iodd.kr/iodd_firmware_updater)


# IODD Mini Pro

IODD Mini Pro product reference covering M.2 SATA 2280 storage, virtual ODD, VHD booting, AES256 encryption, admin users, firmware, and manuals.

The IODD Mini Pro is an M.2 SATA 2280 virtual drive device with ISO mounting, VHD/RMD/IMA support, multi-LUN operation, AES256 XTS hardware encryption, administrator and user accounts, and integrated file viewers. This reference page summarizes Mini Pro functions, menu structure, specifications, firmware, and manuals.

## Appearance

![MINI-PRO-IMG-1](/files/j1gFioaxdXxHHYkD45jm) ![MINI-PRO-IMG-2](/files/TlnGX7CRywMesfi0mJ9r) ![MINI-PRO-IMG-3](/files/wrxO38DQ1IvEGwaE7Byk)

## Functions

1. **Bootable Virtual CD-ROM Drive (DVD-ROM, Blu-ray)**
   * Eliminates the need for physical optical drives and blank media for OS installations.
   * Supports [ISO](https://en.wikipedia.org/wiki/ISO_image) images (CD, DVD, Blu-ray).
2. **Bootable Virtual USB and Flash Drive**
   * Supports OS installation and multi-booting (including "Windows-To-Go").
   * Supports [\*.VHD](https://en.wikipedia.org/wiki/VHD_\(file_format\)), [\*.VMDK](https://en.wikipedia.org/wiki/VMDK), \*.RMD (Virtual HDD), and [\*.IMA](https://en.wikipedia.org/wiki/IMG_\(file_format\)) (Virtual Floppy Disk) formats.
   * Allows independent write-protection for each mounted drive.
   * Supports toggling between Fixed and Removable disk functions for each drive.
3. **Multi-LUN Support**
   * Simultaneously mounts up to three VHDs, one virtual optical drive (ODD), and one physical drive.
4. **System Monitoring**
   * Displays real-time telemetry, including minimum VBUS voltage, drive temperature, and health status (via Key `3`).
5. **Hardware Hotkeys**
   * Includes dedicated startup keys and hotkeys for optimized workflow and system control.
6. **Enhanced Data Protection**
   * Features include logical Write Protection, Safe Removal, and Loading State retention (Save/Restore).
7. **Real-time AES 256-bit XTS Hardware Encryption**
   * Optional encryption using a 4-38 digit PIN (6 digits recommended for optimal security).
   * Includes a random security keypad to prevent unauthorized access via fingerprint tracing.
   * Supports one Administrator and up to four standard user accounts.
     * **Note**: To log in as Administrator, prefix the password with '0' (e.g., if the password is '1234', enter '01234'). IDs: '0' for Admin, '1'-'4' for Users.
   * Configurable permissions for each user.
8. **Integrated File Viewers**
   * **Text Viewer**: Supports UTF-16 (UCS-2 LE) and ASCII text files.
   * **Bitmap Viewer (Experimental)**: Supports images under 128x160 resolution (1, 16, or 24-bit).

### Menu

* `2`: Move cursor up.
* `8`: Move cursor down.
* `6` or `⏎`: Select / Execute.

1. ***`Mode Setting`*** - Device configuration
   * `5`: Toggles Write Protection On/Off (icon updates to reflect status).
   * `6`: Toggles Fixed / Removable drive mode (icon updates to reflect status).
   * `3`: Move selection up.
   * `9`: Move selection down.
   * ***`---disabled---`*** - Use this menu to disable specific device types:
     1. *`ODD`*: Virtual CD Drive (\*.iso).
     2. *`HDD`*: Physical Drive.
     3. *`VHD`*: Virtual Disk Drives (\*.vhd, \*.ima).
2. ***`AES256 encryption`*** - Encryption management (Administrator Mode)
   * **WARNING: Setting or deleting the Administrator password will result in permanent disk data erasure. Backup all data before proceeding.**
   1. ***`Admin`***
      1. *`Set 2nd P.W.`*: Configures a secondary 4-38 digit password. (Requires an existing Admin password and an unencrypted disk).
      2. *`Set Password`*: Sets a 4-38 digit Administrator password. (Erases all data; recovery is only possible if undone immediately).
      3. *`Del password`*: Deletes the password and erases all disk data.
      4. *`Chg password`*: Updates the current password.
   2. ***`general user`***
      1. ***`User1 - User4`***
         1. *`Set Password`*: Sets a 4-38 digit user password.
         2. *`Del password`*: Removes the user password.
         3. *`☑Read-only`*: Enforces write-protection for this user.
         4. *`☑User Change`*: Permits the user to change their own password.
         5. *`☑User Delete`*: Permits the user to delete their own password.
      2. *`Save Users`*: Commits the current user configuration.
3. ***`AES256 encryption`*** - Encryption management (User Mode)
   1. *`Chg Password`*: Updates the user's password.
   2. *`Del Password`*: Deletes the user's password.
4. ***`USB Control`*** - Connection management
   1. *`Keep P.W. 2min`*: Preserves the password in memory for 2 minutes after power-off, allowing reconnection without re-entry.
   2. *`Write Protect`*: Enable write-protection for all active drives.
   3. *`Refresh`*: Reconnects the device.
   4. *`Safe Removal`*: Safely stops the internal drive and enters power-saving mode.
5. ***`Information`*** - System and drive information
   1. *`S.M.A.R.T.`*: Displays internal drive health telemetry.
      * *`HDD Health`*: Overall status (`<< Good >>`, `<< Warning >>`, or `<< Bad >>`).
      * *`HDD Model`*: Internal drive model name.
      * *`HDD Serial`*: Internal drive serial number.
   2. *`Product Info`*: Device technical details.
      1. *`Firmware Ver`*: Current device firmware version.
      2. *`USB Speed`*: Current connection speed (Full-speed, Hi-speed, or Super-speed).
6. ***`Setting`*** - General configuration
   1. *`LCD Bright`*: Adjusts the LCD backlight intensity.
   2. *`Standby time`*: Sets the duration of inactivity before the drive enters sleep mode to reduce wear and power consumption.
   3. *`Screen Saver`*: Activates after 2 minutes of inactivity. Dims the LCD and locks the screen for encrypted drives.
   4. *`Load Default`*: Resets all device settings to factory defaults.
7. ***`Language`*** - Select the display language (English, Korean, Chinese, Japanese, or Russian).

### Basic Functions

#### Supported Partition Styles

* Compatible with [MBR](https://en.wikipedia.org/wiki/Master_boot_record) and [GPT](https://en.wikipedia.org/wiki/GUID_Partition_Table) partition tables.
* Supported File Systems: FAT32, exFAT, and NTFS.
* Supports multiple partitions; there are no specific root folder name requirements (e.g., `_ISO` is not mandatory).

#### Sample Folder Structure

The following structure is provided as an example; any filenames or directory names are permitted.

```
J:
├─ _ISO
│  │  Hiren’s BootCD 15.2.iso
│  │  ubuntu-14.04.4-desktop-amd64.iso
│  │  Windows 10.iso
│  │  Windows XP sp3.iso
│  │  (Maximum of 32 files or subfolders per directory)
│  │  
│  ├─ IMA for Floppy
│  │      Bios updater.ima
│  │      MS-DOS 6.0.ima
│  │      Symantec Ghost.ima
│  │      
│  ├─ RMD Files
│  │      Win 7Ent_x86_x64+8.1Pro+10Pro vol2.RMD
│  │      Win7_Ult_SP1_Russian_x64.RMD
│  │      Windows 10.RMD
│  │      
│  └─ VHD Files
│      │  linuxmint-17.3-cinnamon-32bit.vhd
│      │  Windows 10 Win2Go.vhd
│      │  Windows 7 OS Booting.vhd
│      │  
│      └─ Nested subfolders are supported
├─ Your Folder 01
├─ Your Folder 02
├─ Your Folder 99
│  Your files 01.txt
│  Your files 02.txt
│  Your files 99.txt
```

#### Key Definitions

1. **Navigation**
   * `2` / `8`: Browse the file list up/down.
   * `6` or `⏎`: Select a file or enter a directory.
   * `4`: Return to the parent directory.
2. **Menu Access**
   * `⚙`: Enter or exit the system menu.
3. **Hotkeys (Single Press)**
   * `1`: Rescan the root directory.
   * `3`: Display real-time telemetry (VBUS voltage, drive temperature, and health).
   * `5`: View detailed file information (filename, size, and fragmentation).
   * `7`: Eject the most recently loaded virtual drive.
   * `9`: Manually save the current loading status.
   * `0`: View contextual help or active error message details.
4. **Advanced Hotkeys (3-second press)**
   * `1`: Reconnect the device.
   * `3`: Reconnect with Write-Protection enabled.
   * `4`: View the partition list (Select the default partition).
   * `7`: Reconnect with all virtual drives detached.
   * `9`: Disconnect from USB and enter Sleep Mode.
   * `0`: Reconnect with Write-Protection temporarily disabled.
5. **Startup Hotkeys (Hold while connecting)**
   * `1`: Reset device to factory settings.
   * `3`: Start with Write-Protection enabled.
   * `5`: Start in **Standalone Mode** (configure settings without a PC).
   * `7`: Start with all virtual drives unmounted.
   * `⚙`: Enter Menu in Standalone Mode.
   * `0`: Display startup hotkey reference in Standalone Mode.

#### Power-Saving and Disconnection

To ensure data integrity and preserve the current configuration:

* Save the loading state and enter Sleep Mode by long-pressing key `9` (3 seconds) before physical disconnection.

#### Selecting Files

To ensure that the selected file remains loaded after a reboot, you must save the state manually using the hotkeys defined above.

#### Safely Removing the Hardware in OS

When the IODD partition is formatted as NTFS, it is mandatory to use the OS ejection feature before physical disconnection to prevent file system corruption.

* Perform [Safely Remove Hardware](http://windows.microsoft.com/en-US/windows7/Safely-remove-devices-from-your-computer) before disconnection.

### Drive Initialization

1. Initialize the disk using [MBR](https://en.wikipedia.org/wiki/Master_boot_record) or [GPT](https://en.wikipedia.org/wiki/GUID_Partition_Table).
2. Format partitions as **NTFS**, **exFAT**, or **FAT32**.
   * Note: FAT32 has a 4GB file size limit.
   * The IODD-compatible partition does not need to be the first primary partition.
3. Copy files and directories to the drive.
4. Eject the device from the OS (mandatory for NTFS).
5. Reconnect the IODD.
6. If the file list does not update, long-press key `4` (3 seconds) to refresh or manually select the partition.

### Troubleshooting

If the device malfunctions, try the following steps in order:

1. **Login Verification**: If a password is set (e.g., '1234'), use the correct prefix: '01234' for Admin, or '11234' for User 1.
2. **Temporary Reset**: Hold key `7` while connecting to the PC.
3. **Factory Reset**: Hold key `1` while connecting to the PC.
4. **File System Repair**: Run [Disk Check (CHKDSK)](https://en.wikipedia.org/wiki/CHKDSK) on Windows.
5. **Re-initialization**: Backup data and repeat the [Drive Initialization](#drive-initialization) process.

For suspected hardware issues:

1. Restart the PC and try a different USB port (preferably a motherboard port).
2. Replace the USB cable.
3. **Forced Firmware Recovery**: Connect the device while holding both `9` and `⏎` for approximately 7 seconds to re-flash the firmware.

### Configuring Multi-LUN Devices

1. Navigate to **Menu** -> **Mode Setting**.
2. Independently enable or disable up to 5 virtual device slots.

### Virtual Optical Drive (ISO)

1. Ensure an ODD device is enabled in the Mode Setting menu.
2. Copy ISO images to any directory on the IODD.
3. Safely eject the device from the OS.
4. Reconnect and select the desired ISO file.
5. Press key `9` to save the loading status.
6. If the PC fails to boot, restart the system (Ctrl+Alt+Del).

#### Booting Errors

* Verify that the ISO image is bootable.
* If the PC does not support Multi-LUN, enable only one virtual drive at a time.
* Compare behavior with a physical USB DVD drive.
* Use a USB Y-cable if additional power is required.
* Disable internal optical drives in the BIOS to prevent conflicts.
* Ensure the OS being installed is compatible with the target hardware drivers.

### Virtual Hard Disk (VHD)

* Only **fixed-size** VHD and VMDK files are supported. Dynamic VHD/VHDX formats are not compatible.
* Use [VHD Tool++](/product-reference-wiki/vhd-tool-plus-plus) to create unfragmented VHD files directly on the IODD.
* Up to three VHD drives can be mounted simultaneously.

1. Create a VHD file using [VHD Tool++](/product-reference-wiki/vhd-tool-plus-plus).
2. Reconnect and select the VHD file from the menu.
3. Press key `9` to save the loading status.
4. Use an imaging tool to install an OS to the mounted virtual disk.

### Virtual Floppy Drive (IMA)

* Supports uncompressed images: IMA, IMG, BIF, and VFD (rename extensions to `.IMA`).
* Usage follows the same procedure as ISO/VHD mounting.

## Specifications

1. **External Interface**: USB 3.1 Gen 1 Type-C (up to 5 Gbps).
2. **Internal Interface**: SATA I / II / III (backward compatible).
3. **Drive Compatibility**: M.2 (NGFF) 2280 SATA SSD.
4. **Controls**: 12 tactile switches.
5. **Display**: Color LCD (128 x 160 dots).
6. **Material**: Plastic.

## Manuals

* [Official IODD Web Manual](https://help.iodd.kr/)
* [IODD Mini Pro Quick Guide](https://dir.iodd.kr/Archive/iodd_ST400/en)

## Usage Precautions

* **Power Supply**: Connect the device directly to motherboard USB ports (rear of the PC). Front panels and unpowered hubs may provide insufficient voltage.
* **Data Integrity**: Always use the OS "Safely Remove Hardware" function or the device's "Safe Removal" menu before disconnection.
* **Physical Protection**: Protect the device from strong impacts.
* **Cables**: Use the original high-quality USB cable to prevent voltage drops.
* **Security**: Enable Write-Protect mode when using the device on untrusted or public computers.
* **Backups**: Maintain regular backups of important data.

## System Messages

### Status Reference

1. **`"Please Wait! ..."`** (Please Wait! ...): Operation in progress.
2. **`"Disconnect ..."`** (Disconnect ...): Safe to disconnect the device.
3. **`"Saving data ..."`** (Saving data ...): Writing changes to the drive.
4. **`"Updating Flash ..."`** (Updating Flash ...): Firmware/font update in progress. **Do not disconnect the cable.**
5. **`"Input Limit..."`** (Input Limit...): PIN retry limit reached.
6. **`"Reconnect USB"`** (Reconnect USB): Connection error detected.
7. **`"Not Match..."`** (Not Match...): Incorrect password entered.
8. **`"NO DEVICE !!!"`** (NO DEVICE !!!): Internal drive not detected.
9. **`"HDD ERROR !!!"`** (HDD ERROR !!!): Critical drive failure or excessive bad sectors.
10. **`"HDD WARNING ???"`** (HDD WARNING ???): Drive health warning (bad sectors detected).

### Error Codes

<details>

<summary><code>"Not Match..."</code> (Not Match...)</summary>

Incorrect password.

* To log in as Administrator, prefix the password with '0'.
* IDs: '0' for Admin, '1'-'4' for Users.

</details>

<details>

<summary><code>"Check HDD"</code> (Check HDD) or (Red Screen)</summary>

Internal drive error detected. Refer to the [Troubleshooting](#troubleshooting) section.

</details>

<details>

<summary><code>"No appropriate partition"</code> (No appropriate partition)</summary>

No valid partition found. The drive must be initialized and formatted with NTFS, exFAT, or FAT32. Refer to the [Drive Initialization](#drive-initialization) section.

</details>

<details>

<summary><code>"Drive Error"</code> (Drive Error)</summary>

Communication failure with the internal drive. Test with a different USB port or cable.

</details>

<details>

<summary><code>"Too Many Files"</code> (Too Many Files)</summary>

Directory limit of 32 items reached. Organize files into subfolders.

</details>

<details>

<summary><code>".."</code> (..)</summary>

Navigation to the parent directory. This message indicates that the current folder contains no subfolders or supported file formats.

</details>

<details>

<summary><code>"Disc Locked"</code> (Disc Locked)</summary>

Virtual drive is in use. Close accessing applications or reconnect the device to force an unlock.

</details>

<details>

<summary><code>"DEFRAG"</code> (DEFRAG)</summary>

File fragmentation detected. ISOs allow up to 24 fragments; VHDs must be contiguous. Use a [Disk Defragmenter](https://en.wikipedia.org/wiki/Disk_Defragmenter_\(Windows\)).

</details>

<details>

<summary><code>"Not Use Dynamic"</code> (Not Use Dynamic)</summary>

Dynamic VHDs are not supported. Use fixed-size VHD files.

</details>

<details>

<summary><code>"Not Use Sparse"</code> (Not Use Sparse)</summary>

Sparse image files are not supported by the device.

</details>

<details>

<summary><code>"Product Mismatch"</code> (Product Mismatch)</summary>

Firmware compatibility error. Hold `9` and `⏎` while connecting to enter recovery mode and re-flash the correct firmware.

</details>

### FAQ

<details>

<summary>The device does not boot.</summary>

Refer to the [Booting Errors](#booting-errors) section.

</details>

<details>

<summary>I forgot my password. Can I remove it?</summary>

No. You must re-initialize the device, which will result in total data loss. Refer to the [Drive Initialization](#drive-initialization) section.

</details>

<details>

<summary>The LCD only displays "IODD MINI PRO".</summary>

This indicates a system hang. Please perform a firmware update.

</details>

<details>

<summary>How can I unmount active virtual drives (VHD, RMD, IMA)?</summary>

1. **Unmount All**: Long-press key `7` (3 seconds).
2. **Unmount Single**: Navigate to the drive in the menu and press Select.
3. **Unmount Most Recent**: Single-press key `7`.

</details>

<details>

<summary>What should I do if a red "Excep_code-" popup appears?</summary>

Follow the on-screen instruction:

* **`"Please Reconnect"`** (Please Reconnect): Check the USB connection and power supply.
* **`"Please Check Disk"`** (Please Check Disk): Run `chkdsk` on a PC.
* **`"Please update firmware"`** (Please update firmware): Install the latest firmware version.

</details>

## Firmware

### Update Instructions

**Requirements**: Windows PC and a high-quality USB cable. **Warning**: Connect only one IODD device during the update. Retrying with the correct version will recover the device if the wrong firmware is flashed.

1. Download the firmware package.
2. Extract the ZIP file locally (do not run from the archive).
3. Execute the updater application as Administrator.
4. If the device is detected, click **Update**.
   * If not detected, try different USB ports (motherboard rear ports recommended) or cables.
5. The process takes 2-3 minutes. **Do not disconnect the cable during screen activity.**
6. If the update finishes instantly without activity (due to being up-to-date), use the **Force Update** method:
   * Hold `9` and `⏎` while connecting the USB cable. Continue holding for 7 seconds to force a re-flash.

### Downloads

* [Latest Firmware Directory](https://dir.iodd.kr/iodd_firmware_updater)


# IODD ST300

IODD ST300 product reference covering 2.5-inch SATA storage, virtual ODD, VHD booting, hotkeys, display features, firmware, and manuals.

The IODD ST300 is a 2.5-inch SATA virtual drive enclosure with ISO mounting, VHD/RMD/IMA support, multi-LUN operation, hardware hotkeys, write protection, system monitoring, and integrated file viewers. This reference page summarizes ST300 functions, menu structure, specifications, firmware, and manuals.

## Appearance

![ST300-011](/files/nwqAidhApgGVrQIuCK9s) ![ST400-019](/files/B9Z6bFyEwSyxEHYRRyX9) ![ST300-021](/files/QOSqLtOaktLzVg9ZERWP)

## Functions

1. **Bootable Virtual CD-ROM Drive (DVD-ROM, Blu-ray)**
   * Eliminates the need for physical optical drives and blank media for OS installations.
   * Supports [ISO](https://en.wikipedia.org/wiki/ISO_image) images (CD, DVD, Blu-ray).
2. **Bootable Virtual USB and Flash Drive**
   * Supports OS installation and multi-booting (including "Windows-To-Go").
   * Supports [\*.VHD](https://en.wikipedia.org/wiki/VHD_\(file_format\)), [\*.VMDK](https://en.wikipedia.org/wiki/VMDK), \*.RMD (Virtual HDD), and [\*.IMA](https://en.wikipedia.org/wiki/IMG_\(file_format\)) (Virtual Floppy Disk) formats.
   * Allows independent write-protection for each mounted drive.
   * Supports toggling between Fixed and Removable disk functions for each drive.
3. **Multi-LUN Support**
   * Simultaneously mounts up to three VHDs, one virtual optical drive (ODD), and one physical drive.
4. **System Monitoring**
   * Displays real-time telemetry, including minimum VBUS voltage, drive temperature, and health status (via Key `3`).
5. **Hardware Hotkeys**
   * Includes dedicated startup keys and hotkeys for optimized workflow and system control.
6. **Enhanced Data Protection**
   * Features include logical Write Protection, Safe Removal, and Loading State retention (Save/Restore).
7. **Integrated File Viewers**
   * **Text Viewer**: Supports UTF-16 (UCS-2 LE) and ASCII text files.
   * **Bitmap Viewer (Experimental)**: Supports images under 128x160 resolution (1, 16, or 24-bit).

### Menu

* `2`: Move cursor up.
* `8`: Move cursor down.
* `6` or `⏎`: Select / Execute.

1. ***`Mode Setting`*** - Device configuration
   * `5`: Toggles Write Protection On/Off (icon updates to reflect status).
   * `6`: Toggles Fixed / Removable drive mode (icon updates to reflect status).
   * `3`: Move selection up.
   * `9`: Move selection down.
   * ***`---disabled---`*** - Use this menu to disable specific device types:
     1. *`ODD`*: Virtual CD Drive (\*.iso).
     2. *`HDD`*: Physical Drive.
     3. *`VHD`*: Virtual Disk Drives (\*.vhd, \*.ima).
2. ***`USB Control`*** - Connection management
   1. *`Write Protect`*: Enable write-protection for all active drives.
   2. *`Refresh`*: Reconnects the device.
   3. *`Safe Removal`*: Safely stops the internal drive and enters power-saving mode.
3. ***`Information`*** - System and drive information
   1. *`S.M.A.R.T.`*: Displays internal drive health telemetry.
      * *`HDD Health`*: Overall status (`<< Good >>`, `<< Warning >>`, or `<< Bad >>`).
      * *`HDD Model`*: Internal drive model name.
      * *`HDD Serial`*: Internal drive serial number.
   2. *`Product Info`*: Device technical details.
      1. *`Firmware Ver`*: Current device firmware version.
      2. *`USB Speed`*: Current connection speed (Full-speed, Hi-speed, or Super-speed).
4. ***`Setting`*** - General configuration
   1. *`LCD Bright`*: Adjusts the LCD backlight intensity.
   2. *`Standby time`*: Sets the duration of inactivity before the drive enters sleep mode to reduce wear and power consumption.
   3. *`Screen Saver`*: Activates after 2 minutes of inactivity. Dims the LCD.
   4. *`Load Default`*: Resets all device settings to factory defaults.
5. ***`Language`*** - Select the display language (English, Korean, Chinese, Japanese, or Russian).

### Basic Functions

#### Supported Partition Styles

* Compatible with [MBR](https://en.wikipedia.org/wiki/Master_boot_record) and [GPT](https://en.wikipedia.org/wiki/GUID_Partition_Table) partition tables.
* Supported File Systems: FAT32, exFAT, and NTFS.
* Supports multiple partitions; there are no specific root folder name requirements (e.g., `_ISO` is not mandatory).

#### Sample Folder Structure

The following structure is provided as an example; any filenames or directory names are permitted.

```
J:
├─ _ISO
│  │  Hiren’s BootCD 15.2.iso
│  │  ubuntu-14.04.4-desktop-amd64.iso
│  │  Windows 10.iso
│  │  Windows XP sp3.iso
│  │  (Maximum of 32 files or subfolders per directory)
│  │  
│  ├─ IMA for Floppy
│  │      Bios updater.ima
│  │      MS-DOS 6.0.ima
│  │      Symantec Ghost.ima
│  │      
│  ├─ RMD Files
│  │      Win 7Ent_x86_x64+8.1Pro+10Pro vol2.RMD
│  │      Win7_Ult_SP1_Russian_x64.RMD
│  │      Windows 10.RMD
│  │      
│  └─ VHD Files
│      │  linuxmint-17.3-cinnamon-32bit.vhd
│      │  Windows 10 Win2Go.vhd
│      │  Windows 7 OS Booting.vhd
│      │  
│      └─ Nested subfolders are supported
├─ Your Folder 01
├─ Your Folder 02
├─ Your Folder 99
│  Your files 01.txt
│  Your files 02.txt
│  Your files 99.txt
```

#### Key Definitions

1. **Navigation**
   * `2` / `8`: Browse the file list up/down.
   * `6` or `⏎`: Select a file or enter a directory.
   * `4`: Return to the parent directory.
2. **Menu Access**
   * `⚙`: Enter or exit the system menu.
3. **Hotkeys (Single Press)**
   * `1`: Rescan the root directory.
   * `3`: Display real-time telemetry (VBUS voltage, drive temperature, and health).
   * `5`: View detailed file information (filename, size, and fragmentation).
   * `7`: Eject the most recently loaded virtual drive.
   * `9`: Manually save the current loading status.
   * `0`: View contextual help or active error message details.
4. **Advanced Hotkeys (3-second press)**
   * `1`: Reconnect the device.
   * `3`: Reconnect with Write-Protection enabled.
   * `4`: View the partition list (Select the default partition).
   * `7`: Reconnect with all virtual drives detached.
   * `9`: Disconnect from USB and enter Sleep Mode.
   * `0`: Reconnect with Write-Protection temporarily disabled.
5. **Startup Hotkeys (Hold while connecting)**
   * `1`: Reset device to factory settings.
   * `3`: Start with Write-Protection enabled.
   * `5`: Start in **Standalone Mode** (configure settings without a PC).
   * `7`: Start with all virtual drives unmounted.
   * `⚙`: Enter Menu in Standalone Mode.
   * `0`: Display startup hotkey reference in Standalone Mode.

#### Power-Saving and Disconnection

To ensure data integrity and preserve the current configuration:

* Save the loading state and enter Sleep Mode by long-pressing key `9` (3 seconds) before physical disconnection.

#### Selecting Files

To ensure that the selected file remains loaded after a reboot, you must save the state manually using the hotkeys defined above.

#### Safely Removing the Hardware in OS

When the IODD partition is formatted as NTFS, it is mandatory to use the OS ejection feature before physical disconnection to prevent file system corruption.

* Perform [Safely Remove Hardware](http://windows.microsoft.com/en-US/windows7/Safely-remove-devices-from-your-computer) before disconnection.

### Drive Initialization

1. Initialize the disk using [MBR](https://en.wikipedia.org/wiki/Master_boot_record) or [GPT](https://en.wikipedia.org/wiki/GUID_Partition_Table).
2. Format partitions as **NTFS**, **exFAT**, or **FAT32**.
   * Note: FAT32 has a 4GB file size limit.
   * The IODD-compatible partition does not need to be the first primary partition.
3. Copy files and directories to the drive.
4. Eject the device from the OS (mandatory for NTFS).
5. Reconnect the IODD.
6. If the file list does not update, long-press key `4` (3 seconds) to refresh or manually select the partition.

### Troubleshooting

If the device malfunctions, try the following steps in order:

1. **Temporary Reset**: Hold key `7` while connecting to the PC.
2. **Factory Reset**: Hold key `1` while connecting to the PC.
3. **File System Repair**: Run [Disk Check (CHKDSK)](https://en.wikipedia.org/wiki/CHKDSK) on Windows.
4. **Re-initialization**: Backup data and repeat the [Drive Initialization](#drive-initialization) process.

For suspected hardware issues:

1. Restart the PC and try a different USB port (preferably a motherboard port).
2. Replace the USB cable.
3. **Forced Firmware Recovery**: Connect the device while holding both `9` and `⏎` for approximately 7 seconds to re-flash the firmware.

### Configuring Multi-LUN Devices

1. Navigate to **Menu** -> **Mode Setting**.
2. Independently enable or disable up to 5 virtual device slots.

### Virtual Optical Drive (ISO)

1. Ensure an ODD device is enabled in the Mode Setting menu.
2. Copy ISO images to any directory on the IODD.
3. Safely eject the device from the OS.
4. Reconnect and select the desired ISO file.
5. Press key `9` to save the loading status.
6. If the PC fails to boot, restart the system (Ctrl+Alt+Del).

#### Booting Errors

* Verify that the ISO image is bootable.
* If the PC does not support Multi-LUN, enable only one virtual drive at a time.
* Compare behavior with a physical USB DVD drive.
* Use a USB Y-cable if additional power is required.
* Disable internal optical drives in the BIOS to prevent conflicts.
* Ensure the OS being installed is compatible with the target hardware drivers.

### Virtual Hard Disk (VHD)

* Only **fixed-size** VHD and VMDK files are supported. Dynamic VHD/VHDX formats are not compatible.
* Use [VHD Tool++](/product-reference-wiki/vhd-tool-plus-plus) to create unfragmented VHD files directly on the IODD.
* Up to three VHD drives can be mounted simultaneously.

1. Create a VHD file using [VHD Tool++](/product-reference-wiki/vhd-tool-plus-plus).
2. Reconnect and select the VHD file from the menu.
3. Press key `9` to save the loading status.
4. Use an imaging tool to install an OS to the mounted virtual disk.

### Virtual Floppy Drive (IMA)

* Supports uncompressed images: IMA, IMG, BIF, and VFD (rename extensions to `.IMA`).
* Usage follows the same procedure as ISO/VHD mounting.

## Specifications

1. **External Interface**: USB 3.1 Gen 1 Type-C (up to 5 Gbps).
2. **Internal Interface**: SATA I / II / III (backward compatible).
3. **Drive Compatibility**: 2.5-inch SATA HDD or SSD (7mm thickness only).
4. **Controls**: 12 tactile switches.
5. **Display**: Color LCD (128 x 160 dots).
6. **Material**: Plastic.

## Manuals

* [Official IODD Web Manual](https://help.iodd.kr/)
* [IODD ST300 Quick Guide](https://dir.iodd.kr/Archive/iodd_ST300/en)

## Usage Precautions

* **Power Supply**: Connect the device directly to motherboard USB ports (rear of the PC). Front panels and unpowered hubs may provide insufficient voltage.
* **Data Integrity**: Always use the OS "Safely Remove Hardware" function or the device's "Safe Removal" menu before disconnection.
* **Physical Protection**: Protect the device from strong impacts.
* **Cables**: Use the original high-quality USB cable to prevent voltage drops.
* **Security**: Enable Write-Protect mode when using the device on untrusted or public computers.
* **Backups**: Maintain regular backups of important data.

## System Messages

### Status Reference

1. **`"Please Wait ..."`** (Please Wait ...): Operation in progress.
2. **`"Disconnect ..."`** (Disconnect ...): Safe to disconnect the device.
3. **`"Saving data ..."`** (Saving data ...): Writing changes to the drive.
4. **`"Updating Flash ..."`** (Updating Flash ...): Firmware/font update in progress. **Do not disconnect the cable.**
5. **`"Input Limit..."`** (Input Limit...): Password retry limit reached.
6. **`"Reconnect USB"`** (Reconnect USB): Connection error detected.
7. **`"Not Match..."`** (Not Match...): Incorrect password entered.
8. **`"NO DEVICE !!!"`** (NO DEVICE !!!): Internal drive not detected.
9. **`"HDD ERROR !!!"`** (HDD ERROR !!!): Critical drive failure or excessive bad sectors.
10. **`"HDD WARNING ???"`** (HDD WARNING ???): Drive health warning (bad sectors detected).

### Error Codes

<details>

<summary><code>"Check HDD"</code> (Check HDD) (Red Screen)</summary>

Internal drive error detected. Refer to the [Troubleshooting](#troubleshooting) section.

</details>

<details>

<summary><code>"No appropriate partition"</code> (No appropriate partition)</summary>

No valid partition found. The drive must be initialized and formatted with NTFS, exFAT, or FAT32. Refer to the [Drive Initialization](#drive-initialization) section.

</details>

<details>

<summary><code>"Drive Error"</code> (Drive Error)</summary>

Communication failure with the internal drive. Test with a different USB port or cable.

</details>

<details>

<summary><code>"Too Many Files"</code> (Too Many Files)</summary>

Directory limit of 32 items reached. Organize files into subfolders.

</details>

<details>

<summary><code>".."</code> (..)</summary>

Navigation to the parent directory. This message indicates that the current folder contains no subfolders or supported file formats.

</details>

<details>

<summary><code>"Disc Locked"</code> (Disc Locked)</summary>

Virtual drive is in use. Close accessing applications or reconnect the device to force an unlock.

</details>

<details>

<summary><code>"DEFRAG"</code> (DEFRAG)</summary>

File fragmentation detected. ISOs allow up to 24 fragments; VHDs must be contiguous. Use a [Disk Defragmenter](https://en.wikipedia.org/wiki/Disk_Defragmenter_\(Windows\)).

</details>

<details>

<summary><code>"Not Use Dynamic"</code> (Not Use Dynamic)</summary>

Dynamic VHDs are not supported. Use fixed-size VHD files.

</details>

<details>

<summary><code>"Not Use Sparse"</code> (Not Use Sparse)</summary>

Sparse image files are not supported by the device.

</details>

<details>

<summary><code>"Product Mismatch"</code> (Product Mismatch)</summary>

Firmware compatibility error. Hold `9` and `⏎` while connecting to enter recovery mode and re-flash the correct firmware.

</details>

### FAQ

<details>

<summary>The device does not boot.</summary>

Refer to the [Booting Errors](#booting-errors) section.

</details>

<details>

<summary>The LCD only displays "IODD ST300".</summary>

This indicates a system hang. Please perform a firmware update.

</details>

<details>

<summary>How can I unmount active virtual drives (VHD, RMD, IMA)?</summary>

1. **Unmount All**: Long-press key `7` (3 seconds).
2. **Unmount Single**: Navigate to the drive in the menu and press Select.
3. **Unmount Most Recent**: Single-press key `7`.

</details>

<details>

<summary>What should I do if a red "Excep_code-" popup appears?</summary>

Follow the on-screen instruction:

* **`"Please Reconnect"`** (Please Reconnect): Check the USB connection and power supply.
* **`"Please Check Disk"`** (Please Check Disk): Run `chkdsk` on a PC.
* **`"Please update firmware"`** (Please update firmware): Install the latest firmware version.

</details>

## Firmware

### Update Instructions

**Requirements**: Windows PC and a high-quality USB cable. **Warning**: Connect only one IODD device during the update. Retrying with the correct version will recover the device if the wrong firmware is flashed.

1. Download the firmware package.
2. Extract the ZIP file locally (do not run from the archive).
3. Execute the updater application as Administrator.
4. If the device is detected, click **Update**.
   * If not detected, try different USB ports (motherboard rear ports recommended) or cables.
5. The process takes 2-3 minutes. **Do not disconnect the cable during screen activity.**
6. If the update finishes instantly without activity (due to being up-to-date), use the **Force Update** method:
   * Hold `9` and `⏎` while connecting the USB cable. Continue holding for 7 seconds to force a re-flash.

### Latest Firmware

* [Download Latest Firmware](https://dir.iodd.kr/iodd_firmware_updater)


# IODD ST400

IODD ST400 product reference covering 2.5-inch SATA storage, virtual ODD, VHD booting, AES256 encryption, admin users, firmware, and manuals.

The IODD ST400 is a 2.5-inch SATA virtual drive enclosure with ISO mounting, VHD/RMD/IMA support, multi-LUN operation, AES256 XTS hardware encryption, administrator and user accounts, and integrated file viewers. This reference page summarizes ST400 functions, menu structure, specifications, firmware, and manuals.

## Appearance

![ST400-020](/files/Hxaqgr0aO7wMSg2uemp3) ![ST400-019](/files/B9Z6bFyEwSyxEHYRRyX9) ![ST400-021](/files/WeAMsuuklvSopVnsBagc)

## Functions

1. **Bootable Virtual CD-ROM Drive (DVD-ROM, Blu-ray)**
   * Eliminates the need for physical optical drives and blank media for OS installations.
   * Supports [ISO](https://en.wikipedia.org/wiki/ISO_image) images (CD, DVD, Blu-ray).
2. **Bootable Virtual USB and Flash Drive**
   * Supports OS installation and multi-booting (including "Windows-To-Go").
   * Supports [\*.VHD](https://en.wikipedia.org/wiki/VHD_\(file_format\)), [\*.VMDK](https://en.wikipedia.org/wiki/VMDK), \*.RMD (Virtual HDD), and [\*.IMA](https://en.wikipedia.org/wiki/IMG_\(file_format\)) (Virtual Floppy Disk) formats.
   * Allows independent write-protection for each mounted drive.
   * Supports toggling between Fixed and Removable disk functions for each drive.
3. **Multi-LUN Support**
   * Simultaneously mounts up to three VHDs, one virtual optical drive (ODD), and one physical drive.
4. **System Monitoring**
   * Displays real-time telemetry, including minimum VBUS voltage, drive temperature, and health status (via Key `3`).
5. **Hardware Hotkeys**
   * Includes dedicated startup keys and hotkeys for optimized workflow and system control.
6. **Enhanced Data Protection**
   * Features include logical Write Protection, Safe Removal, and Loading State retention (Save/Restore).
7. **Real-time AES 256-bit XTS Hardware Encryption**
   * Optional encryption using a 4-38 digit PIN (6 digits recommended for optimal security).
   * Includes a random security keypad to prevent unauthorized access via fingerprint tracing.
   * Supports one Administrator and up to four standard user accounts.
     * **Note**: To log in as Administrator, prefix the password with '0' (e.g., if the password is '1234', enter '01234'). IDs: '0' for Admin, '1'-'4' for Users.
   * Configurable permissions for each user.
8. **Integrated File Viewers**
   * **Text Viewer**: Supports UTF-16 (UCS-2 LE) and ASCII text files.
   * **Bitmap Viewer (Experimental)**: Supports images under 128x160 resolution (1, 16, or 24-bit).

### Menu

* `2`: Move cursor up.
* `8`: Move cursor down.
* `6` or `⏎`: Select / Execute.

1. ***`Mode Setting`*** - Device configuration
   * `5`: Toggles Write Protection On/Off (icon updates to reflect status).
   * `6`: Toggles Fixed / Removable drive mode (icon updates to reflect status).
   * `3`: Move selection up.
   * `9`: Move selection down.
   * ***`---disabled---`*** - Use this menu to disable specific device types:
     1. *`ODD`*: Virtual CD Drive (\*.iso).
     2. *`HDD`*: Physical Drive.
     3. *`VHD`*: Virtual Disk Drives (\*.vhd, \*.ima).
2. ***`AES256 encryption`*** - Encryption management (Administrator Mode)
   * **WARNING: Setting or deleting the Administrator password will result in permanent disk data erasure. Backup all data before proceeding.**
   1. ***`Admin`***
      1. *`Set 2nd P.W.`*: Configures a secondary 4-38 digit password. (Requires an existing Admin password and an unencrypted disk).
      2. *`Set Password`*: Sets a 4-38 digit Administrator password. (Erases all data; recovery is only possible if undone immediately).
      3. *`Del password`*: Deletes the password and erases all disk data.
      4. *`Chg password`*: Updates the current password.
   2. ***`general user`***
      1. ***`User1 - User4`***
         1. *`Set Password`*: Sets a 4-38 digit user password.
         2. *`Del password`*: Removes the user password.
         3. *`☑Read-only`*: Enforces write-protection for this user.
         4. *`☑User Change`*: Permits the user to change their own password.
         5. *`☑User Delete`*: Permits the user to delete their own password.
      2. *`Save Users`*: Commits the current user configuration.
3. ***`AES256 encryption`*** - Encryption management (User Mode)
   1. *`Chg Password`*: Updates the user's password.
   2. *`Del Password`*: Deletes the user's password.
4. ***`USB Control`*** - Connection management
   1. *`Keep P.W. 2min`*: Preserves the password in memory for 2 minutes after power-off, allowing reconnection without re-entry.
   2. *`Write Protect`*: Enable write-protection for all active drives.
   3. *`Refresh`*: Reconnects the device.
   4. *`Safe Removal`*: Safely stops the internal drive and enters power-saving mode.
5. ***`Information`*** - System and drive information
   1. *`S.M.A.R.T.`*: Displays internal drive health telemetry.
      * *`HDD Health`*: Overall status (`<< Good >>`, `<< Warning >>`, or `<< Bad >>`).
      * *`HDD Model`*: Internal drive model name.
      * *`HDD Serial`*: Internal drive serial number.
   2. *`Product Info`*: Device technical details.
      1. *`Firmware Ver`*: Current device firmware version.
      2. *`USB Speed`*: Current connection speed (Full-speed, Hi-speed, or Super-speed).
6. ***`Setting`*** - General configuration
   1. *`LCD Bright`*: Adjusts the LCD backlight intensity.
   2. *`Standby time`*: Sets the duration of inactivity before the drive enters sleep mode to reduce wear and power consumption.
   3. *`Screen Saver`*: Activates after 2 minutes of inactivity. Dims the LCD and locks the screen for encrypted drives.
   4. *`Load Default`*: Resets all device settings to factory defaults.
7. ***`Language`*** - Select the display language (English, Korean, Chinese, Japanese, or Russian).

### Basic Functions

#### Supported Partition Styles

* Compatible with [MBR](https://en.wikipedia.org/wiki/Master_boot_record) and [GPT](https://en.wikipedia.org/wiki/GUID_Partition_Table) partition tables.
* Supported File Systems: FAT32, exFAT, and NTFS.
* Supports multiple partitions; there are no specific root folder name requirements (e.g., `_ISO` is not mandatory).

#### Sample Folder Structure

The following structure is provided as an example; any filenames or directory names are permitted.

```
J:
├─ _ISO
│  │  Hiren’s BootCD 15.2.iso
│  │  ubuntu-14.04.4-desktop-amd64.iso
│  │  Windows 10.iso
│  │  Windows XP sp3.iso
│  │  (Maximum of 32 files or subfolders per directory)
│  │  
│  ├─ IMA for Floppy
│  │      Bios updater.ima
│  │      MS-DOS 6.0.ima
│  │      Symantec Ghost.ima
│  │      
│  ├─ RMD Files
│  │      Win 7Ent_x86_x64+8.1Pro+10Pro vol2.RMD
│  │      Win7_Ult_SP1_Russian_x64.RMD
│  │      Windows 10.RMD
│  │      
│  └─ VHD Files
│      │  linuxmint-17.3-cinnamon-32bit.vhd
│      │  Windows 10 Win2Go.vhd
│      │  Windows 7 OS Booting.vhd
│      │  
│      └─ Nested subfolders are supported
├─ Your Folder 01
├─ Your Folder 02
├─ Your Folder 99
│  Your files 01.txt
│  Your files 02.txt
│  Your files 99.txt
```

#### Key Definitions

1. **Navigation**
   * `2` / `8`: Browse the file list up/down.
   * `6` or `⏎`: Select a file or enter a directory.
   * `4`: Return to the parent directory.
2. **Menu Access**
   * `⚙`: Enter or exit the system menu.
3. **Hotkeys (Single Press)**
   * `1`: Rescan the root directory.
   * `3`: Display real-time telemetry (VBUS voltage, drive temperature, and health).
   * `5`: View detailed file information (filename, size, and fragmentation).
   * `7`: Eject the most recently loaded virtual drive.
   * `9`: Manually save the current loading status.
   * `0`: View contextual help or active error message details.
4. **Advanced Hotkeys (3-second press)**
   * `1`: Reconnect the device.
   * `3`: Reconnect with Write-Protection enabled.
   * `4`: View the partition list (Select the default partition).
   * `7`: Reconnect with all virtual drives detached.
   * `9`: Disconnect from USB and enter Sleep Mode.
   * `0`: Reconnect with Write-Protection temporarily disabled.
5. **Startup Hotkeys (Hold while connecting)**
   * `1`: Reset device to factory settings.
   * `3`: Start with Write-Protection enabled.
   * `5`: Start in **Standalone Mode** (configure settings without a PC).
   * `7`: Start with all virtual drives unmounted.
   * `⚙`: Enter Menu in Standalone Mode.
   * `0`: Display startup hotkey reference in Standalone Mode.

#### Power-Saving and Disconnection

To ensure data integrity and preserve the current configuration:

* Save the loading state and enter Sleep Mode by long-pressing key `9` (3 seconds) before physical disconnection.

#### Selecting Files

To ensure that the selected file remains loaded after a reboot, you must save the state manually using the hotkeys defined above.

#### Safely Removing the Hardware in OS

When the IODD partition is formatted as NTFS, it is mandatory to use the OS ejection feature before physical disconnection to prevent file system corruption.

* Perform [Safely Remove Hardware](http://windows.microsoft.com/en-US/windows7/Safely-remove-devices-from-your-computer) before disconnection.

### Drive Initialization

1. Initialize the disk using [MBR](https://en.wikipedia.org/wiki/Master_boot_record) or [GPT](https://en.wikipedia.org/wiki/GUID_Partition_Table).
2. Format partitions as **NTFS**, **exFAT**, or **FAT32**.
   * Note: FAT32 has a 4GB file size limit.
   * The IODD-compatible partition does not need to be the first primary partition.
3. Copy files and directories to the drive.
4. Eject the device from the OS (mandatory for NTFS).
5. Reconnect the IODD.
6. If the file list does not update, long-press key `4` (3 seconds) to refresh or manually select the partition.

### Troubleshooting

If the device malfunctions, try the following steps in order:

1. **Login Verification**: If a password is set (e.g., '1234'), use the correct prefix: '01234' for Admin, or '11234' for User 1.
2. **Temporary Reset**: Hold key `7` while connecting to the PC.
3. **Factory Reset**: Hold key `1` while connecting to the PC.
4. **File System Repair**: Run [Disk Check (CHKDSK)](https://en.wikipedia.org/wiki/CHKDSK) on Windows.
5. **Re-initialization**: Backup data and repeat the [Drive Initialization](#drive-initialization) process.

For suspected hardware issues:

1. Restart the PC and try a different USB port (preferably a motherboard port).
2. Replace the USB cable.
3. **Forced Firmware Recovery**: Connect the device while holding both `9` and `⏎` for approximately 7 seconds to re-flash the firmware.

### Configuring Multi-LUN Devices

1. Navigate to **Menu** -> **Mode Setting**.
2. Independently enable or disable up to 5 virtual device slots.

### Virtual Optical Drive (ISO)

1. Ensure an ODD device is enabled in the Mode Setting menu.
2. Copy ISO images to any directory on the IODD.
3. Safely eject the device from the OS.
4. Reconnect and select the desired ISO file.
5. Press key `9` to save the loading status.
6. If the PC fails to boot, restart the system (Ctrl+Alt+Del).

#### Booting Errors

* Verify that the ISO image is bootable.
* If the PC does not support Multi-LUN, enable only one virtual drive at a time.
* Compare behavior with a physical USB DVD drive.
* Use a USB Y-cable if additional power is required.
* Disable internal optical drives in the BIOS to prevent conflicts.
* Ensure the OS being installed is compatible with the target hardware drivers.

### Virtual Hard Disk (VHD)

* Only **fixed-size** VHD and VMDK files are supported. Dynamic VHD/VHDX formats are not compatible.
* Use [VHD Tool++](/product-reference-wiki/vhd-tool-plus-plus) to create unfragmented VHD files directly on the IODD.
* Up to three VHD drives can be mounted simultaneously.

1. Create a VHD file using [VHD Tool++](/product-reference-wiki/vhd-tool-plus-plus).
2. Reconnect and select the VHD file from the menu.
3. Press key `9` to save the loading status.
4. Use an imaging tool to install an OS to the mounted virtual disk.

### Virtual Floppy Drive (IMA)

* Supports uncompressed images: IMA, IMG, BIF, and VFD (rename extensions to `.IMA`).
* Usage follows the same procedure as ISO/VHD mounting.

## Specifications

1. **External Interface**: USB 3.1 Gen 1 Type-C (up to 5 Gbps).
2. **Internal Interface**: SATA I / II / III (backward compatible).
3. **Drive Compatibility**: 2.5-inch SATA HDD or SSD (7mm thickness only).
4. **Controls**: 12 tactile switches.
5. **Display**: Color LCD (128 x 160 dots).
6. **Material**: Plastic.

## Manuals

* [Official IODD Web Manual](https://help.iodd.kr/)
* [IODD ST400 Quick Guide](https://dir.iodd.kr/Archive/iodd_ST400/en)

## Usage Precautions

* **Power Supply**: Connect the device directly to motherboard USB ports (rear of the PC). Front panels and unpowered hubs may provide insufficient voltage.
* **Data Integrity**: Always use the OS "Safely Remove Hardware" function or the device's "Safe Removal" menu before disconnection.
* **Physical Protection**: Protect the device from strong impacts.
* **Cables**: Use the original high-quality USB cable to prevent voltage drops.
* **Security**: Enable Write-Protect mode when using the device on untrusted or public computers.
* **Backups**: Maintain regular backups of important data.

## System Messages

### Status Reference

1. **`"Please Wait ..."`** (Please Wait ...): Operation in progress.
2. **`"Disconnect ..."`** (Disconnect ...): Safe to disconnect the device.
3. **`"Saving data ..."`** (Saving data ...): Writing changes to the drive.
4. **`"Updating Flash ..."`** (Updating Flash ...): Firmware/font update in progress. **Do not disconnect the cable.**
5. **`"Input Limit..."`** (Input Limit...): Password retry limit reached.
6. **`"Reconnect USB"`** (Reconnect USB): Connection error detected.
7. **`"Not Match..."`** (Not Match...): Incorrect password entered.
8. **`"NO DEVICE !!!"`** (NO DEVICE !!!): Internal drive not detected.
9. **`"HDD ERROR !!!"`** (HDD ERROR !!!): Critical drive failure or excessive bad sectors.
10. **`"HDD WARNING ???"`** (HDD WARNING ???): Drive health warning (bad sectors detected).

### Error Codes

<details>

<summary><code>"Not Match..."</code> (Not Match...)</summary>

Incorrect password.

* To log in as Administrator, prefix the password with '0'.
* IDs: '0' for Admin, '1'-'4' for Users.

</details>

<details>

<summary><code>"Check HDD"</code> (Check HDD) (Red Screen)</summary>

Internal drive error detected. Refer to the [Troubleshooting](#troubleshooting) section.

</details>

<details>

<summary><code>"No appropriate partition"</code> (No appropriate partition)</summary>

No valid partition found. The drive must be initialized and formatted with NTFS, exFAT, or FAT32. Refer to the [Drive Initialization](#drive-initialization) section.

</details>

<details>

<summary><code>"Drive Error"</code> (Drive Error)</summary>

Communication failure with the internal drive. Test with a different USB port or cable.

</details>

<details>

<summary><code>"Too Many Files"</code> (Too Many Files)</summary>

Directory limit of 32 items reached. Organize files into subfolders.

</details>

<details>

<summary><code>".."</code> (..)</summary>

Navigation to the parent directory. This message indicates that the current folder contains no subfolders or supported file formats.

</details>

<details>

<summary><code>"Disc Locked"</code> (Disc Locked)</summary>

Virtual drive is in use. Close accessing applications or reconnect the device to force an unlock.

</details>

<details>

<summary><code>"DEFRAG"</code> (DEFRAG)</summary>

File fragmentation detected. ISOs allow up to 24 fragments; VHDs must be contiguous. Use a [Disk Defragmenter](https://en.wikipedia.org/wiki/Disk_Defragmenter_\(Windows\)).

</details>

<details>

<summary><code>"Not Use Dynamic"</code> (Not Use Dynamic)</summary>

Dynamic VHDs are not supported. Use fixed-size VHD files.

</details>

<details>

<summary><code>"Not Use Sparse"</code> (Not Use Sparse)</summary>

Sparse files are not supported by the device.

</details>

<details>

<summary><code>"Product Mismatch"</code> (Product Mismatch)</summary>

Firmware compatibility error. Hold `9` and `⏎` while connecting to enter recovery mode and re-flash the correct firmware.

</details>

### FAQ

<details>

<summary>The device does not boot.</summary>

Refer to the [Booting Errors](#booting-errors) section.

</details>

<details>

<summary>I forgot my password. Can I remove it?</summary>

No. You must re-initialize the device, which will result in total data loss. Refer to the [Drive Initialization](#drive-initialization) section.

</details>

<details>

<summary>The LCD only displays "IODD ST400".</summary>

This indicates a system hang. Please perform a firmware update.

</details>

<details>

<summary>How can I unmount active virtual drives (VHD, RMD, IMA)?</summary>

1. **Unmount All**: Long-press key `7` (3 seconds).
2. **Unmount Single**: Navigate to the drive in the menu and press Select.
3. **Unmount Most Recent**: Single-press key `7`.

</details>

<details>

<summary>What should I do if a red "Excep_code-" popup appears?</summary>

Follow the on-screen instruction:

* **`"Please Reconnect"`** (Please Reconnect): Check the USB connection and power supply.
* **`"Please Check Disk"`** (Please Check Disk): Run `chkdsk` on a PC.
* **`"Please update firmware"`** (Please update firmware): Install the latest firmware version.

</details>

## Firmware

### How to Update

Requirements: Windows PC, USB Port. **Warning:** Ensure only one IODD device is connected to the PC during the update. Please ensure you are installing the exact firmware version that matches your IODD model. If an incorrect firmware is installed, simply retry the process with the correct version. **Note:** The device features a "bricking-proof" design. It will remain recoverable even if an unexpected error occurs during the update process.

1. Download the firmware file.
2. Extract the ZIP file to a local folder. (**Caution:** Do not run the updater directly from within the ZIP file).
3. Run the EXE file as an Administrator.
4. If the **`"Device is Detected"`** (Device is Detected) message appears, click the **`"Update"`** (Update) button.
   * If the device is not detected, try the following:
     * Use a different USB port (preferably on the rear of the motherboard).
     * Use a different USB cable.
     * Try the update on another computer.
5. The update process typically takes 2-3 minutes. If the screen flickers, please wait patiently and **DO NOT** disconnect the USB cable.
6. If the update finishes instantly without screen activity (this can happen if the version is already current), use the following "Force Update" method:
   * Disconnect the device.
   * Press and hold both the `9` and `⏎ (Enter)` buttons simultaneously while reconnecting the USB cable.
   * Continue holding the buttons for at least 7 seconds to force a re-flash of the firmware.

### Latest Firmware

* [Download Latest Firmware](https://dir.iodd.kr/iodd_firmware_updater)


# VHD Tool++

VHD Tool++ reference for creating, converting, extending, defragmenting, and uploading fixed VHD files for IODD virtual drive booting.

## 1. Overview

**VHD Tool++** is a specialized utility designed to manage virtual disk images for IODD devices. This program is designed exclusively for **Windows environments**. Beyond standard Virtual CD-ROM booting, IODD supports Virtual USB Flash Drive and Windows-To-Go (WTG) booting through the use of VHD files.

### Key Capabilities

* **Virtual Drive Emulation**: Supports up to 6 virtual devices simultaneously.
* **Drive Type Selection**: Categorizes virtual drives into four distinct types: **Fixed**, **Removable**, **Floppy (FDD)**, and **Optical (ODD)**.
* **Multi-Language Support**: Available in English, Korean, and Chinese. The English interface can be launched directly using the `VHD_Tool++(en).bat` file.

***

## 2. Screenshots

![VHD Tool Screenshot 1](/files/pdBGHOAwgeM87d1gIcpq) ![VHD Tool Screenshot 2](/files/P1VUZwYuP9dKHmRp7u8k) ![VHD Tool Screenshot 3](/files/dYIo4JmpdOO9VbcWAGew) ![VHD Tool Screenshot 4](/files/TXBPvm8dgo4fTHjgQ1qq) ![VHD Tool Screenshot 5](/files/eJkJzFGXIy82TQ3yWvj4) ![VHD Tool Screenshot 6](/files/NxkeC7oetZ5DCrk4EYlv)

***

## 3. Core Functions

### Create

Instantly creates fixed-size VHD files directly on the IODD drive. This process is highly optimized to ensure files are **completely unfragmented**, which is critical for successful mounting on IODD devices.

### Convert

Converts standard raw disk dump images into the fixed-size VHD format compatible with IODD.

### Extend

Allows users to increase the capacity of an existing fixed-size VHD file without compromising stored data.

### Defragment

Analyzes and defragments individual files on the IODD to ensure they meet the zero-fragmentation requirement for virtual drive functionality.

### Upload

A specialized transfer function that copies files from a PC to the IODD while actively preventing fragmentation during the write process.

### Write To HDD (Expert Only)

Performs a physical, sector-by-sector clone of an image file directly to a hard drive.

* **Support**: Currently supports NTFS only.
* **WARNING**: This is an advanced feature. **All existing data on the target drive will be permanently erased.**

***

## 4. Enhanced Features for Legacy Models (IODD 2531 / 2541)

Legacy IODD models utilize specific filename conventions to control drive behavior and hardware-level write protection.

### Filename Extensions

* `.VHD`: Mounted as a **USB Fixed Drive**.
* `.RMD`: Mounted as a **USB Removable Drive**.

### Write-Protection Tags

By appending specific tags to the filename (e.g., `Win2Go&DW.VHD`), you can define the default connection mode:

* **Standard Name** (e.g., `Win2Go.VHD`): Defaults to CD-MODE or ODD-MODE (on 2541).
* **`&D` Tag** (e.g., `Win2Go&D.VHD`): Defaults to **Dual-Mode**. The physical HDD is hardware **Write-Protected**.
* **`&DW` Tag** (e.g., `Win2Go&DW.VHD`): Defaults to **Dual-Mode**. The physical HDD is **Write-Enabled**.

***

## 5. Getting Started

### Installation

1. Download the latest ZIP package.
2. Extract the ZIP archive to a local directory.
   * *Tip: For maximum compatibility, use a directory path that uses English characters and contains no spaces.*
3. Execute `VHD_Tool++.exe` or use the provided `.bat` file for specific language settings.

### Version History

* **v0.7.0.10 (2021-07-29)**: Added comprehensive support for NTFS, exFAT, and FAT file systems.
* **v0.6.0.5 (2015-06-20)**: Introduced initial support for NTFS.

***

## 6. Resources

* [Official IODD Virtual Drive Guide](https://help.iodd.kr/bootable-virtual-drive/virtual-drive-vhd)

## 7. Download

* [VHD TOOL++ Download](https://dir.iodd.kr/vhd_tools)


# Legacy Device & Historical Reference

Legacy IODD device reference, company history, patents, older model details, emergency recovery procedures, and support notes.

This appendix collects historical IODD information that supports the main setup and troubleshooting guides. It includes legacy model differences, company and patent history, emergency recovery notes, and references for older IODD 2531, 2541, and MINI devices.

## 15.1 Corporate History and Patents

### Company Timeline

* **1996**: Co-founded **CNS Co., Ltd.**
* **2011**: Spun off as **CNS Korea**.
* **2013**: Established **IODD Co., Ltd.**

### Intellectual Property

* **Patent (2nd Password)**: "Device password setting for preventing duplication of encrypted devices." (Patent-2022-0021783). Supports 4-38 digit passwords.
* **Patent (Virtual ODD)**: "Memory device recognizable as an optical disk drive and its driving method." (No. 0993935). Valid until September 9, 2028.

***

## 15.2 Legacy Device Details (2531 / 2541 / MINI)

The legacy models use different physical controls and firmware structures compared to the modern ST/MINI PRO series.

### Hardware Characteristics

* **Modern Series (ST300/400, MINI PRO)**: Feature a color LCD (128x160 dots) and support **Multi-LUN** (Mount up to **3 VHDs**, **1 ODD**, and **1 Physical HDD** simultaneously for a total of 5 devices).
* **Legacy Series (2531, 2541, MINI Legacy)**: Support up to **4 Virtual Drives**, **1 ODD**, and **1 Physical HDD** simultaneously.
* **IODD 2531**: Uses a **3-way Jog Dial** (Up/Down/Click) and a side back button. Supports 2.5-inch SATA HDDs up to 9.5mm. It shares the same architecture as the **ZM-VE300**. **Material**: Aluminum and PC (Plastic).
  * **Tip**: If installing a thinner **7mm** drive in a 2531, a spacer is required for a secure fit.
* **IODD 2541**: Uses **12 Touch Keys**. Based on the **ZM-VE400** architecture but with improved hardware.
* **IODD MINI (Legacy)**: Uses **12 Tactile buttons** and a Micro-B USB 3.0 connector. Uses M.2 SATA **2242** (42mm) SSDs.
* **Tip**: For older 2541 units with touch sensitivity issues, placing a thin sheet of plastic or paper between the HDD and the front body (not the cover) can improve responsiveness.

### Additional Modern Features (ST/MINI PRO)

* **Bitmap File Viewer (Experimental)**: Supports viewing small bitmap images (under 128x160 resolution, **1/16/24-bit** color depth).
* **Text Viewer**: Supports reading `.txt` files in UTF-16 (UCS-2 LE) and ASCII formats.
* **Standalone Mode**: Allows users to configure settings or browse files using a USB power bank without connecting to a PC (Hold key **\[5]** or **\[M]** during connection).
* **Admin/User Login**: When encryption is active, the first digit of the password entry identifies the user: **`0`** for Administrator, **`1`** through **`4`** for standard users. (e.g., if the admin password is `1234`, enter `01234`).

### Legacy-Specific Features (2531 / 2541)

* **Force USB 3.0**: A menu option to force the device to maintain a USB 3.0 connection even in harsh conditions where it might otherwise downshift to USB 2.0.
* **Instant Save**: Quickly saves the current configuration and loading state.
* **Fixed/Removable filenames**: Use `.VHD` for fixed disks and `.RMD` for removable media (Legacy only).

### Emergency Recovery Procedures

| Device Type       | Procedure          | Description                                                                           |
| ----------------- | ------------------ | ------------------------------------------------------------------------------------- |
| **ST / MINI PRO** | **Force Recovery** | Hold **\[9] + \[Enter]** for 7 seconds while connecting. Re-flashes current firmware. |
| **2541 / 2531**   | **Tact Switch**    | Open back cover, hold internal tact switch for 7s while connecting.                   |

### Emergency Reset For 2541 (Tact Switch)

If the device fails to initialize or becomes unresponsive during a firmware update, follow this hardware reset procedure (requires opening the device):

1. **Open the back cover** of the IODD.
2. Locate and **press the tact switch** (reset button) on the internal PCB.
3. While holding the switch, **connect the USB cable** to the PC.
4. Continue holding the switch for about **7 seconds**.
5. **Release the switch** and wait for approximately **1 minute** for the system to recover.

#### **Specific Hotkeys (Legacy)**

| Device   | Action       | Hotkey                                                                     |
| -------- | ------------ | -------------------------------------------------------------------------- |
| **2531** | Rescan Files | Long press **Jog Up** (3s)                                                 |
| **2531** | Power Down   | Long press **Jog Down** (3s)                                               |
| **2531** | Enter Menu   | Long press **Jog Center** (3s)                                             |
| **2531** | Detach All   | Long press **Back/Up** (3s)                                                |
| **2541** | Select File  | **\[5]** or **\[6]** (**\[6]** maintains loading state on newer firmware)  |
| **2541** | Power Down   | Long press **\[1]** (3s)                                                   |
| **2541** | Reboot       | Long press **\[3]** (3s)                                                   |
| **2541** | Rescan Files | Long press **\[4]** (3s)                                                   |
| **2541** | Detach All   | Long press **\[7]** (3s)                                                   |
| **2541** | Disable WP   | Long press **\[0]** (3s) - Reboot and temporarily disable Write-Protection |

* **Tip (2531)**: On firmware 1558 or higher, the loading state is saved automatically. For older versions, use the Power Down hotkey to save the state manually.
* **Tip (2541)**: Button **\[6]** for maintaining loading state requires firmware 6(7)9-05 or higher.

#### **Startup Keys (2531 Only)**

During startup (when connecting the USB cable), holding the following keys will force a specific mode:

| Key             | Resulting Mode                                |
| --------------- | --------------------------------------------- |
| **Jog Up**      | Start in **CD-MODE**                          |
| **Jog Down**    | Start in **HDD-MODE**                         |
| **Jog Center**  | Start in **DUAL-MODE** (Resets loading state) |
| **Back Button** | Start in **Write-Protected** mode             |

#### **Firmware & Partition Limits (Legacy)**

* **NTFS vs FAT**: Separate firmware versions exist (ending in **N** or **F**) depending on the first partition's file system.
* **6x vs 7x Versions (2541)**: `7x` versions include enhanced security against brute-force password attacks. **Note**: Data must be backed up when switching between `6x` and `7x`.
* **2TB Limit**: When using virtual drive functions (ISO/VHD), a **maximum 2TB partition** size is supported on 2531/2541/MINI models.

***

### Advanced VHD Naming Conventions (IODD 2531 / 2541 Only)

{% hint style="warning" %}
**Model Limitation**: The following tips for controlling modes via filenames (**`&D`**, **`&DW`**) apply **only to IODD 2531 and 2541 models**. These features are not supported on newer models like ST400, LK100, or MINI PRO.
{% endhint %}

For legacy models (2531/2541) and specific automated workflows, the filename of a VHD can control the IODD's behavior upon mounting:

* **Standard Mounting**: `filename.VHD` or `filename.VMDK` (Mounts as a fixed disk). iODD supports fixed-size VMDK files (can be created by renaming a VHD to VMDK).
* **Removable Mounting**: `filename.RMD` (Mounts as removable media/flash drive).
* **Dual Mode (Write-Protected)**: Append **`&D`** to the filename (e.g., `Win2Go&D.VHD`). Mounts in Dual Mode with the physical HDD write-protected.
* **Dual Mode (Write-Enabled)**: Append **`&DW`** to the filename (e.g., `Win2Go&DW.VHD`). Mounts in Dual Mode with the physical HDD write-enabled.

#### **Virtual FDD Support**

IODD supports uncompressed floppy disk images in **IMA, IMG, BIF, or VFD** formats. If using `.IMG`, `.BIF`, or `.VFD`, rename the extension to **`.IMA`** for best compatibility.